I was halfway through a disastrous stir‑fry that had turned my kitchen into a smoky maze when my phone buzzed with a message from an old college friend. “You’ve got to try this salt and chilli chicken I found online,” she said, attaching a link that promised a crispy, flavor‑bombed dish. I laughed, because I’ve tried countless versions, each one a little too bland or too greasy, but something about that text made me curious. The message was simple: a handful of ingredients, a dash of daring, and the promise that this was the best salt and chilli chicken you’d ever make at home.
Picture this: I’m standing in my kitchen, the air thick with the scent of onions caramelizing and the sizzle of oil hitting the pan. The sound of the chicken hitting the heat is a satisfying thunk, and a tiny puff of steam rises, carrying the aroma of fresh chilies and a splash of rice wine that hints at an Asian twist. My eyes catch the gleam of a golden crust forming on the chicken, a texture that feels like a promise of crunch with every bite. I can almost taste the contrast—a fiery, salty bite that lingers on the tongue, followed by a subtle sweetness from the onion and pepper that balances the heat.
What makes this recipe stand out, beyond the obvious crunch, is the meticulous layering of flavors and the clever use of simple ingredients that elevate the dish to a level of culinary artistry. I dare you to taste this and not go back for seconds, because the moment the first bite hits, you’ll understand why this is hands down the best version you'll ever make at home. It’s not just the sauce; it’s the coating that clings to the chicken like a velvet glove, the subtle umami of rice wine, and the precise seasoning that turns every bite into a revelation. If you’ve ever struggled to get a consistent crunch, you’re not alone—this recipe has a fix that will change your approach forever.
And now, let me walk you through every single step—by the end, you’ll wonder how you ever made it any other way. Picture yourself pulling this out of the pan, the whole kitchen smelling incredible, the steam dancing like tiny fireworks. The anticipation is almost tangible, and you’ll be ready to taste the first bite that will have you reaching for the next. Stay with me here—this is worth it, and the flavor payoff will make every minute worth it.
What Makes This Version Stand Out
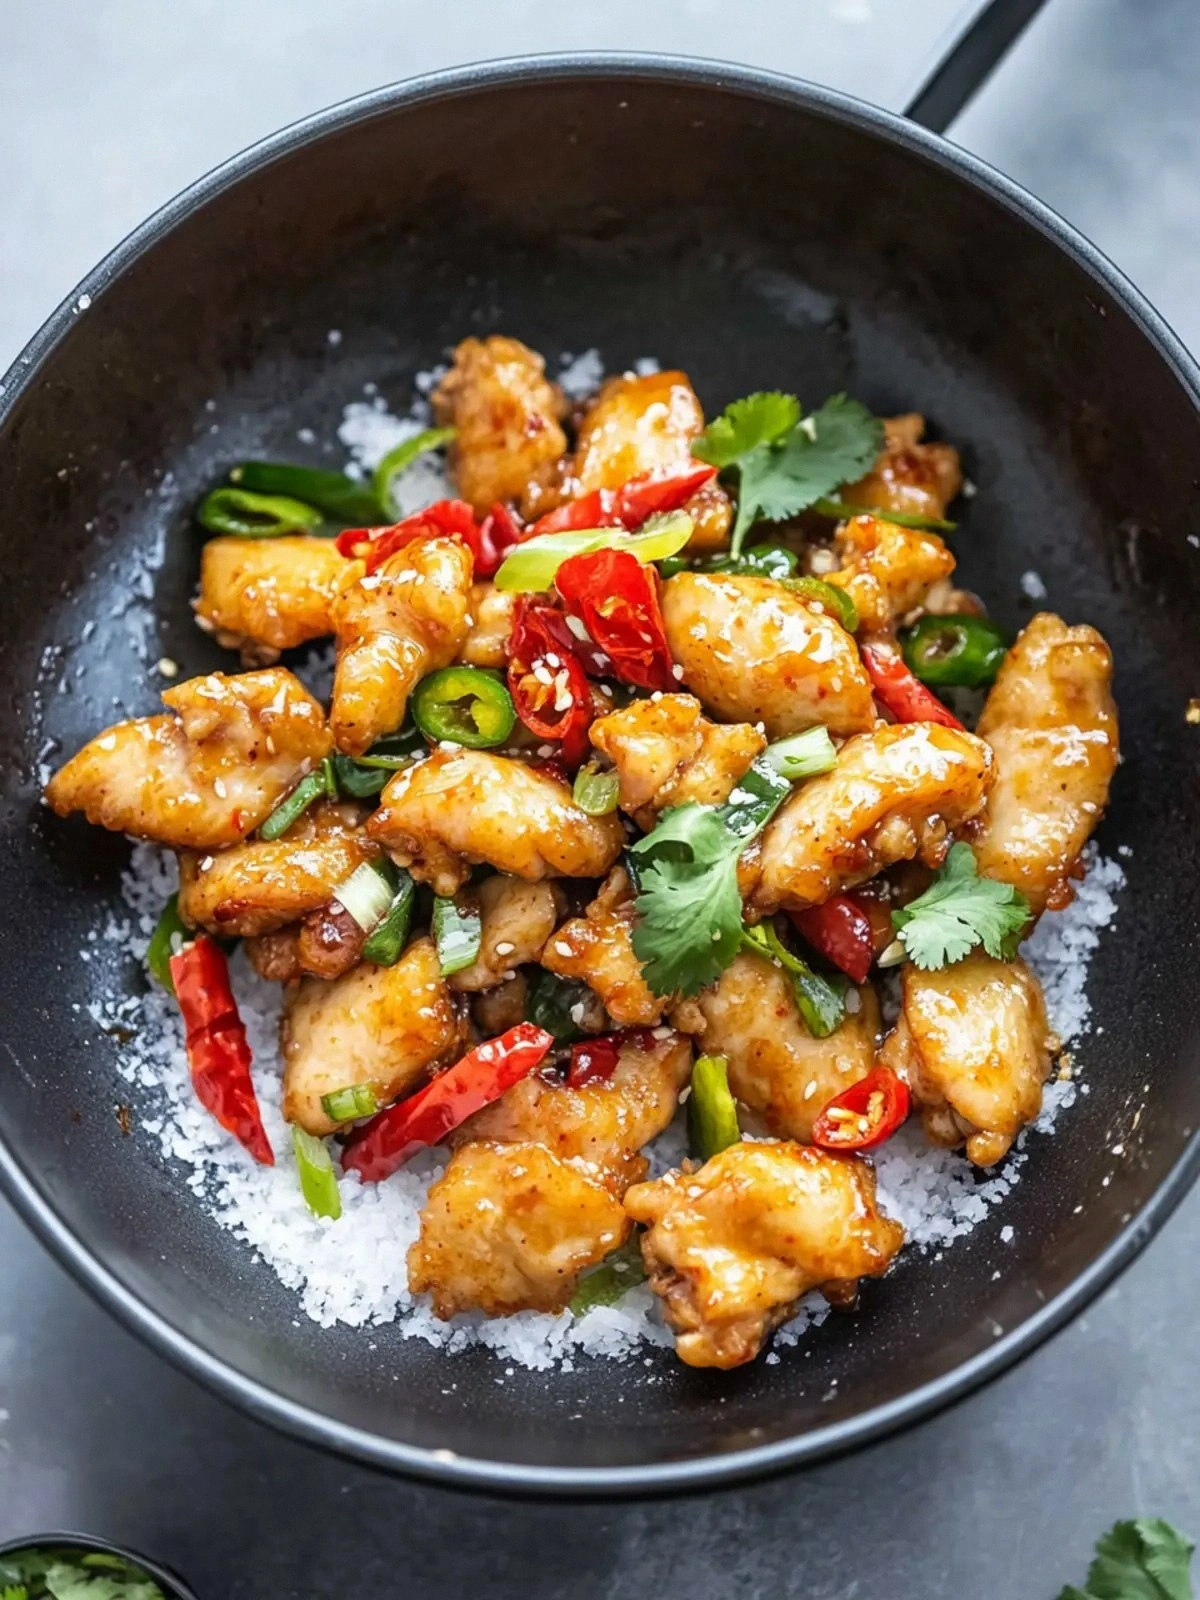
- Crunch: The corn flour batter creates a crisp shell that shatters like thin ice with each bite, delivering a satisfying crunch that lingers long after the first chew.
- Heat: The combination of medium red chilies and a dash of salt and pepper seasoning provides a balanced heat that warms the palate without overwhelming it.
- Umami: A splash of rice wine adds depth, turning simple chicken into a savory masterpiece that feels like it was cooked in a high‑end kitchen.
- Balance: Sweetness from onions and green peppers counteracts the salt, creating a harmonious flavor profile that keeps you coming back for more.
- Speed: With a prep time of just fifteen minutes, this dish is a quick fix for busy nights yet still delivers restaurant‑quality results.
- Versatility: The recipe scales effortlessly, making it perfect for a small family dinner or a large gathering—just adjust the servings and you’re good to go.
- Texture: The batter’s lightness ensures the chicken stays tender inside, while the exterior remains crisp, giving you the best of both worlds.
- Make‑Ahead: You can marinate the chicken in advance, letting the flavors seep in, and then fry it just before serving for maximum freshness.
Alright, let’s break down exactly what goes into this masterpiece…
Inside the Ingredient List
The Flavor Base
The 30 ml of rice wine isn’t just a splash of liquid; it’s a flavor enhancer that brings a subtle sweetness and a depth of umami to the dish. When heated, rice wine evaporates some of its alcohol, leaving behind a concentrated burst that marries well with the salt and pepper seasoning. If you’re avoiding alcohol, a dash of mirin or a teaspoon of rice vinegar can serve as a suitable substitute, though the final taste will be slightly different.
The Texture Crew
The 60 ml of corn flour is the backbone of the coating. Corn flour has a higher protein content than wheat flour, which gives the batter a firmer, more stable structure that crisps up beautifully when fried. Skipping it would result in a soggy exterior that clings to the chicken like a damp blanket. For a gluten‑free alternative, you can replace corn flour with a blend of rice flour and potato starch, maintaining the desired crispness.
The Unexpected Star
The 2 large egg whites act as a binder, ensuring the coating adheres firmly to the chicken pieces. Egg whites are low in fat, which keeps the dish lighter, while their protein content provides a firm structure that holds the batter together during frying. If you prefer a richer coating, you can use whole eggs, but be mindful that the extra yolk will add a slight greasiness.
The Final Flourish
The 2 medium red chilies and 5 ml of salt and pepper seasoning bring the heat and depth that make this dish unforgettable. The chilies’ bright, slightly smoky flavor cuts through the richness of the fried chicken, while the seasoning adds a subtle peppery kick that lingers on the palate. If you’re not a fan of heat, reduce the number of chilies or replace them with a milder pepper variety like poblano for a milder heat.
Everything's prepped? Good. Let’s get into the real action…
The Method — Step by Step
- Start by cutting the 500 g chicken breasts into bite‑sized pieces, ensuring each piece is roughly the same size for even cooking. Pat them dry with a paper towel; moisture is the enemy of crispness. Season the chicken lightly with a pinch of salt and pepper, then set aside. This step helps the coating adhere better and adds a subtle flavor base before the batter.
- In a shallow bowl, whisk together the 2 large egg whites and 30 ml of rice wine until the mixture is frothy. The froth traps air, which will help create a lighter coating. If you’re using a substitute for rice wine, make sure to whisk it into the eggs thoroughly to blend the flavors.
- Add the 60 ml of corn flour to the egg mixture, stirring until you get a smooth batter with no lumps. The consistency should be thick enough to coat the chicken but not so thick that it clumps. If the batter is too thin, add a tablespoon of corn flour; if too thick, add a splash of water.
- Dice the 1 large onion, 2 large green peppers, and 2 medium red chilies into bite‑sized pieces. The onion and peppers will add sweetness and crunch, while the chilies bring the heat. Keep the veggies in a separate bowl; they’ll be sautéed later and will complement the chicken’s flavor.
- Heat about 2 inches of oil in a deep skillet or wok over medium‑high heat. The oil temperature should reach around 180°C (350°F). To test, drop a small amount of batter into the oil; if it sizzles and rises to the surface within a second, the oil is ready.
- Coat each chicken piece in the batter, letting excess drip off. Carefully drop the coated pieces into the hot oil, frying them in batches to avoid overcrowding. Fry each side for about 4–5 minutes, or until a deep golden brown crust forms and the internal temperature reaches 75°C (165°F). The edges will start pulling away, signaling that the chicken is done.
- Remove the fried chicken with a slotted spoon and place on a wire rack over a sheet of paper towels to drain excess oil. Let the chicken rest for a minute; this helps the crust stay crisp.
- In a separate pan, sauté the diced onion, green pepper, and chilies in a tablespoon of oil until they’re slightly caramelized, about 5 minutes. This step brings out the natural sweetness of the vegetables and adds a layer of texture to the dish.
- Combine the fried chicken with the sautéed vegetables in a large mixing bowl. Sprinkle the 5 ml of salt and pepper seasoning evenly over the mixture, tossing gently to coat all the pieces. The seasoning will give a final burst of flavor that ties everything together.
- Serve immediately, garnished with a sprinkle of chopped green onions or a squeeze of lime if you like a fresh zing. The dish is best enjoyed hot, while the coating remains crisp and the juices are still warm.
That’s it — you did it. But hold on, I’ve got a few more tricks that will take this to another level…
Insider Tricks for Flawless Results
The Temperature Rule Nobody Follows
Maintaining the oil at a steady 180°C is crucial for a golden crust. I’ve seen people drop the heat too low, leading to a greasy finish. Use a thermometer or the drop‑in test: a small drop of batter should sizzle and rise instantly. If it takes longer, raise the heat slightly. Keeping the temperature consistent ensures every piece fries evenly.
Why Your Nose Knows Best
When the onions and peppers start caramelizing, you’ll notice a sweet, almost buttery aroma. That smell is a clear indicator that the vegetables are at their peak flavor. If you rush this step, the result will be under‑cooked and bland. Take your time, let them develop that caramelized sweetness.
The 5‑Minute Rest That Changes Everything
After frying, let the chicken rest on a wire rack for at least five minutes. This allows the steam to escape and the coating to firm up, preventing it from becoming soggy. I once skipped this step, and the next bite was a soggy mess. Trust me, the extra rest pays off.
Add a Splash of Water When Reheating
If you’re reheating leftovers, add a splash of water to the pan and cover it with a lid. The steam will revive the crispness without drying out the chicken. This trick works wonders for preserving that first‑time crunch.
Use a Silicone Baking Mat for Even Frying
Place a silicone mat on the cooling rack to catch any excess oil that drips off. It keeps your countertop clean and lets you see exactly how much oil is left on each piece. I’ve found it helps me gauge how crispy each piece has become.
Creative Twists and Variations
This recipe is a playground. Here are some of my favorite ways to switch things up:
Coconut‑Cream Fusion
Swap the corn flour with coconut flour and add a splash of coconut milk to the batter. The result is a tropical, slightly sweet flavor that pairs wonderfully with the heat of the chilies. Perfect for a summer evening.
Spicy Peanut Glaze
After frying, toss the chicken in a sauce made of peanut butter, soy sauce, lime juice, and a pinch of sugar. The creamy, nutty glaze adds a new dimension of flavor that complements the crispy exterior. A crowd‑pleaser at parties.
Herb‑Infused Variation
Add fresh rosemary or thyme to the batter for an aromatic twist. The herbs infuse the coating with a fragrant, savory note that balances the heat from the chilies. Ideal for a comforting weeknight meal.
Vegan Take‑Away
Replace the chicken with tofu cubes and use a plant‑based oil for frying. The tofu will absorb the batter’s flavor, creating a crispy, protein‑rich dish that satisfies even the most discerning vegans.
Low‑Calorie Version
Use a non‑stick skillet and a light spray of oil instead of deep frying. The result is a lighter dish with fewer calories but still a satisfying crunch. Great for those watching their intake.
Storing and Bringing It Back to Life
Fridge Storage
Cool the chicken completely, then place it in an airtight container. Store in the refrigerator for up to 3 days. When ready to eat, reheat in a skillet over medium heat for 5 minutes, turning occasionally, until the coating is crisp again.
Freezer Friendly
Wrap each piece individually in parchment paper before placing them in a freezer bag. Freeze for up to 2 months. When you’re ready, thaw in the refrigerator overnight and reheat as described above.
Best Reheating Method
To preserve the crunch, avoid microwaving. Instead, use a skillet or oven at 180°C (350°F) for about 10 minutes, flipping halfway through. Add a tiny splash of water before reheating to steam the coating back to perfection.