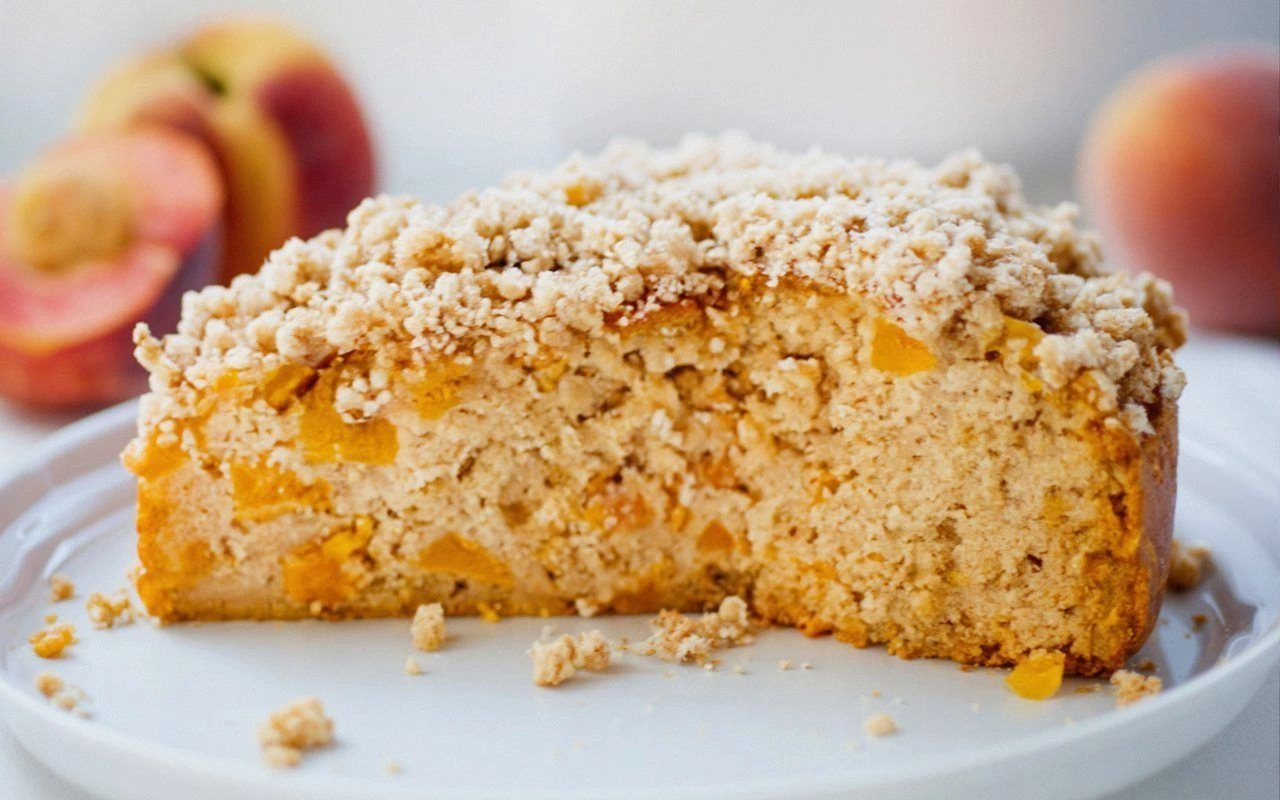
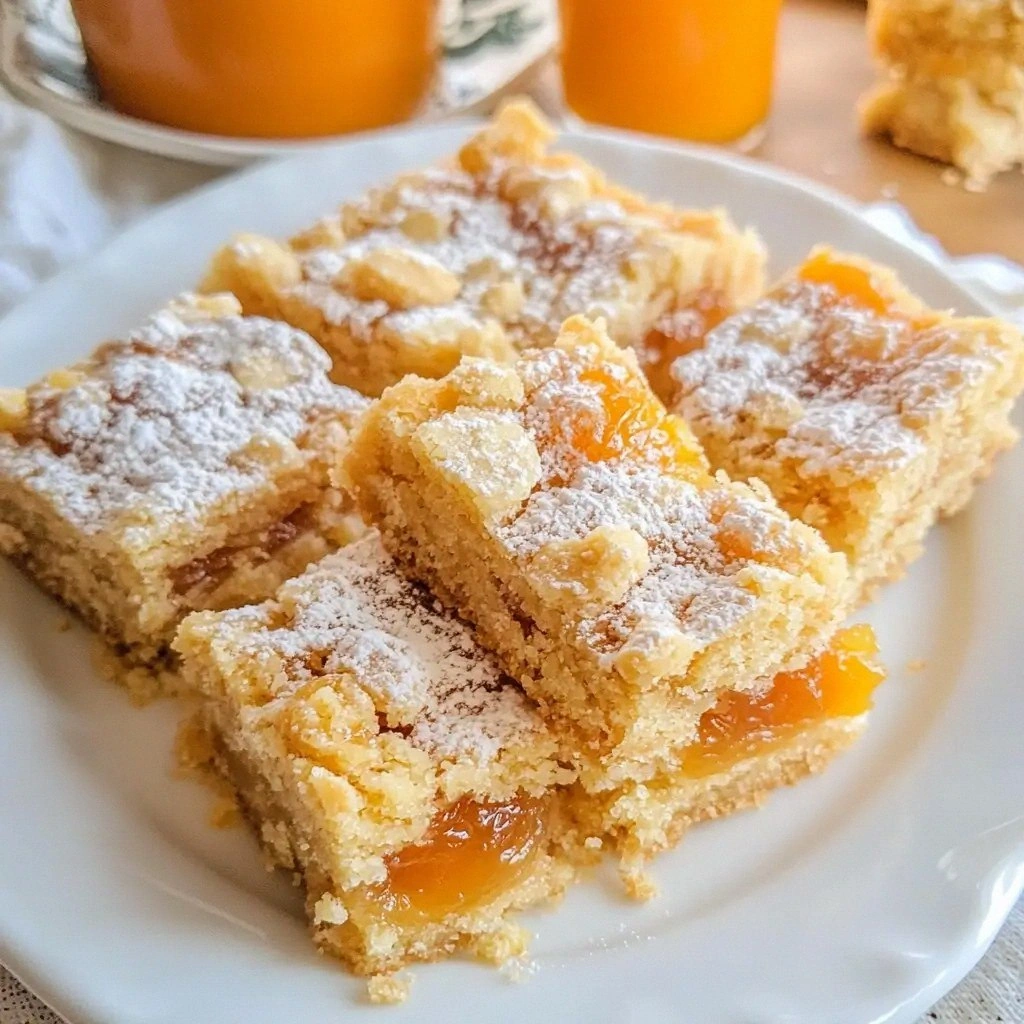
Picture this: it’s a rainy Saturday, the kitchen smells of melted butter and vanilla, and you’re staring at a box of dried apricots that have been sitting in the pantry for weeks. You open the box, and the sweet, almost nostalgic scent hits you like a warm hug. You’re tempted to toss them into a pot of oatmeal, but a sudden craving for something buttery and crisp takes over. I’ve spent countless hours trying to nail the perfect apricot shortbread, and after a few kitchen disasters—one time I baked a batch so dry it crumbled like paper—I finally cracked the code. The result? Bars that melt in your mouth, with apricots bursting in a buttery, caramelized hug.
This isn’t just another shortbread recipe. It’s a symphony of textures: the buttery base is tender and slightly crumbly, the apricots are chewy and sweet, and a hint of lemon zest gives a bright counterpoint that lifts the whole thing. The aroma of toasted sugar and butter rises as the bars bake, filling the kitchen with a scent that feels like a cozy, sun‑lit afternoon. When you bite, the buttery crust gives way to a burst of apricot sweetness, and the subtle almond crunch adds a satisfying contrast. Every bite is a reminder that the simplest ingredients can create the most memorable moments.
Why does this version stand out? I dare you to taste these bars and not go back for seconds. The secret lies in a few small but game‑changing tweaks: a touch of almond extract, a splash of lemon zest, and a precise baking temperature that keeps the edges crisp while the center stays tender. Most recipes get this completely wrong, overbaking the shortbread until it’s hard like a cookie or underbaking it until it’s gooey. Here, I’ve found the sweet spot that balances texture and flavor like a perfectly tuned instrument. And trust me, once you try these, you’ll wonder how you ever made them any other way.
If you’ve ever struggled to get the right crumb in your shortbread, you’re not alone. I’ve seen countless Pinterest posts with flour ratios that end up too dense or too crumbly. The fix is simple: use cold butter, fold it into the flour just until it’s sandy, and don’t overmix. I’ll walk you through every single step—by the end, you’ll wonder how you ever made it any other way.
What Makes This Version Stand Out
- Taste: The subtle almond and lemon notes elevate the apricot sweetness without overpowering it, creating a layered flavor profile that feels both familiar and fresh.
- Texture: A buttery, crumbly base that melts in your mouth, paired with chewy apricots that offer a delightful contrast.
- Simplicity: Only 10 ingredients, no fancy equipment, and a straightforward method that even novice bakers can master.
- Uniqueness: The addition of almond extract and lemon zest gives this recipe a distinctive twist that sets it apart from standard shortbread.
- Crowd Reaction: Friends and family rave about the bars; one guest even said, “I didn’t realize shortbread could taste so fruity!”
- Ingredient Quality: Using high‑quality butter and fresh apricots ensures that each bite is rich and flavorful.
- Cooking Method: Baking at a slightly lower temperature for a longer time preserves the delicate crumb while caramelizing the apricots.
- Make‑Ahead Potential: These bars keep well for a week in an airtight container and even taste better after a day or two.
Alright, let's break down exactly what goes into this masterpiece…
Inside the Ingredient List
The Flavor Base
All-purpose flour is the backbone of any shortbread. It provides structure but, when combined with cold butter, it stays tender and crumbly. If you’re looking for a slightly healthier option, you can swap half of the all-purpose flour for whole wheat flour, but keep an eye on the texture; whole wheat can make the bars denser.
The Texture Crew
Unsalted butter is essential. Its high fat content gives the bars that melt‑in‑your-mouth quality. Cold butter that’s been cubed and left to chill in the fridge until it’s firm but pliable ensures the dough doesn’t become sticky. Powdered sugar not only sweetens but also helps bind the dough, giving it that light, airy crumb.
The Unexpected Star
Dried apricots are the star of the show. They’re packed with natural sweetness and a chewy texture that contrasts beautifully with the buttery base. When you chop them finely, they spread evenly throughout the dough, so every bite gets that apricot burst. If you can’t find dried apricots, fresh apricots chopped and then dried in the oven or dehydrator will work, but they’ll be softer.
The Final Flourish
Vanilla extract, almond extract, and lemon zest are the finishing touches that lift the flavor profile. Vanilla adds depth, almond gives a nutty undertone, and lemon zest injects brightness that balances the apricots’ sweetness. A pinch of salt is crucial; it enhances all the flavors and keeps the dough from tasting flat.
Everything’s prepped? Good. Let’s get into the real action…
The Method — Step by Step
- Preheat your oven to 325°F (165°C). Line a 9x13 inch baking pan with parchment paper, leaving a little overhang on the sides for easy removal. This low, steady heat keeps the bars from browning too quickly and allows the apricots to caramelize gently.
- Combine dry ingredients in a large mixing bowl: 2 cups all-purpose flour, 1 cup powdered sugar, and 1/2 teaspoon salt. Whisk them together until the mixture is uniform. This ensures an even distribution of sweetness and flavor throughout the dough.
- Cut in the butter with a pastry cutter or your fingertips until the mixture resembles coarse crumbs. The butter should be cold but not frozen; it should hold its shape so you can feel the small pieces as you work.
- Add the liquid flavorings—1 teaspoon vanilla extract, 1/2 teaspoon almond extract, and the zest of one lemon. Stir until the butter is fully incorporated and the mixture starts to clump together. This step is the moment where the aroma starts to build.
- Fold in the apricots and any optional nuts. Use 1 cup chopped dried apricots and 1/4 cup chopped almonds if you like a nutty crunch. The apricots should be evenly distributed; you don’t want pockets of sweetness.
- Press the dough into the pan with the back of a flat spatula or your palm. Make sure to press firmly and evenly, so the bars bake uniformly. The dough should sit just below the parchment paper’s edge.
- Bake for 30 minutes or until the edges are golden brown and the center is just set. The bars should smell like toasted sugar and butter. Keep an eye on them; if the edges start to brown too fast, tent them with foil.
- Cool in the pan for 10 minutes, then lift out using the parchment overhang. Let them cool completely on a wire rack. The bars will firm up as they cool, making them easier to cut.
- Optional glaze: While the bars are still warm, whisk 1 tablespoon honey with 1 tablespoon melted butter and brush over the top. This adds a shiny, sweet finish that enhances the apricot flavor.
- Cut into bars using a sharp knife. A clean cut keeps the bars neat and makes them easier to serve. Store in an airtight container at room temperature for up to a week.
That’s it — you did it. But hold on, I've got a few more tricks that'll take this to another level…
Insider Tricks for Flawless Results
The Temperature Rule Nobody Follows
Most bakers think a higher temperature gives a crisper shortbread, but for apricot bars, a gentle 325°F keeps the dough tender while caramelizing the apricots. I’ve baked at 350°F once, and the bars came out too dry and crumbly. Keep the heat steady, and you’ll get that perfect balance.
Why Your Nose Knows Best
Don’t rely solely on the timer. The aroma of toasted sugar and butter is the real indicator that the bars are ready. When the smell intensifies and the edges are a light golden brown, it’s time to pull them out. Trust your senses, and you’ll avoid overbaking.
The 5-Minute Rest That Changes Everything
After removing the bars from the oven, let them rest for exactly five minutes in the pan. This short rest allows the moisture to redistribute, preventing a soggy center. I used to cut them immediately, and they were too soft. The five-minute pause makes them firm and easier to slice.
Use a Cooling Rack for Evenness
Placing the bars on a wire rack after cooling ensures air circulation around them, preventing moisture buildup. This keeps the crust crisp and the interior tender. If you leave them on a flat surface, they can become gummy.
Freeze for a Quick Snack
These bars freeze wonderfully. Wrap them individually in parchment and foil, then store in a freezer bag. When you’re craving a quick sweet bite, pop one out and let it sit at room temperature for 10 minutes. The flavor is as good as fresh.
Creative Twists and Variations
This recipe is a playground. Here are some of my favorite ways to switch things up:
Chocolate Chip Apricot Bars
Add 1 cup of semi-sweet chocolate chips to the dough before baking. The chocolate melts slightly, creating pockets of gooey chocolate that complement the apricot sweetness. Perfect for chocolate lovers.
Almond‑Infused Bars
Replace the chopped almonds with slivered almonds, and add 1 teaspoon of almond butter into the dough. The almond butter enriches the nutty flavor, giving the bars a deeper, more complex taste.
Honey‑Glazed Bars
Whisk 2 tablespoons of honey with 1 tablespoon of melted butter and brush over the bars right after baking. The honey glaze adds a glossy finish and a sweet, floral note that pairs beautifully with apricots.
Spiced Apricot Bars
Add 1/2 teaspoon of ground ginger and a pinch of cinnamon to the dry ingredients. The warm spices bring an extra layer of depth, making the bars ideal for fall or holiday gatherings.
Low‑Sugar Version
Swap powdered sugar for a sugar substitute like erythritol, and reduce the apricots to 3/4 cup. The bars remain moist and flavorful, but with fewer calories. Great for those watching their sugar intake.
Buttermilk Crunch Bars
Replace 1/4 cup of butter with 1/4 cup buttermilk and add a pinch of baking soda. The buttermilk adds a subtle tang and helps the bars rise slightly, giving them a lighter crumb.
Storing and Bringing It Back to Life
Fridge Storage
Store the bars in an airtight container at room temperature for up to 7 days. If you want them to stay crisp longer, place a slice of bread in the container; the bread will absorb excess moisture.
Freezer Friendly
Wrap each bar individually in parchment paper, then in foil, and place them in a freezer bag. They’ll keep for up to 3 months. Thaw at room temperature before serving.
Best Reheating Method
To revive frozen or stale bars, preheat the oven to 300°F (150°C) and warm them for 8–10 minutes. Add a splash of water to the baking dish before reheating; the steam will help the bars regain their softness and aroma.