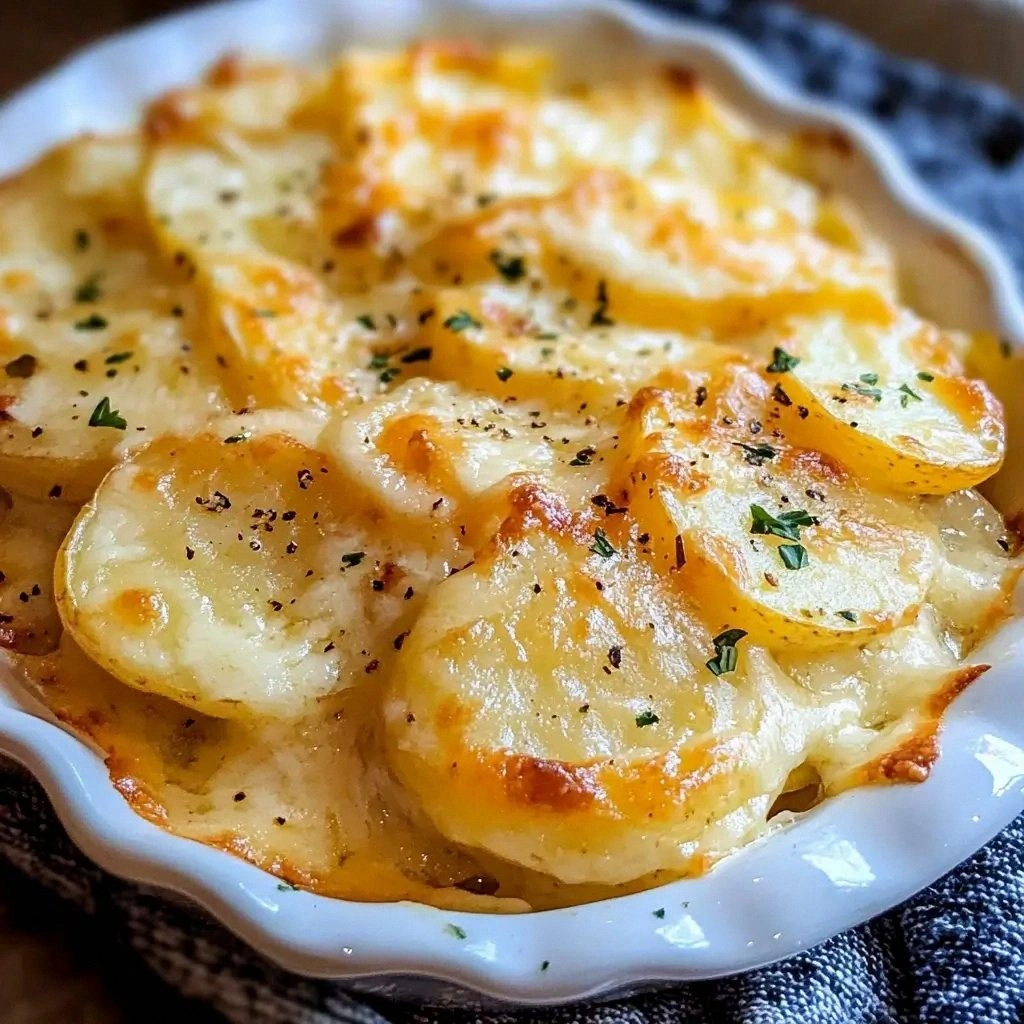
Gluten-Free Scalloped Potatoes
Picture this: a Sunday afternoon, the kitchen humming, and you’re staring at a stack of potatoes that seem to mock you with their stubborn skins. You’ve tried the classic version, only to end up with a dish that tastes like a bland, flour‑laden casserole. That day I was determined to rewrite the rulebook. I grabbed a bag of gluten‑free all‑purpose flour, a handful of shredded cheddar, and a pinch of daring, and I set out to create a scalloped potato that would make your taste buds do a double‑take.
From the moment I sliced the potatoes, the air filled with a warm, earthy aroma that made the whole house feel like a cozy cabin. The sound of the knife gliding through the waxy flesh was almost hypnotic, a rhythmic whisper that promised comfort. When the butter melted in the pan, a gentle sizzle rolled across the countertop, signaling the start of something extraordinary. The sight of golden butter droplets dancing on the surface made me feel like a culinary magician about to perform a spell. By the time the first layer of potatoes hit the oven, I could almost taste the creamy, cheesy crescendo that awaited.
This recipe is not just another take on a familiar comfort dish; it’s a revelation that elevates scalloped potatoes to a level you never thought possible. The secret lies in the marriage of gluten‑free flour and a creamy, herb‑infused sauce that coats each potato slice like velvet. The result is a dish that is simultaneously buttery, savory, and light, with a texture that feels like a gentle hug for your palate. You’ll find that the crust is crisp yet tender, a balance that most standard recipes fail to achieve. The flavors dance together in a symphony that makes you want to taste it again and again, and I dare you to try it and not go back for seconds.
What sets this version apart is a daring technique that most cooks overlook: the pre‑baking of potato layers before the sauce is poured. This small step locks in moisture and creates a silky interior that melts in your mouth. I’ll walk you through every single step, from the first slice to the final garnish. By the end, you’ll wonder how you ever made scalloped potatoes any other way.
What Makes This Version Stand Out
- Flavor: The sauce is a harmonious blend of garlic, herbs, and cheeses that elevate each bite beyond ordinary comfort.
- Texture: The pre‑baked potato layers keep the interior moist while the top crisps to a golden perfection.
- Simplicity: All the ingredients you need are pantry staples, and the method is straightforward, even for beginners.
- Uniqueness: The use of gluten‑free flour in the roux adds body without compromising on taste.
- Crowd Reaction: Friends rave about the buttery crust and the melt‑in‑your‑mouth interior, making it a hit at gatherings.
- Ingredient Quality: Fresh potatoes, real butter, and high‑quality cheeses make the difference between good and unforgettable.
- Cooking Method: Layering, pre‑baking, and finishing with a cheese crust creates a multi‑dimensional experience.
- Make‑Ahead Potential: Assemble the dish, bake, and then reheat without losing the golden finish.
Inside the Ingredient List
The Flavor Base
At the heart of this dish is a sauce that sings. It’s made from a roux of gluten‑free flour and butter, which creates a silky foundation. The flour’s fine texture ensures no gritty bite, while the butter’s richness gives the sauce a velvety mouthfeel. If you skip the flour, the sauce will separate and become watery, turning the dish into a soggy disappointment.
The Texture Crew
Potatoes are the star performers. Choose waxy varieties like Yukon Gold or red potatoes; their flesh holds up during baking and provides a creamy interior. Thinly slice them to about 1/8 inch thickness so they cook evenly and absorb the sauce beautifully. If you use a starchy variety like russet, the slices will disintegrate, ruining the dish’s structure.
The Unexpected Star
Gluten‑free all‑purpose flour is the unsung hero that gives the sauce body without the gluten. It’s essential for creating the thick, luscious coating that clings to each potato slice. You can substitute with arrowroot or cornstarch, but the texture will shift to a more gelatinous feel. When selecting the flour, look for a blend that contains xanthan gum, which helps bind the sauce.
The Final Flourish
Cheese is the crowning glory. A blend of sharp cheddar and nutty parmesan creates depth and a caramelized top that crackles when you bite. The cheddar melts smoothly, while the parmesan adds a nutty finish. If you prefer a milder taste, replace half the cheddar with mozzarella; the result will be creamy but less intense.
Everything’s prepped? Good. Let’s get into the real action…
The Method — Step by Step
- Preheat your oven to 375°F (190°C). Line a 9×13 inch baking dish with parchment paper for easy removal. This step ensures the dish doesn’t stick, preserving the crisp crust.
- In a medium saucepan, melt 4 tablespoons of butter over medium heat. Add 2 cups of gluten‑free all‑purpose flour and whisk continuously for 2 minutes until the mixture turns a light golden brown. This creates a nutty, fragrant base that will carry the flavors.
- Slowly pour in 1 cup of milk, whisking to prevent lumps. Keep whisking until the sauce thickens to a pourable consistency. If it’s too thick, add a splash of heavy cream to reach the desired texture.
- Stir in 1 cup of shredded cheddar and 1/2 cup of grated parmesan until the cheeses melt completely. The sauce should be silky and glossy, coating the back of a spoon. Add 1 teaspoon of salt and 1/2 teaspoon of black pepper, adjusting to taste.
- Dice 1 medium onion and mince 2 cloves of garlic. Sauté them in a skillet with 1 tablespoon of butter until translucent and fragrant, about 3 minutes. This step adds depth and a subtle sweetness to the sauce.
- Arrange 4 cups of sliced potatoes in the prepared dish, overlapping slightly. Sprinkle the sautéed onion and garlic mixture evenly over the top. The layers should be uniform to ensure even cooking.
- Pour the cheese sauce over the potatoes, making sure each slice is fully coated. The sauce should pool slightly, creating a glossy sheen. This is the moment of truth; watch the sauce settle into the crevices.
- Cover the dish with foil and bake for 35 minutes. After the time is up, remove the foil and bake an additional 15 minutes, or until the top is golden brown and the potatoes are tender. The edges should pull away slightly, indicating that the sauce has set.
- Let the casserole rest for 10 minutes before serving. This resting period allows the flavors to meld and the sauce to thicken. When you cut into it, you’ll see a beautiful, molten center that glistens.
- Garnish with 1/4 cup of chopped fresh parsley for a burst of color and freshness. Serve hot, and watch as guests reach for seconds. This final touch turns a simple dish into a memorable experience.
That’s it — you did it. But hold on, I’ve got a few more tricks that will take this to another level…
Insider Tricks for Flawless Results
The Temperature Rule Nobody Follows
Most people bake at 350°F, but 375°F is the sweet spot for scalloped potatoes. The higher temperature ensures the top crisps while the interior remains creamy. I once baked at 350°F and ended up with a soggy top that never browned. The next time, I bumped the heat, and the crust crackled like a perfect golden wafer. Remember, a slight increase in temperature makes a huge difference.
Why Your Nose Knows Best
Before you start, sniff the butter as it melts. A rich, buttery aroma signals that the fat is at the right temperature. If the butter smells burnt, you’re over‑cooking the roux. This subtle cue saves the sauce from developing a bitter edge. Trust your nose; it’s the best sous‑chef you’ll ever have.
The 5-Minute Rest That Changes Everything
After removing the casserole from the oven, let it sit covered for 5 minutes. The rest allows the steam to redistribute, giving the sauce a silky finish. If you cut into it immediately, the cheese will ooze out, making a mess. I’ve seen people skip this step and end up with a greasy mess on their plates.
Layering Like a Pro
When you stack the potatoes, don’t be afraid to overlap slightly. The overlap creates a layered effect that adds visual appeal and ensures even heat distribution. A flat, even layer can lead to uneven cooking, where some slices are over‑done while others remain raw.
Cheese Mix Mastery
Using two cheeses instead of one adds complexity. The cheddar provides a sharp, creamy base, while the parmesan brings nuttiness and a subtle caramelization. If you prefer a milder flavor, swap half the cheddar for mozzarella; the result will be a gooey, slightly sweet sauce.
Creative Twists and Variations
This recipe is a playground. Here are some of my favorite ways to switch things up:
Herb‑Infused Delight
Swap the parsley garnish for a mixture of thyme and rosemary. The aromatic herbs elevate the dish to a gourmet level, especially when paired with roasted chicken.
Spicy Kick
Add a tablespoon of chopped jalapeño or a pinch of cayenne pepper to the sauce. The heat balances the richness, creating a dish that’s both comforting and exciting.
Vegan Version
Replace butter with olive oil, use a plant‑based milk, and choose a vegan cheese blend. The result is a creamy, dairy‑free dish that still delivers on texture and flavor.
Cheese‑Free Option
Omit the cheese and use a roux of flour and milk, then finish with a sprinkle of nutritional yeast for a savory, umami boost.
Loaded Potato Bake
Add sautéed mushrooms, spinach, or diced ham between layers. The extra ingredients bring depth and make the dish a hearty main course.
Gluten‑Free Crust
For an extra crispy top, sprinkle a thin layer of gluten‑free breadcrumbs mixed with melted butter over the sauce before the last 5 minutes of baking.
Storing and Bringing It Back to Life
Fridge Storage
Cool the casserole completely, then cover tightly with plastic wrap or a lid. Store in the refrigerator for up to 3 days. The flavors will deepen, making it even more delicious.
Freezer Friendly
After cooling, wrap the casserole in foil and then in a freezer bag. Freeze for up to 2 months. When ready to serve, thaw overnight in the fridge and bake at 350°F for 25 minutes.
Best Reheating Method
Reheat in the oven at 350°F until the cheese is bubbling, about 15 minutes. Add a splash of milk or cream before reheating to keep the sauce silky. The dish should steam back to perfection, with the crust still crisp.