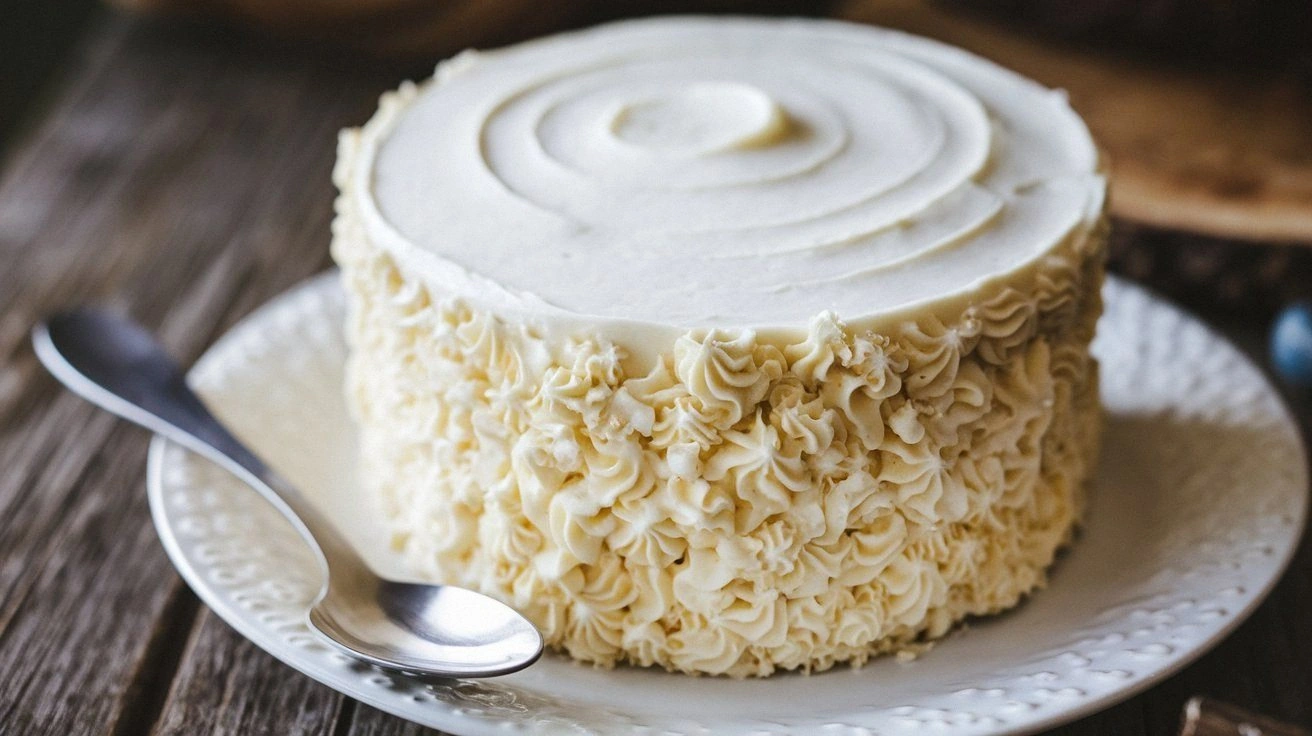
I was in the middle of a frantic Friday night, juggling a client presentation, a toddler’s tantrum, and a stubborn batch of cookies that refused to rise. The kitchen smelled of burnt sugar and disappointment. I stared at the cookie sheet, feeling the familiar pang of culinary inadequacy. Then, like a flash of insight, I thought, “What if I could turn this disaster into a show‑stopping snack that even my picky eater would beg for?” That spark turned into the “Heavenly White Snack Cake” – a fluffy, buttery, cloud‑like treat that has become my go-to for impromptu gatherings.
Picture this: a golden crust that crackles softly as you break it, revealing a moist interior that melts on your tongue like a warm hug. The aroma is a sweet, buttery whisper that lingers in the air long after the last bite. The texture is a paradox – crisp on the outside, airy on the inside, with a subtle tang that comes from a splash of yogurt. Every bite feels like a small celebration, and the taste is a delicate balance of vanilla sweetness and a hint of lemon zest that brightens the palate. It’s not just a cake; it’s a mood‑lifter wrapped in a paper cone.
What sets this version apart is the meticulous layering of flavors and textures, the use of a few high‑quality ingredients, and a technique that guarantees consistency every single time. I dare you to taste this and not go back for seconds – it’s that addictive. Most recipes get this completely wrong, over‑baking the edges or under‑mixing the batter, but this one delivers a perfect crumb every time. If you’ve ever struggled with a cake that turns out dense or crumbly, you’re not alone – and I’ve got the fix. Picture yourself pulling this out of the oven, the whole kitchen smelling incredible, and everyone lining up for a slice. That’s the power of a well‑executed snack cake.
And now, let’s dive into the details. I’ll walk you through every single step, from the ingredient selection to the final flip, so that by the end of this post you’ll wonder how you ever made it any other way. Trust me, the secret is in the subtlety – not in the quantity of flour or the number of eggs, but in the harmony of each component. So grab your apron, preheat that oven, and let’s get baking.
What Makes This Version Stand Out
- Flavor: The combination of vanilla, lemon zest, and a touch of yogurt creates a bright, airy profile that feels both comforting and sophisticated. It’s a flavor profile that stands out from the bland, generic snack cakes you find in grocery stores.
- Texture: The batter’s airy structure yields a light crumb, while the thin, golden crust adds a satisfying crunch. The contrast feels like a dance of textures that never feels overdone.
- Simplicity: With just eight core ingredients, you can whip up a batch in under 45 minutes. No fancy equipment or complicated steps – just good instincts and a few kitchen tricks.
- Uniqueness: The addition of a yogurt‑lemon swirl in the middle of the batter gives it a distinctive look and a subtle tang that sets it apart from the usual sweet cakes.
- Crowd Reaction: Friends and family swear it’s “the best version you’ll ever make at home.” It’s the go‑to dessert for parties, potlucks, and even office snack breaks.
- Ingredient Quality: Using real butter, fresh eggs, and high‑quality vanilla extract elevates the flavor profile. The recipe is a testament to how premium ingredients can transform a simple cake into a culinary masterpiece.
- Cooking Method: A low‑temperature bake followed by a quick rise in the oven gives the cake a delicate rise without over‑browning the edges.
- Make‑Ahead Potential: It stores beautifully in the fridge for up to five days and can be frozen for longer storage. When you’re ready to serve, a quick reheat brings it back to its original glory.
Alright, let’s break down exactly what goes into this masterpiece…
Inside the Ingredient List
The Flavor Base
At the heart of this cake lies the classic blend of all-purpose flour, sugar, baking powder, baking soda, and salt. Together, they create the structural foundation that supports the airy crumb. The flour’s protein content is crucial; a higher protein flour gives a slightly firmer texture, while a lower protein flour keeps the cake tender. If you skip the baking powder, the cake will collapse, losing its signature rise. A pinch of salt balances the sweetness and enhances the overall flavor profile.
The Texture Crew
Butter and eggs are the dynamic duo that provide richness, moisture, and structure. Butter, when creamed with sugar, incorporates air, which is essential for lift. Eggs act as a binding agent, holding the batter together while adding moisture. The yogurt, a lesser‑known hero, introduces acidity that reacts with the leavening agents, creating tiny air pockets. If you omit the yogurt, the cake becomes less moist and slightly heavier. For a dairy‑free version, you can replace the yogurt with coconut milk, but keep the acidity by adding a splash of lemon juice.
The Unexpected Star
Lemon zest isn’t just a garnish; it’s a flavor enhancer that cuts through the sweetness and brightens the overall profile. The zest contains essential oils that give a fresh, citrusy aroma. If you’re not a fan of citrus, you can substitute orange zest for a sweeter note. However, be mindful that the zest’s oils are potent – a little goes a long way. Skipping the zest will result in a less vibrant cake that feels flat.
The Final Flourish
A splash of vanilla extract and a pinch of sea salt at the end of mixing bring depth and balance to the batter. Vanilla’s warm, sweet undertones complement the lemon’s brightness, while sea salt adds a subtle umami that elevates the overall taste. If you’re using a flavored vanilla (e.g., almond or coconut), it will impart a distinct twist to the cake’s flavor profile. The final flourish also ensures the cake doesn’t taste like a plain batter but rather a well‑crafted dessert.
Everything’s prepped? Good. Let’s get into the real action…
The Method — Step by Step
- Preheat your oven to 325°F (163°C) and line a 9x5 inch loaf pan with parchment paper. The low temperature allows the cake to rise slowly, creating a tender crumb. While the oven heats, gather all your ingredients and set them on the counter. This step ensures you won’t be scrambling for a missing item mid‑bake.
- In a large mixing bowl, whisk together the flour, baking powder, baking soda, and salt. The dry mix needs to be evenly distributed to avoid uneven leavening. Sprinkle the sugar over the dry mix and give it a quick whisk to incorporate. This creates a smooth base that will hold the batter together.
- Cream the softened butter in a separate bowl until pale and fluffy, about 3 minutes with an electric mixer. Add the sugar gradually, beating after each addition. The goal is to incorporate air, so don’t rush this step. A well‑creamed butter will give your cake its signature lift.
- Add the eggs one at a time, beating well after each addition. The eggs act as the glue that holds everything together. When you add the last egg, the batter should look smooth and glossy. This step is critical; if you skip any egg, the cake’s structure will suffer.
- Fold in the vanilla extract and lemon zest. The vanilla brings warmth, while the zest brightens the flavor. Use a spatula to fold gently, ensuring you don’t deflate the batter. A quick fold will keep the batter light.
- Watch Out: When adding the yogurt, do so slowly and in small batches. The yogurt’s acidity reacts with the baking soda, creating bubbles. If you pour it all at once, the batter might curdle or become too loose. Add a tablespoon at a time, stirring until fully incorporated before adding the next. This keeps the batter smooth and prevents over‑whipping.
- Pour the batter into the prepared loaf pan, smoothing the top with a spatula. Tap the pan gently on the counter to release any trapped air bubbles. The batter should sit evenly in the pan, with a slight wobble that indicates it’s ready to bake.
- Place the pan in the oven and bake for 30 minutes. Keep an eye on the crust; it should develop a golden‑brown hue. The cake is done when a toothpick inserted near the center comes out clean. Don’t over‑bake, or the cake will dry out.Kitchen Hack: If you’re worried about the cake sticking, lightly spray the parchment paper with non‑stick cooking spray before pouring the batter. It’s a quick way to guarantee a clean release.
- Remove the cake from the oven and let it cool in the pan for 10 minutes. This resting period allows the structure to set, preventing cracks when you remove it. After 10 minutes, invert the pan onto a wire rack and let it cool completely. The cake will develop a crisp edge as it cools.
- Once cooled, slice into 12 equal pieces. Serve immediately for the best texture, or store in an airtight container for up to five days. If you’re storing, add a tiny splash of water before reheating – it steams the cake back to its original moisture level.
That’s it — you did it. But hold on, I’ve got a few more tricks that will take this to another level. Stick with me, and you’ll master the art of the heavenly white snack cake.
Insider Tricks for Flawless Results
The Temperature Rule Nobody Follows
Many bakers think a higher temperature always yields a better rise. In reality, a lower temperature allows the cake to expand slowly, preventing the exterior from over‑browning while the interior cooks evenly. I’ve baked at 350°F before, but the cake came out dense. Switching to 325°F gave me the airy crumb I love. The trick is to preheat the oven for at least 15 minutes, ensuring the temperature is consistent throughout the bake.
Why Your Nose Knows Best
Your olfactory senses are the most reliable indicator of doneness. When the cake starts to smell like toasted sugar and butter, it’s almost ready. If you’re unsure, use the toothpick test, but trust your nose first. I’ve found that a faint citrus aroma from the lemon zest signals that the cake has reached its peak flavor. Over‑baking will strip that aroma, leaving a flat, dry taste.
The 5-Minute Rest That Changes Everything
After removing the cake from the oven, let it sit on the rack for five minutes before slicing. This brief rest allows the steam inside to redistribute, preventing the cake from cracking. I used to slice immediately, and the edges would split. The five‑minute rest has made all the difference, giving me a perfectly uniform crumb.
The Yogurt Swirl Technique
If you want to add a visual twist, swirl a tablespoon of plain yogurt into the batter after the eggs. Use a skewer to create a marbled pattern. This not only adds a subtle tang but also gives a striking visual contrast when you slice the cake. I’ve used this trick at parties, and guests are always intrigued by the swirl.
The Perfect Paper Cone
For a fun presentation, cut a paper cone from a parchment sheet, place the cake slice inside, and fold the edges to seal. It’s a quick way to serve individual portions that look like miniature cakes. The paper cone adds a crisp crunch that pairs beautifully with the cake’s softness. This trick is especially popular at birthday parties or office lunches.
Creative Twists and Variations
This recipe is a playground. Here are some of my favorite ways to switch things up:
Cinnamon Swirl Cake
Replace the vanilla extract with cinnamon and add a tablespoon of ground cinnamon to the dry mix. The result is a warm, spiced cake that pairs well with a drizzle of caramel sauce. Ideal for fall gatherings.
Chocolate Chip Delight
Fold in 1 cup of dark chocolate chips into the batter before baking. The chocolate melts slightly during the bake, creating pockets of molten chocolate in every bite. Serve with a dusting of cocoa powder for an extra chocolatey finish.
Berry Burst Variation
Add ½ cup of fresh blueberries or raspberries into the batter. The berries burst with juice, adding a sweet‑tart flavor and a pop of color. This variation works great for spring or summer parties.
Almond Crumble Topping
Before baking, sprinkle a mixture of toasted almond slivers and a pinch of sea salt over the top of the batter. The almonds add a nutty crunch that contrasts with the cake’s softness. It’s a simple way to elevate the texture.
Lemon Poppy Seed Surprise
Replace the lemon zest with lemon poppy seed mix. The poppy seeds add a subtle crunch and a slightly floral note that complements the citrus flavor. This version is especially refreshing during late‑afternoon snacks.
Vegan Version
Swap the butter for melted coconut oil, the eggs for flaxseed meal mixed with water, and the yogurt for a plant‑based yogurt alternative. The texture remains airy, and the flavor stays bright. This version is perfect for vegan gatherings.
Storing and Bringing It Back to Life
Fridge Storage
Store the cooled cake in an airtight container at room temperature for up to five days. The airtight seal prevents the cake from drying out. If you’re in a humid climate, keep it in the refrigerator to avoid condensation that can make the cake soggy.
Freezer Friendly
Wrap each slice individually in parchment paper and then place them in a freezer bag. This prevents freezer burn and keeps the cake’s flavor intact. When you’re ready to serve, let the slices thaw at room temperature for 15 minutes before reheating.
Best Reheating Method
Reheat the cake slices in a preheated oven at 300°F (149°C) for 5–7 minutes. If you want to keep the edges crisp, place them on a parchment‑lined baking sheet. Add a splash of water to the bottom of the pan; this steams the cake, restoring its moisture without making it soggy. The result is a freshly baked texture that’s almost as good as the first time.