Confession time: I once tried to impress a date by making fancy appetizers from scratch, and ended up with a kitchen that looked like a flour bomb exploded. The smell of burnt garlic bread lingered for three days, and let's just say there wasn't a second date. Fast forward to last weekend when my friend dared me to create the perfect party appetizer—something that wouldn't leave my apartment smelling like a failed Italian restaurant. Challenge accepted. After three batches (okay, maybe four), I cracked the code on Italian pinwheels that are so good, I ate half of them before anyone else arrived. Picture this: creamy cheese spirals flecked with herbs, wrapped around savory Italian meats and roasted peppers, each bite delivering that perfect balance of rich and bright, soft and crisp. The aroma of basil and garlic mingling with cream cheese will make your neighbors knock on your door asking what you're cooking. These aren't your average roll-ups that taste like cardboard with a hint of disappointment. These are the kind of appetizers that disappear faster than you can say "mangia," leaving behind only empty plates and people begging for the recipe. The secret lies in the layering technique and a few unexpected ingredients that transform ordinary cream cheese into something magical. Stay with me here—this is worth it.
Most recipes get this completely wrong. They use plain cream cheese, add some dried herbs, and call it a day. But here's what actually works: we're building flavor like a symphony, each layer complementing the next until you get this harmonious bite that makes people close their eyes and sigh. The cream cheese gets whipped with Italian herbs, sun-dried tomatoes, and a touch of lemon zest that cuts through the richness like a bright summer day. The tortillas get a quick toast that brings out their nuttiness, and the fillings are arranged in a specific order that ensures every slice shows off those beautiful spirals. Okay, ready for the game-changer? We're adding a whisper of honey to the cream cheese mixture—just enough to make people wonder what makes these so addictive. Trust me on this one; it's the difference between good and "oh my god, what did you put in these?"
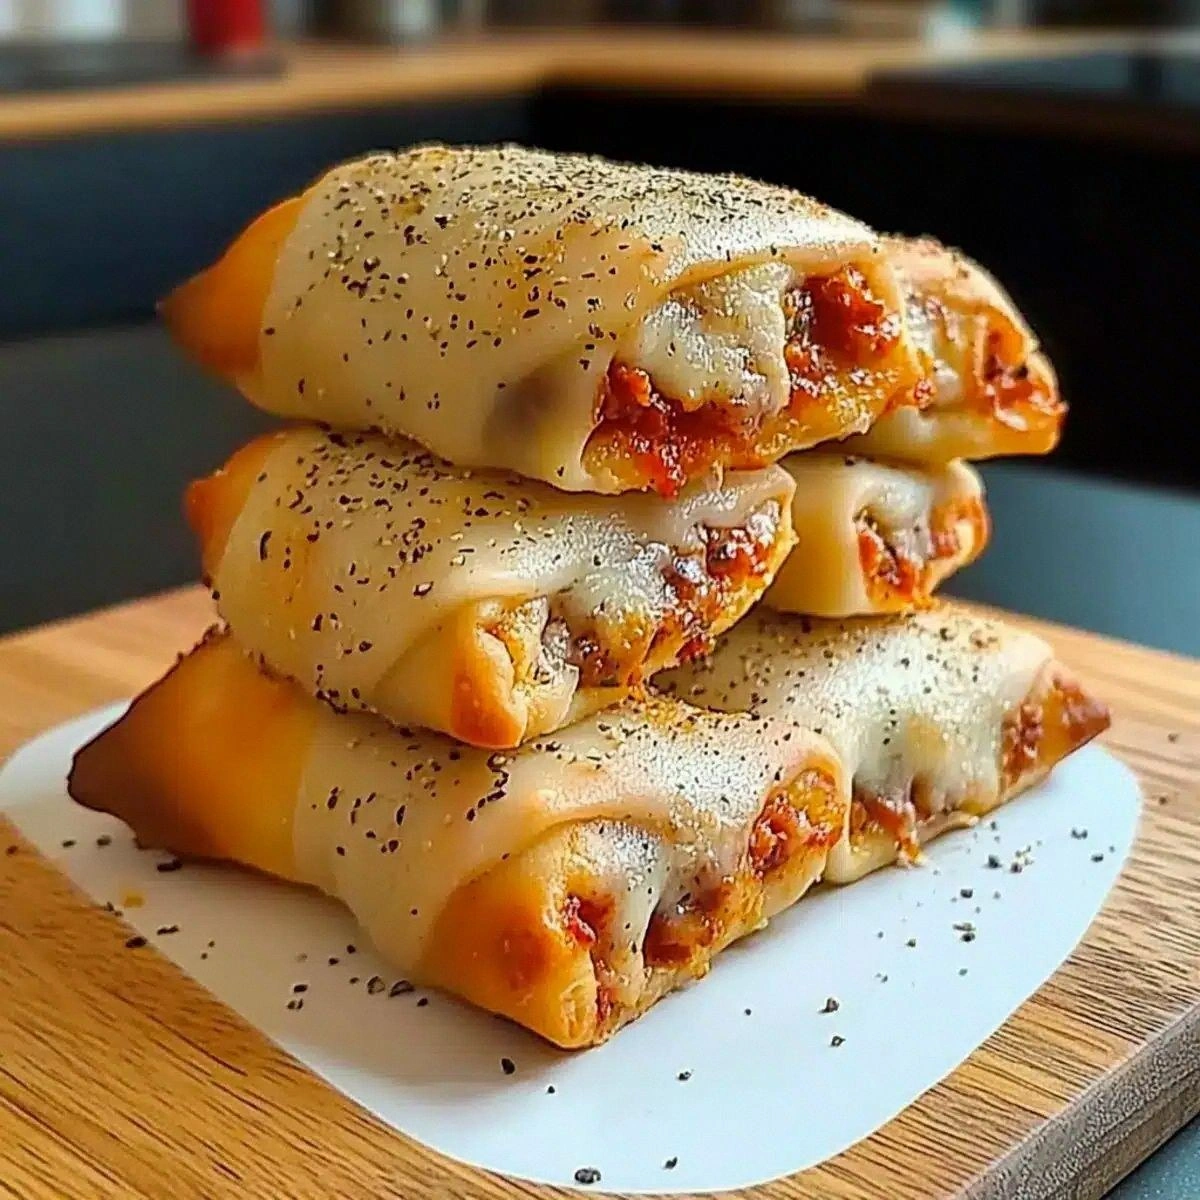
What makes these pinwheels absolutely irresistible is how they manage to be both elegant and approachable. They're fancy enough for your wine club friends but familiar enough that your pickiest nephew will devour them. The textures play together like a perfect duet—the soft cream cheese mixture, the slight chew of the tortilla, the snap of roasted red peppers, the salty bite of prosciutto. When you slice through that roll and see those perfect spirals, it's like edible art that you can't wait to destroy. And the best part? You can make these the night before, wrap them tight, and slice them right before serving. No last-minute panic, no sweating over a hot stove while your guests wonder where you disappeared to. Just slice, arrange, and watch them vanish. Picture yourself pulling these out of the fridge, already sliced and perfect, while everyone thinks you're some kind of kitchen wizard. That sizzle when the cream cheese hits your tongue? Absolute perfection.
Let me walk you through every single step—by the end, you'll wonder how you ever made it any other way. We're talking about creating pinwheels that don't fall apart when you slice them, that don't get soggy sitting out, that don't taste like every other forgettable appetizer at the potluck. These are the ones people will remember, the ones they'll ask you to bring to every gathering, the ones that might just make you the most popular person at the party. And now the fun part.
What Makes This Version Stand Out
Flavor Explosion: This isn't just cream cheese and herbs slapped together. We're talking about a carefully balanced blend where sun-dried tomatoes bring umami depth, fresh basil adds brightness, and that touch of honey makes your taste buds dance. Each component is chosen to complement the others, creating a filling that's complex but not complicated.
Texture Perfection: Most pinwheels suffer from texture monotony—everything's soft and mushy. Not these babies. We've got creamy filling, tender tortilla, crisp vegetables, and salty meat all in one bite. The contrast makes you want to keep eating just to experience that perfect mouthfeel again.
Make-Ahead Magic: These actually get better after a few hours in the fridge. The flavors meld together, the tortillas soften just enough to roll perfectly, and you can slice them without everything squishing out. I dare you to taste this and not go back for seconds—especially after they've had time to chill.
Presentation Power: Those spirals are showstoppers. When you slice through and see the perfect pinwheel pattern, people think you're some kind of culinary genius. Little do they know it's just about layering in the right order and rolling tight enough—but we'll keep that our little secret.
Customizable Canvas: Once you master the base recipe, you can swap ingredients based on what you love or what's in season. The technique stays the same while the flavors can go anywhere from Greek to Mexican to whatever crazy combination you dream up.
Party Proven: I'll be honest—I ate half the batch before anyone else got to try it. Then I watched my guests do the exact same thing. These disappear faster than free samples at Costco, and everyone's asking for the recipe before they've even finished chewing.
Beginner Friendly: If you've ever struggled with appetizers that require 47 steps and three different temperatures, you're not alone—and I've got the fix. These come together in about 15 minutes of active time, no special equipment needed, and they're pretty much impossible to mess up.
Alright, let's break down exactly what goes into this masterpiece...
Inside the Ingredient List
The Flavor Base
Cream cheese is obviously the star here, but not just any cream cheese. You want the full-fat variety—none of that reduced-fat nonsense that tastes like disappointment and has the texture of spackle. The full-fat version whips up lighter, spreads smoother, and carries flavors like a dream. Let it come to room temperature before you start; cold cream cheese is stubborn and will fight you every step of the way. When it's properly softened, it blends with the other ingredients to create this luscious, spreadable base that holds everything together without being gluey.
The Texture Crew
Here's where we get strategic about what goes inside. Sun-dried tomatoes pack incredible flavor but can be tough and chewy if you don't handle them right. Chop them fine and let them hydrate in the cream cheese mixture for a few minutes—they'll soften and distribute their concentrated tomato essence throughout every bite. Roasted red peppers add sweetness and a pop of color, but make sure you pat them dry with paper towels first. Excess moisture is the enemy of a good pinwheel; it'll make your tortillas soggy and cause everything to slide around like a bad slip-n-slide.
The Unexpected Star
Fresh basil is non-negotiable, but here's the twist: chiffonade it ultra-thin so it distributes evenly and doesn't create big tough pieces that tear through your tortilla when you slice. The honey might seem weird, but it balances the saltiness of the meats and cheese, creating this perfect harmony that makes people wonder why these taste so much better than any pinwheels they've had before. Don't skip it—unless you want ordinary results.
The Final Flourish
For the meats, quality matters more than quantity. A few slices of good prosciutto or salami will do more for your pinwheels than a whole package of cheap lunch meat. Look for meats that are sliced thin but not paper-thin; you want them to provide structure, not disappear into the cream cheese. And here's a pro tip: layer them so they overlap slightly—this creates a barrier that prevents the moisture from seeping through and making your tortillas sad and soggy.
Everything's prepped? Good. Let's get into the real action...
The Method — Step by Step
- Start with your cream cheese in a medium bowl, and for the love of all that's holy, make sure it's at room temperature. Cold cream cheese is like that friend who shows up to the party two hours early—it's just not ready to mingle yet. Add your softened cream cheese, then go in with the sun-dried tomatoes that you've chopped so fine they almost disappear. The goal is distribution of flavor, not big chunks that'll create weak spots in your roll. Add the honey, lemon zest, dried oregano, and a good pinch of salt and pepper. Mix with a fork first—this helps break up the cream cheese without splattering your entire kitchen—then switch to a spatula when it starts coming together.
- Now for the herbs: basil gets chiffonaded (that fancy word for rolled and sliced into ribbons), but here's where most recipes mess up. They add the basil to the cream cheese mixture, where it gets bruised and turns black. Instead, we're keeping it separate for now. The basil goes on top of the cream cheese layer, where it stays vibrant and fresh-tasting. Add your minced garlic to the cream cheese mixture now—just one small clove, minced so fine it practically dissolves. You want the flavor without the harsh bite of big pieces.
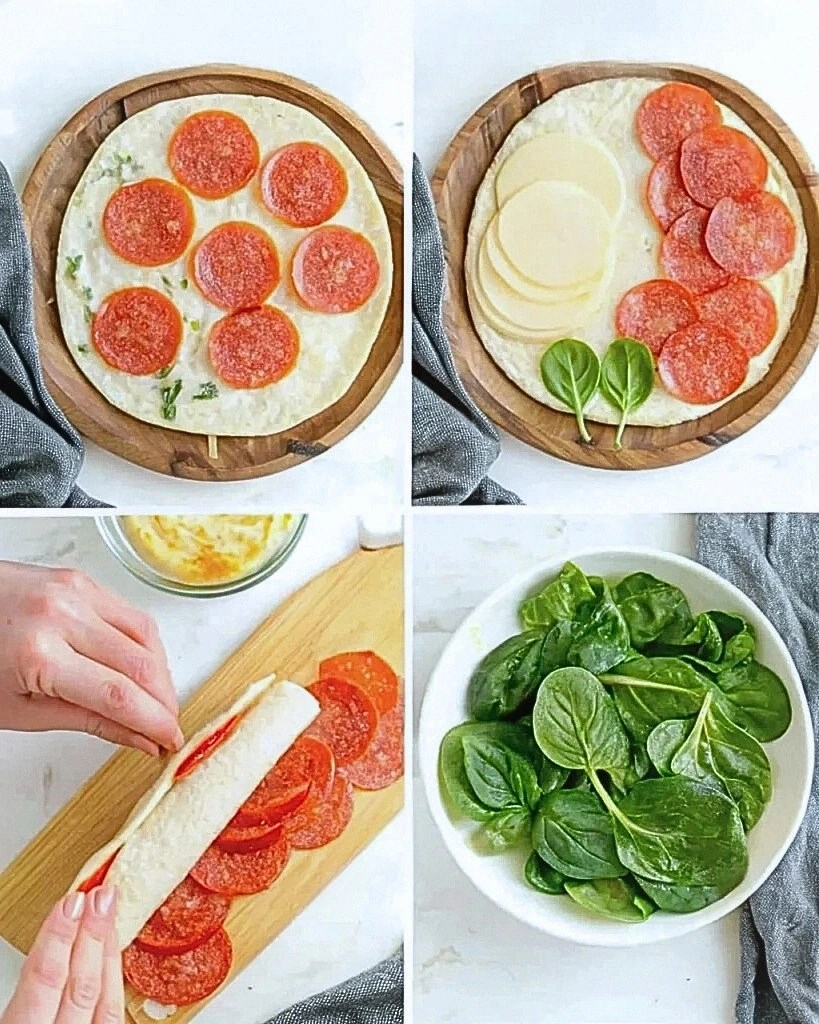
- Lay out your tortillas on a clean surface, and here's where we start building smart. You want flour tortillas, not corn—corn will crack when you roll them. Warm them briefly in the microwave for 10 seconds to make them pliable. Spread the cream cheese mixture in an even layer, leaving about half an inch around the edges. This border is crucial; it prevents the filling from squishing out when you roll. The layer should be thin enough that you can still see the tortilla through it in spots—too much filling and your pinwheels will be more like cream cheese bombs.
- Time for the layering strategy: lay down your meats first, overlapping slightly like shingles on a roof. This creates a moisture barrier that keeps your tortillas from getting soggy. Next goes the roasted red peppers, patted dry and sliced into thin strips. Then sprinkle your fresh basil evenly across the surface. The key is even distribution—you want every bite to have a little bit of everything. Press down gently as you go; this helps everything adhere and prevents sliding when you roll.
- Roll time: start at the edge closest to you and roll away, keeping it as tight as possible without squishing everything out. Use the plastic wrap to help you get tension—the tighter the roll, the cleaner your slices will be. When you reach the end, give it a gentle squeeze all around to compress everything together. Wrap the whole thing in plastic wrap, twist the ends like a candy wrapper, and refrigerate for at least 2 hours. This is where the magic happens—the flavors meld, the cream cheese firms up, and everything becomes sliceable.
- When you're ready to slice, grab your sharpest knife and run it under hot water for a few seconds. This melts through the cream cheese without dragging and gives you clean, professional-looking cuts. Wipe the blade between slices for the neatest presentation. Cut into 1-inch pieces—any smaller and they fall apart, any bigger and they're awkward to eat. Arrange on a platter with the cut sides up to show off those beautiful spirals.
- The final touch: a drizzle of good olive oil and a sprinkle of fresh cracked pepper right before serving. This isn't just for looks—the olive oil adds a fruity note that complements all the Italian flavors, and the pepper gives a little kick that makes people reach for another one before they've even finished the first. Stand back and watch them disappear faster than free samples at Costco.
That's it—you did it. But hold on, I've got a few more tricks that'll take this to another level...
Insider Tricks for Flawless Results
The Temperature Rule Nobody Follows
Here's the thing about temperature that most people ignore: everything needs to be at room temperature except the final product. Cold cream cheese won't blend properly, warm tortillas tear, but the rolled pinwheels need to be cold to slice cleanly. It's like a dance where everyone needs to know when to enter and exit. Let your ingredients sit out for 30 minutes before you start, but then chill the finished rolls for at least 2 hours. A friend tried skipping the chill time once—let's just say it didn't end well, and she ended up with what looked like a cream cheese crime scene on her cutting board.
Why Your Nose Knows Best
When you're mixing the cream cheese base, smell it. Really smell it. The mixture should smell bright and herby, not flat and one-note. If all you get is cream cheese, you need more lemon zest or herbs. Your nose is actually a better judge than your tongue at this stage because the flavors haven't melded yet. This is why professional chefs taste and smell everything—they're building layers of flavor that hit different parts of your palate at different times.
The 5-Minute Rest That Changes Everything
After you spread the cream cheese mixture but before you add the other ingredients, let it sit for 5 minutes. This gives the dried herbs time to hydrate and release their essential oils into the cream cheese. It's a small step that makes a huge difference in flavor distribution. You know how soup tastes better the next day? Same principle—those herbs need time to share their gifts with the cream cheese base.
The Rolling Secret That Changes Everything
The secret to tight, even rolls isn't in how strong you are—it's in using the right surface. A piece of parchment paper gives you grip and lets you really pull the roll tight without tearing the tortilla. Plus, you can use the parchment to help you roll, lifting and pulling as you go. Think of it like making sushi—tight, even pressure all the way around creates those perfect spirals that make people think you're some kind of kitchen wizard.
Creative Twists and Variations
This recipe is a playground. Here are some of my favorite ways to switch things up:
The Greek Goddess Version
Swap the Italian herbs for oregano and dill, use feta instead of cream cheese (mixed with a little cream cheese to keep it spreadable), and add chopped Kalamata olives and cucumber strips. The briny olives against the fresh cucumber is like a Greek salad in pinwheel form. Use spinach tortillas for extra color and flavor that screams Mediterranean sunshine.
The Southwest Fiesta
Replace the basil with cilantro, add cumin and lime zest to the cream cheese, and use pepper jack cheese strips along with roasted poblano peppers. Add a layer of black beans for protein and that satisfying Southwest flavor profile. Serve with a side of salsa verde for dipping—people will lose their minds over these.
The Breakfast Champion
Mix everything bagel seasoning into the cream cheese, add thin slices of smoked salmon, and top with capers and red onion. These are incredible for brunch—the cream cheese base gets jazzed up with dill and lemon, creating the perfect vehicle for all those bagel-shop flavors you love, but in party-friendly form.
The Veggie Powerhouse
Skip the meats entirely and load up on roasted vegetables—zucchini, eggplant, and bell peppers all work beautifully. Add some goat cheese crumbles for tang and toasted pine nuts for crunch. Even meat-lovers devour these, proving that vegetarian doesn't have to mean boring or unsatisfying.
The Mediterranean Dream
Use whipped ricotta instead of cream cheese for a lighter texture, add chopped artichoke hearts, sun-dried tomatoes, and a sprinkle of lemon zest. The ricotta makes these feel almost airy while still being satisfying, and the artichokes add that meaty texture that keeps you coming back for more.
The Everything Bagel Remix
Everything bagel seasoning in the cream cheese, thinly sliced scallions, smoked salmon, and a drizzle of everything bagel-flavored cream cheese. It's like your favorite breakfast but elevated and party-ready. The seasoning gives you those familiar flavors but in a totally new format that feels fresh and exciting.
Storing and Bringing It Back to Life
Fridge Storage
These keep beautifully in the fridge for up to 4 days, wrapped tightly in plastic wrap. The key is wrapping them individually so they don't pick up weird fridge flavors or dry out. Store them in the coldest part of your fridge—usually the back of the bottom shelf—where the temperature is most stable. If you're making them ahead for a party, slice them the day of for the cleanest cuts and freshest appearance.
Freezer Friendly
Here's where these really shine: they freeze perfectly for up to 3 months. Wrap each roll individually in plastic wrap, then aluminum foil to prevent freezer burn. When you're ready to use them, thaw overnight in the fridge, then let them sit at room temperature for 30 minutes before slicing. They'll taste just as fresh as the day you made them, making them perfect for emergency entertaining situations.
Best Reheating Method
While these are meant to be served cold, sometimes you want to refresh them slightly. The trick is to let them come to room temperature for 30 minutes before serving—no actual reheating needed. If they've been in the fridge and seem a bit firm, add a tiny splash of water to the platter and cover with plastic wrap for 10 minutes. The gentle steam softens the tortillas just enough to make them taste freshly made without getting soggy.