Picture this: It's ten minutes past midnight, the game just ended, and you're standing in your kitchen wearing nothing but socks and a triumphant grin, scraping the last molten bite of buffalo chicken dip straight from the baking dish with a tortilla chip that snapped three scoops ago. Been there? Good. We're already friends. This dip has a way of turning reasonable adults into competitive, chip-wielding treasure hunters who will absolutely body-block a grandmother for the corner piece where the cheese gets extra blistered. I know because last Super Bowl I watched my normally polite cousin Sarah hip-check her own mother to get the last scoop, then try to play it off like she was "just stretching." The dip does things to people. Wonderful, terrible, delicious things.
After fifteen years of tinkering, burning, over-salting, under-spicing, and one memorable incident involving a fire extinguisher and a very confused golden retriever, I finally cracked the code on what I genuinely believe is the platonic ideal of buffalo chicken dip. Not the gloopy, separated mess you get from those "just toss everything in a slow cooker" recipes. Not the oil-slicked disappointment that sits like a rock in your stomach. This is the creamy, tangy, perfectly balanced version that stays luscious even when it starts to cool, with ribbons of real chicken, pockets of molten cheddar, and that signature buffalo tang that makes your lips tingle in the best possible way.
Here's the thing that drives me absolutely bonkers about most buffalo chicken dip recipes: they treat it like some kind of dump-and-stir afterthought. Throw chicken, hot sauce, cheese, hope for the best. That's how you end up with a grainy, greasy disaster that separates faster than a cheap hollandaise. The secret — and stay with me here because this is going to change everything — is in the foundation. We're building layers of flavor like we're constructing the world's most addictive edible skyscraper, starting with a perfectly balanced base that keeps everything creamy and cohesive even when your guests are circling like vultures twenty minutes later.
I dare you to taste this and not go back for seconds. Actually, I double-dog dare you, because I have never seen anyone, and I mean anyone, exercise anything resembling portion control around this dip. My neighbor claims she doesn't like spicy food; she ate half the pan. My friend's vegan boyfriend "just wanted to smell it" and somehow ended up with a plate. It's kitchen sorcery, pure and simple, and it's about to become your signature move for every game day, poker night, book club, or Tuesday that ends in Y.
What Makes This Version Stand Out
The Velvet Base: Most recipes throw everything together cold and hope the oven sorts it out. That's amateur hour. We start by whipping cream cheese with sour cream until it's lighter than your excuses for not going to the gym, creating a stable emulsion that won't break or weep. The result is a dip that stays creamy from first bite to last, no oily puddles of shame in sight.
The Ranch Revelation: Here's where I lose half of you and gain the other half forever. We're using ranch seasoning instead of blue cheese dressing, but hear me out. The dried herbs and buttermilk solids in the packet bloom when heated, creating these little flavor bombs throughout the dip. It's ranch flavor without the ranch soup consistency that makes other versions taste like you're eating chicken wings through a dairy filter.
The Worcestershire Wonder: Just one tablespoon transforms the entire dish. It adds that elusive umami depth that makes people say "what is that?" in the best way. It's the difference between a good dip and a dip that haunts people's dreams. I learned this trick from a bartender in Buffalo who swore by it, and that man understood the assignment.
The Temperature Trick: We're not just baking until bubbly. We're baking until the edges caramelize and the top develops these little golden spots that taste like the best part of a grilled cheese. Then — and this is crucial — we let it rest for five minutes so the cheeses can settle into their final form. Skip this step and you'll burn your tongue so badly you won't taste anything for a week.
The Texture Triangle: Shredded chicken for body, cheddar for stretch, blue cheese for pops of funky complexity. Each bite gives you something different: creamy base, stringy cheese pull, and those little blue cheese crumbles that melt just enough to create pockets of intense flavor. It's like a theme park ride for your mouth, but without the overpriced snacks and questionable safety standards.
The Make-Ahead Miracle: Mix everything the night before, cover tight, and bake when guests arrive. The flavors actually improve as they mingle in the fridge, creating this harmonious buffalo symphony that makes you look like a culinary genius with minimal effort. I've had friends insist I must have spent hours on it. I let them believe that while I secretly watched three episodes of reality TV.
Alright, let's break down exactly what goes into this masterpiece...
Inside the Ingredient List
The Flavor Foundation
Cream cheese is the backbone here, but not just any cream cheese. You want the full-fat brick, not the whipped stuff in the tub. The brick has less air incorporated, which means it melts more smoothly and creates that luxurious mouthfeel we're after. I've tried this with neufchatel and light cream cheese, and while your waistline might thank you, your taste buds will file a formal complaint. The fat content is what carries all those buffalo flavors and keeps everything silky even when the dip starts to cool.
Sour cream adds tang and lightness, cutting through the richness like a skilled comedian defusing tension at a awkward dinner party. Greek yogurt works in a pinch, but sour cream has this particular cultured depth that plays beautifully with the hot sauce. Don't even think about using fat-free sour cream unless you enjoy the taste of disappointment and broken emulsions. Full-fat sour cream melts into the cream cheese, creating this perfect creamy base that holds everything together like the world's most delicious edible glue.
The Heat and the Herb
Buffalo-style hot sauce is non-negotiable, but here's where you get to play mad scientist. Frank's is the classic, but I've had tremendous success with Crystal, Louisiana, and even mixing half Frank's with half something hotter for extra kick. The key is avoiding sauces with too much vinegar or odd spices that will fight with everything else. You want that clean buffalo flavor, not something that tastes like someone spilled potpourri in your wing sauce. Start with half a cup and add more to taste — remember, you can always add heat but you can't take it away without throwing off the entire balance.
Ranch seasoning is my secret weapon against boring dip syndrome. That little packet contains a perfectly balanced blend of herbs and spices that would take you forever to measure out individually. The dried chives, parsley, dill, and garlic powder bloom when heated, creating these little pockets of ranch flavor throughout the dip. If you're feeling fancy and want to make your own, go for it, but I've tested this extensively and the packet wins every time for consistency and flavor.
The Protein Powerhouse
Shredded cooked chicken seems straightforward, but the texture makes or breaks this dip. Canned chicken is an abomination that should be banned by international treaty. Rotisserie chicken works if you're in a hurry, but I prefer poaching my own chicken breasts in seasoned water. You get cleaner flavor and perfect texture every time. The chicken should be shredded, not chopped — those little strands create pockets and ridges that grab the sauce like tiny edible fishing nets. Two cups might seem like a lot, but trust me, people want to know they're eating buffalo chicken dip, not mysterious orange goo.
The Cheese Trinity
Cheddar brings the melt and that classic orange color that screams comfort food. Skip the pre-shredded stuff — it's coated with cellulose to prevent clumping, which also prevents smooth melting. Buy a block and shred it yourself. Sharp cheddar gives you more flavor impact with less cheese, keeping the dip from becoming a dairy bomb. The blue cheese is where people get divided faster than a family trying to choose a Netflix movie, but hear me out: use it. Just half a cup of good quality crumbled blue cheese adds these little pockets of funky complexity that make the dip interesting. If you absolutely can't stand blue cheese, substitute with more cheddar, but you'll be missing the dimension that makes people ask for the recipe.
The Final Flourish
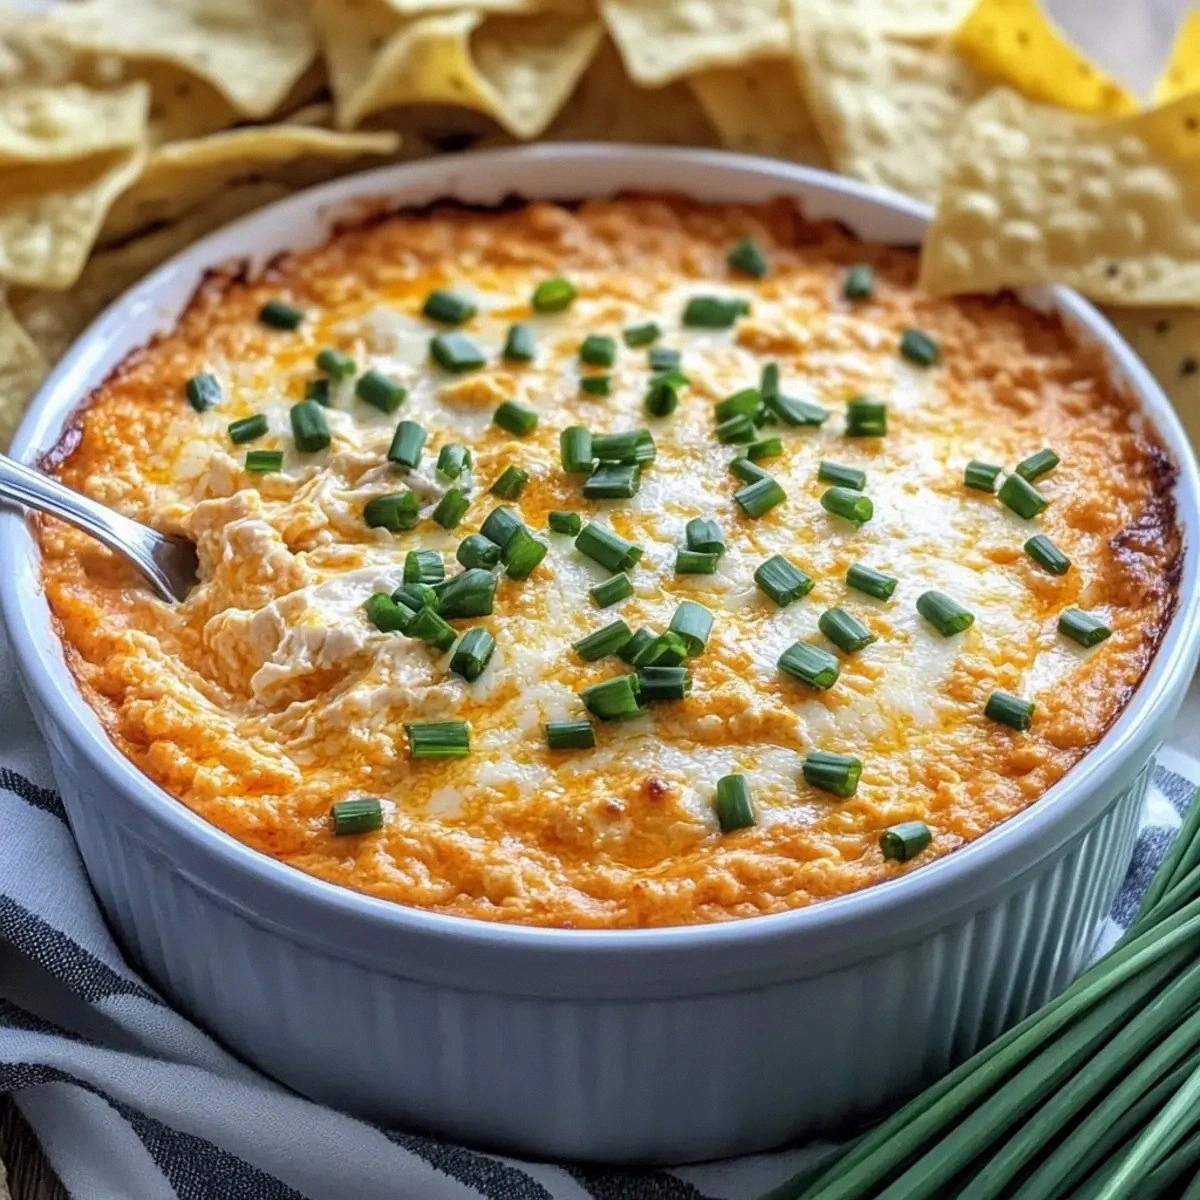
Fresh chives or scallions aren't just garnish — they're the fresh, bright counterpoint to all that richness. Add them right before serving so they stay crisp and vibrant. The green color also signals to your brain that this might be slightly healthy, which is obviously ridiculous but let's not question the psychology of eating. Worcestershire sauce is the final touch that makes people say "what's in this?" It's like adding a bass line to a song — you might not consciously notice it, but you'd miss it if it were gone. Just one tablespoon adds this savory depth that ties everything together like the world's most delicious edible bow.
Everything's prepped? Good. Let's get into the real action...
The Method — Step by Step
- Preheat your oven to 375°F (190°C). Not 350, not 400 — 375 is the sweet spot where everything melts together without the edges burning before the center is hot. I learned this the hard way after serving what my friends now call "volcano dip" — burnt on the edges, lukewarm in the middle, with the structural integrity of a chocolate teapot. While the oven heats, let all your dairy ingredients come to room temperature. This isn't culinary snobbery — cold cream cheese will fight you like a angry cat in a bathtub, leaving you with lumpy dip that tastes fine but looks like it lost a fight with a cheese grater.
- In a large bowl, beat the cream cheese with an electric mixer on medium speed for about two minutes. You're not just softening it here — you're incorporating air which makes the final dip lighter and more scoopable. It should look like thick whipped cream and be about double its original volume. This step is crucial and non-negotiable. I've watched people skip it and end up with dip that has the texture of cement mixed with disappointment. The cream cheese should be smooth enough that when you lift the beaters, it forms gentle peaks that slowly melt back into themselves like delicious edible lava.
- Add the sour cream, ranch seasoning, and Worcestershire sauce to the whipped cream cheese. Beat on low speed just until combined — about 30 seconds. Over-mixing here can make the sour cream break and get watery, which defeats the whole purpose of our careful cream cheese whipping. The mixture should be pale, fluffy, and smell like the world's most addictive vegetable dip. Taste it now (I won't tell) and you'll understand why this base works so well — it's tangy, herby, and complex before we even add the heat. This is the foundation that everything else builds on, so make sure it's perfectly smooth and well combined.
- Fold in the shredded chicken using a spatula, not the mixer. We want to maintain those nice chicken shreds, not turn them into chicken paste that looks suspiciously like cat food. Add the chicken in three additions, folding gently after each addition. The chicken should be evenly distributed but still visible — you want people to know they're eating buffalo chicken dip, not mystery orange spread. If you're using rotisserie chicken, remove the skin and any excess fat first. Nobody wants to bite into a rubbery chicken skin surprise in the middle of their dip experience.
- Add the hot sauce gradually, starting with 1/4 cup and tasting as you go. Different brands have different heat levels, and your tolerance might not match mine. The dip should taste distinctly buffalo but not so hot that your guests can't taste anything else for the rest of the evening. Mix the hot sauce in thoroughly — you want every bite to have that signature flavor, not random pockets of face-melting heat. Remember, the cheese will mellow the spice slightly, so err on the side of a little hotter than you want the final product.
- Stir in 3/4 cup of the shredded cheddar and all the blue cheese crumbles. Save the remaining 1/4 cup of cheddar for the top — this creates that beautiful golden crust that makes people hover around the oven like vultures. The cheese should be evenly distributed but not over-mixed. You want pockets of cheddar for those Instagram-worthy cheese pulls, and the blue cheese should stay in distinct little nuggets that create surprise bursts of flavor. Think of it like chocolate chip cookies — you want chips, not chocolate-flavored dough.
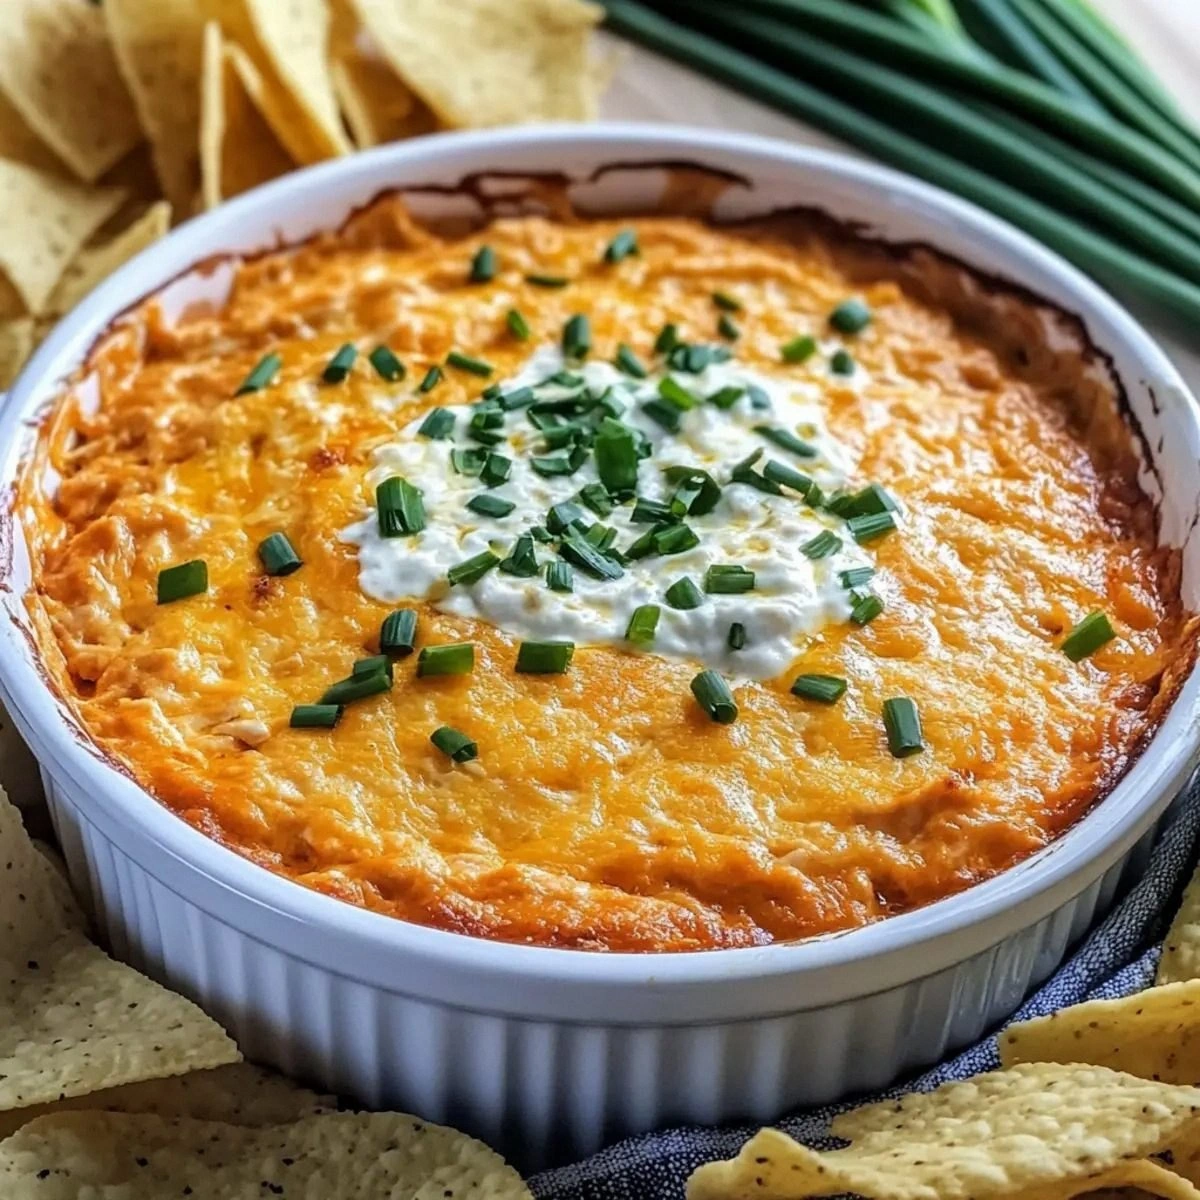
- Transfer the mixture to a 9-inch baking dish and smooth the top with your spatula. I like using a shallow dish rather than a deep one because it creates more of those coveted crispy edges. Sprinkle the remaining cheddar evenly over the top, then add a final drizzle of hot sauce in a decorative pattern if you're feeling fancy. The top should look like a canvas of orange and white that's about to become a masterpiece of melted cheese and buffalo goodness.
- Bake for 20-25 minutes, until the edges are bubbling furiously and the top is golden brown with little darker spots where the cheese has caramelized. The center should be hot and bubbly when you gently shake the dish. If the top isn't golden enough but the edges are done, switch to broil for the last 2-3 minutes, but watch it like a hawk — it goes from perfect to charcoal in about 30 seconds. When it's done, your kitchen should smell like buffalo wings had a baby with the best grilled cheese sandwich you've ever eaten.
- Let the dip rest for 5 minutes before serving. I know, I know — it's torture. But this brief rest allows the cheeses to settle and the whole thing to thicken slightly so you get perfect scoops instead of molten lava that slides off your chip and onto your shirt. While it rests, chop your chives or scallions and get your serving vessel ready. The dip will stay scoopable for about 30 minutes at room temperature, making it perfect for game day grazing.
That's it — you did it. But hold on, I've got a few more tricks that'll take this to another level...
Insider Tricks for Flawless Results
The Temperature Rule Nobody Follows
Here's the thing that separates amateur dip makers from the pros: serving temperature matters more than you think. Too hot and the oils separate, creating that unappetizing layer of orange grease on top. Too cool and it sets up like cement, breaking your chips and your spirit. The sweet spot is warm but not hot — about 140°F if you're being precise, or "I can hold my finger in it for three seconds without crying" if you're not. A friend once asked why my dip always stayed creamy while hers turned into a solid mass after ten minutes. The answer? I serve it in a warmed dish, not the cold baking dish straight from the oven. Just pop your serving dish in the oven for the last five minutes of baking time, and your dip will stay at the perfect consistency for twice as long.
Why Your Nose Knows Best
Trust your sense of smell when this is baking. When you can smell buffalo sauce from the living room, it's probably done. The aroma compounds in hot sauce are volatile, and they really start releasing when the dip hits about 160°F internally. This is usually 3-5 minutes before it looks completely done, so use your nose as much as your eyes. My neighbor thought I was being pretentious when I told her this, then she tried it and texted me later that her dip was perfectly timed for the first time ever. Your nose is smarter than you give it credit for — it's been keeping you from eating spoiled food your whole life, so let it help you nail this timing too.
The 5-Minute Rest That Changes Everything
I cannot stress this enough: let the dip rest. Not just for temperature, but for texture. During those five minutes, something magical happens. The proteins in the cheese relax, the fats redistribute, and the whole thing transforms from a bubbling cauldron of molten dairy into the perfect scoopable consistency. It's like the difference between a freshly baked cookie that's still too soft and one that's had time to set up properly. Skip this step and you'll end up with half your dip sliding off the chip in a tragic orange avalanche. A friend once told me she couldn't wait because her guests were "literally hovering" and I told her that's what chips and salsa are for. Make them wait. They're not vultures, they can survive five minutes.
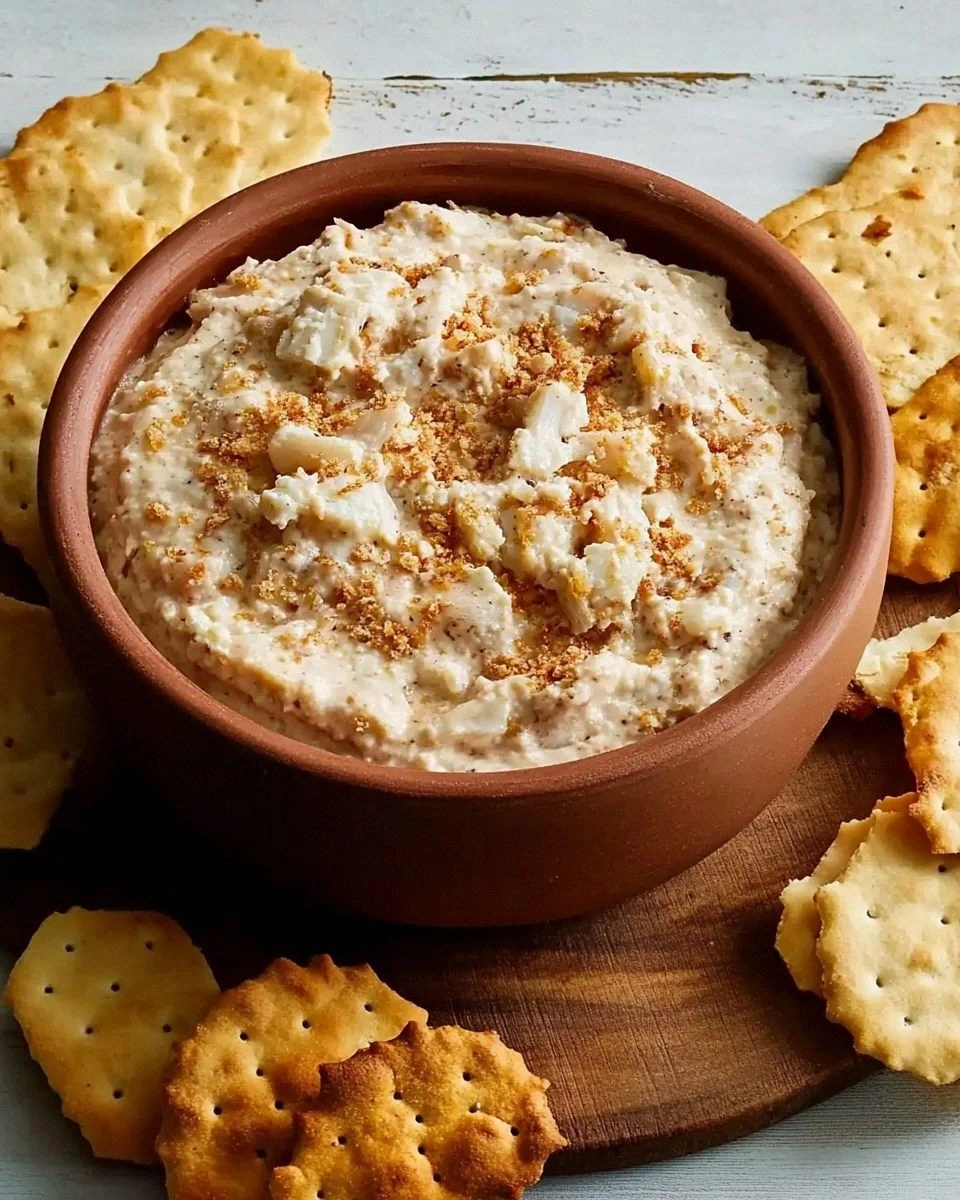
The Chip Choice Makes a Difference
Thick, sturdy tortilla chips are your best bet here. Those thin, restaurant-style chips will snap under the weight of a proper scoop, leaving you fishing broken chip pieces out of the dip like some kind of sad appetizer archaeology. I like the scoop-style chips because they create perfect little buffalo chicken dip boats, but regular triangle chips work if they're thick enough. Avoid flavored chips — the buffalo flavor is complex enough without competing ranch or lime or whatever trendy flavor the chip companies are pushing this week. Plain, thick, salty chips are the vehicle, not the star of this show.
The Make-Ahead Magic Method
You can mix everything up to two days ahead and keep it covered in the fridge. The flavors actually improve as they meld together, creating this harmonious buffalo symphony that tastes like it took way more effort than it did. Just bring it to room temperature before baking — cold dip in a hot oven means the outside burns before the inside is warm. I've mixed this on Friday for Saturday game day and had people insist it was the best batch I'd ever made. The hot sauce flavors develop, the ranch seasoning hydrates, and everything just gets better acquainted. Think of it like a party where everyone needs a few hours to really get comfortable with each other.
Creative Twists and Variations
This recipe is a playground. Here are some of my favorite ways to switch things up:
The Heat Seeker's Dream
For those who think Frank's is basically ketchup, swap half the hot sauce for something with real bite — I'm partial to Crystal Extra Hot or even a few tablespoons of habanero sauce. Add a diced fresh jalapeño to the mix, seeds and ribs included if you're feeling brave. The fresh pepper adds a bright heat that complements the buffalo flavor, while the hotter sauce brings the kind of heat that makes your nose run and your taste buds dance. Top with sliced fresh peppers before serving so people know what they're getting into. I'll be honest — I ate half the batch before anyone else got to try it, and I regret nothing except maybe not making a double batch.
The Smoky Mountain Version
Add two tablespoons of liquid smoke and swap the cheddar for smoked gouda. The result tastes like buffalo wings that were cooked over a campfire, with this incredible depth that makes people ask if you have a smoker hidden in your kitchen. I discovered this variation when I accidentally grabbed liquid smoke instead of Worcestershire (note to self: label your bottles) and it was so good it became a regular in my rotation. The smoked gouda melts like a dream and adds this sophisticated edge that elevates the whole thing from game day food to "serve this at your next dinner party" territory.
The Green Chile Obsession
Replace half the chicken with diced roasted green chiles (Hatch if you can get them, canned if you can't) and add a teaspoon of ground cumin. This Southwestern twist creates this incredible fusion where buffalo meets New Mexico, and the result is addictive enough that my friend from Albuquerque insists it's better than the original. The green chiles add this vegetal sweetness that plays beautifully against the hot sauce heat, while the cumin adds an earthy base note that makes everything taste more complex. Top with fresh cilantro if you want to really commit to the theme.
The Everything Bagel Edition
Mix in two tablespoons of everything bagel seasoning and serve with bagel chips instead of tortilla chips. This breakfast-inspired version works surprisingly well for brunch gatherings, and the sesame and poppy seeds add this nutty crunch that complements the creamy dip perfectly. Use scallions instead of chives for garnish, and if you're really feeling wild, add everything seasoning to the top before baking. It creates this crispy, savory crust that's basically everything you love about an everything bagel but in buffalo chicken dip form.
The Mediterranean Mashup
Replace the ranch seasoning with Italian herbs (oregano, basil, thyme), swap the blue cheese for feta, and add a cup of chopped artichoke hearts. It sounds weird until you taste it — the artichokes add this tangy, almost lemony note that brightens everything, while the feta keeps the salty, funky element that blue cheese provides but in a more Mediterranean direction. Serve with pita chips and prepare for people to look confused for exactly three seconds before devouring it. This version is particularly good if you're serving to people who claim they don't like buffalo sauce — the Italian herbs temper the heat while maintaining that addictive quality.
Storing and Bringing It Back to Life
Fridge Storage
Leftover dip (ha, right) keeps beautifully in the fridge for up to four days. Store it in an airtight container with plastic wrap pressed directly against the surface to prevent a skin from forming. When you're ready to reheat, let it come to room temperature first, then warm it gently in a 300°F oven covered with foil. The microwave works in a pinch, but do it in 30-second bursts stirring between each, or you'll end up with hot edges and a cold center that refuses to cooperate. I've successfully reheated this for lunch three days in a row, and honestly, day two might be even better than fresh — the flavors have had time to meld into this incredible depth that tastes like you spent way more time on it than you did.
Freezer Friendly
Here's where things get controversial: I don't recommend freezing this dip. The dairy tends to separate and become grainy when thawed, creating a texture that's about as appealing as eating sand mixed with disappointment. However, if you absolutely must freeze it (maybe you're pregnant and nesting, or you're stockpiling for the apocalypse), mix everything except the cheeses and freeze the base. When ready to serve, thaw overnight in the fridge, stir in fresh cheeses, and bake as directed. It's an extra step but worth it to avoid the grainy texture that frozen dairy develops. Think of it like meal prepping, but for buffalo chicken dip emergencies.
Best Reheating Method
The oven is your friend here, but with a caveat: add a splash of cream or milk before reheating and cover with foil. This creates a steam environment that helps everything come back together smoothly. Heat at 300°F for about 15-20 minutes, stirring once halfway through. If it looks separated when it comes out, whisk it vigorously — sometimes that's all it needs to come back together. The microwave is faster but riskier; use 50% power and stir every 30 seconds. Add a tiny splash of water before reheating — it steams back to perfection and prevents the dreaded dry edges that make reheated dip taste like punishment for your previous enjoyment.