I was halfway through a midnight snack raid when my kitchen turned into a cookie catastrophe. One clumsy hand slipped a bag of Oreos onto the counter, and the whole thing crashed like a domino tower. The crumbs scattered everywhere, and the sweet, buttery scent filled the air, making me feel like a mad scientist in a chocolate laboratory. My friend, who had been watching, laughed and dared me to create something out of the mess. I grabbed the nearest bowl, and the idea sparked like a match in a dry forest.
That night, I decided to turn the chaos into a culinary adventure. I thought, “Why not roll these cookies into something that feels like a sushi roll?” The vision of a bite-sized, no‑bake treat that combines the crunch of Oreo crumbs with the silky smoothness of a creamy filling began to take shape. I imagined the glossy surface of a sushi roll, but instead of rice, it would be chocolate cookie dust. The anticipation of that first bite was almost tangible.
In the middle of the kitchen, I mixed the Oreos into a fine powder, then blended them with milk until they formed a doughy consistency. The mixture smelled like a sweet, buttery cake, but it was far lighter, like a cloud of chocolate. I spread the dough on parchment and pressed it into a flat sheet, then cooled it in the fridge while I prepared the filling. The filling was a creamy blend of Oreo cream and a splash of melted butter, which gave it a silky texture that would cling to the cookie sheet. The whole process felt like a science experiment with a delicious outcome.
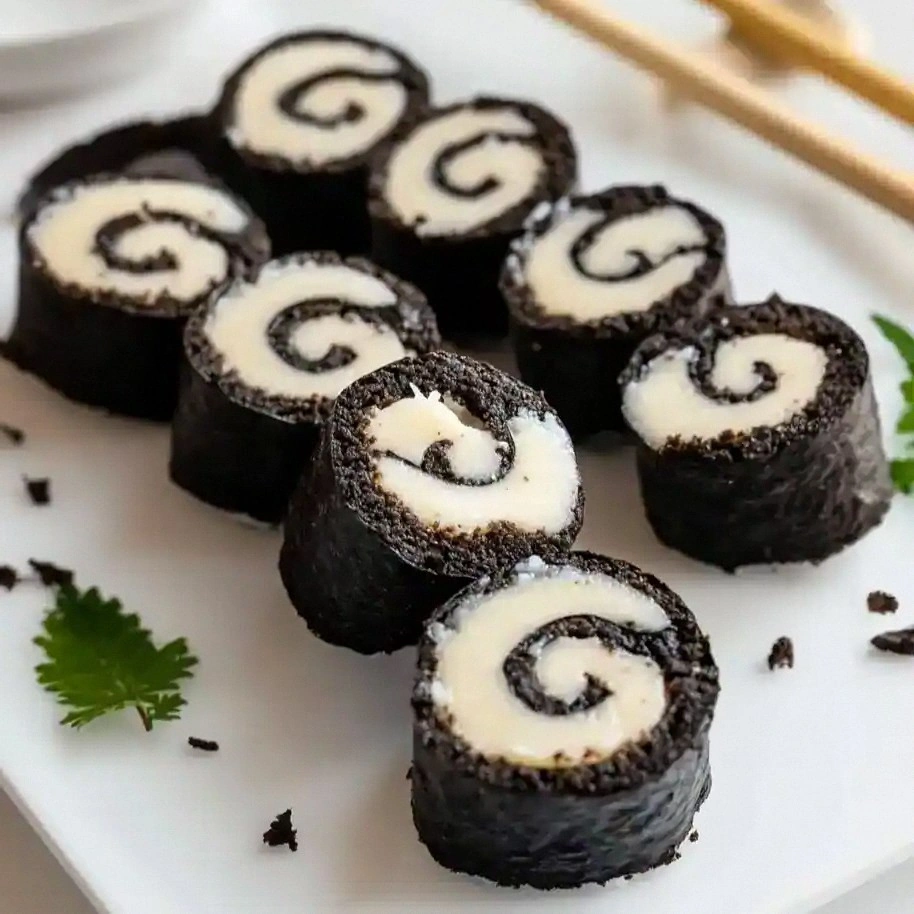
What made this version stand out was the playful twist: I rolled the cookie sheet into a sushi shape, sliced it into bite-sized rolls, and topped each piece with fresh strawberry slices and rainbow sprinkles. The combination of crunchy cookie, creamy filling, and bright fruit made it a multi-sensory delight. The texture was a perfect balance of crisp and smooth, and the flavor profile was a sweet, chocolatey explosion with a hint of fruit. It was a dish that looked like a dessert sushi roll but tasted like a chocolate cookie cake.
Most people think of sushi as a savory dish, but this version flips that expectation on its head. The cookie roll’s edges are crisp and golden, while the inside is moist and creamy. The strawberries add a juicy burst of freshness, and the rainbow sprinkles provide a playful pop of color and crunch. It’s a treat that feels both indulgent and whimsical, making it perfect for parties, birthdays, or a quick sweet fix after a long day.
There’s one secret ingredient that many recipes overlook: a splash of milk or melted butter in the cookie dough. This tiny addition keeps the dough pliable and prevents it from crumbling as you roll it into shape. Without that, the cookie sheet would break apart, and the whole process would become a mess. That tiny splash is the difference between a smooth roll and a sticky disaster.
I can’t stress enough how much this recipe will change your dessert game. The next time you crave something sweet, try this no‑bake Oreo sushi roll, and let the combination of cookie, cream, fruit, and sprinkles surprise you. I dare you to taste this and not go back for seconds. If you’ve ever struggled with making cookie dough that stays together, you’re not alone—and I’ve got the fix.
What Makes This Version Stand Out
- Crunch: The Oreo crumbs form a crisp outer shell that gives a satisfying bite, unlike traditional cookie cakes that can become soggy. This crunch is maintained even when the roll is refrigerated, thanks to the butter in the dough.
- Creaminess: The filling, a blend of Oreo cream and butter, coats the cookie sheet like velvet. It melts slightly in your mouth, creating a luscious contrast to the crunchy shell.
- Fruit Freshness: Fresh strawberries or banana slices add a juicy counterpoint that brightens the overall flavor. The fruit’s natural sweetness balances the chocolatey richness.
- Color Pop: Rainbow sprinkles or mini chocolate chips add a visual splash that makes the dish feel festive. The sprinkles also add a subtle crunch and a touch of sweet caramel.
- Make‑Ahead Friendly: Because the rolls are no‑bake, you can prepare them ahead of time and store them in the fridge for up to 48 hours. This makes them ideal for last‑minute gatherings.
- Minimal Equipment: No oven, no pans, just a bowl, a spoon, and parchment paper. It’s a recipe that can be whipped up in a single kitchen, even if you’re on a tight schedule.
Alright, let’s break down exactly what goes into this masterpiece…
Inside the Ingredient List
The Flavor Base
The Oreo cookies are the heart of this recipe. They provide the chocolatey crunch that anchors every bite. When you crush them into a fine powder, they become a versatile base that can be mixed into dough or sprinkled on top. If you skip the Oreos, the entire flavor profile collapses into a bland, sweet dough that lacks depth. To get the best results, choose a sturdy Oreo variety that holds up when pressed.
When selecting Oreos, look for the original or double-stuffed varieties. The original has a classic chocolate flavor, while the double-stuffed adds a creamy center that melts into the dough. The double-stuffed version also provides a richer taste that pairs beautifully with the creamy filling. If you’re looking for a healthier twist, try using a dark chocolate Oreo for a slightly bitter note.
The Texture Crew
Milk or melted butter is the glue that holds the cookie dough together. The butter adds richness and keeps the dough from crumbling when you roll it. Milk, on the other hand, helps to soften the dough, making it easier to spread on parchment. The ratio of milk to butter can be adjusted depending on how firm you want the dough. Too much milk will make it sticky; too little will make it brittle.
For a firmer dough, use 1 tablespoon of melted butter per 20 Oreos. If you prefer a softer, more pliable dough, add an extra tablespoon of milk. The key is to aim for a consistency that can be flattened into a sheet without tearing. Once the dough is ready, chill it for at least 20 minutes to set the structure.
The Unexpected Star
The creamy filling is where the magic happens. It can be made with Oreo cream, cream cheese, Nutella, or peanut butter – each choice gives a slightly different flavor profile. Oreo cream offers a chocolatey richness that echoes the cookie base. Cream cheese adds a tangy contrast that cuts through the sweetness. Nutella brings a hazelnut sweetness, while peanut butter adds a nutty depth.
When using Nutella or peanut butter, consider adding a splash of milk or a pinch of salt to balance the sweetness. If you’re using cream cheese, blend it with a tablespoon of honey to create a smooth, sweet filling that still has a slight tang. The filling should be thick enough to coat the cookie sheet but not so runny that it leaks out during rolling.
The Final Flourish
Fresh fruit, such as strawberries or banana slices, adds a bright, juicy element that balances the richness of the cookie and filling. Strawberries are ideal for their crispness and natural sweetness. If you prefer a softer fruit, banana slices provide a creamy texture that complements the creamy filling. Slice the fruit thinly so it can be evenly distributed across the rolls.
Rainbow sprinkles or mini chocolate chips are the final touch that gives the rolls a playful, celebratory look. Sprinkles add a pop of color and a subtle crunch, while chocolate chips deepen the chocolate flavor. Sprinkle them generously over the rolled sheet before slicing, or add a dusting to each individual roll for a decorative finish. The visual appeal is just as important as the taste.
Everything's prepped? Good. Let's get into the real action…
The Method — Step by Step
- Start by crushing 20 Oreo cookies into a fine powder using a food processor or a sturdy plastic bag and a rolling pin. The finer the powder, the smoother the dough will be. Keep the crumbs in a bowl for later use as a topping. As you crush, the aroma of chocolate fills the kitchen, hinting at the deliciousness to come. This step is crucial for achieving the right texture.
- In a separate bowl, combine the Oreo powder with 2 tablespoons of milk or melted butter until the mixture becomes sticky and dough-like. If the dough feels too dry, add a splash of milk; if it’s too wet, add a pinch more Oreo powder. The dough should be pliable enough to spread without cracking. This is the moment where the base takes shape, and the anticipation builds.
- Press the dough onto a parchment‑lined baking sheet, forming an even 10x10-inch square. Use a spatula or the back of a spoon to smooth the surface. The sheet should be flat and firm, ready to hold the filling. This step requires a steady hand, but the result is a perfect canvas for the next stage.
- Spread 2.5 tablespoons of your chosen creamy filling—Oreo cream, cream cheese, Nutella, or peanut butter—across the dough in a thin, even layer. The filling should cover the surface but not be too thick; you want it to cling to the dough without dripping. The creamy texture should feel like a light, silky sauce. This is the heart of the roll, and it determines the flavor intensity.
- Roll the dough tightly from one side to the other, forming a long log. The rolling motion should be firm but gentle to avoid tearing the dough. Once rolled, wrap the log in plastic wrap and refrigerate for at least 20 minutes. Chilling firm up the dough, making it easier to slice into neat rolls.
- After chilling, unwrap the log and slice it into 1-inch thick rounds using a sharp knife. Each slice should look like a small sushi roll, complete with the filling visible through the translucent cookie shell. The slices will be the individual servings for your guests. The knife should glide smoothly if the dough is properly chilled.
- Arrange the slices on a platter and top each one with a thin slice of strawberry or a sliver of banana. The fruit adds a fresh burst of flavor and a pop of color that contrasts the dark cookie. Place a sprinkle of rainbow sprinkles or mini chocolate chips on top of each roll for a festive finish. The visual appeal is just as important as the taste.
- Serve immediately, or refrigerate the rolls in an airtight container for up to 48 hours. The rolls will keep their crispness and creamy filling when stored properly. When you’re ready to serve, let them sit at room temperature for a few minutes to soften slightly. This step ensures the filling is luscious and the texture is inviting.
That’s it — you did it. But hold on, I've got a few more tricks that'll take this to another level…
Insider Tricks for Flawless Results
The Temperature Rule Nobody Follows
Temperature is everything when it comes to cookie dough. If the dough is too warm, it will stick to your hands and flatten, losing its shape. Keep the dough in the fridge for at least 20 minutes before rolling; this firm up the structure and makes it easier to handle. If you’re in a hurry, chill the dough in a bag for 10 minutes instead. The key is to maintain a cool, stable base that resists crumbling.
Why Your Nose Knows Best
Smell is a powerful indicator of readiness. As you roll the dough, a faint buttery aroma should emerge. If the dough smells overly sweet or stale, it’s time to adjust the milk ratio or add a pinch of salt. A subtle, fresh scent signals that the dough has the right balance of moisture and flavor. Trust your nose; it’s the best judge of quality.
The 5-Minute Rest That Changes Everything
After rolling, let the log rest for 5 minutes before slicing. This short pause allows the filling to set, preventing it from leaking out during cutting. It also gives the dough a chance to relax, making the slices cleaner and more uniform. A quick rest is a small step that yields a big difference in presentation.
Keep the Parchment Clean
Clean parchment paper prevents the dough from sticking to the surface. If you’re using a reusable sheet, wipe it with a damp cloth before placing the dough. A clean sheet ensures a smooth release when you cut the rolls. It also helps maintain a neat appearance, which is essential for a polished final product.
Use a Sharp Knife for Clean Cuts
A dull knife will crush the rolls, creating uneven edges. Keep a sharp chef’s knife on hand, or use a serrated knife for a cleaner cut. A sharp blade slices through the dough cleanly, preserving the integrity of each roll. This small detail can elevate the overall look and feel.
Creative Twists and Variations
This recipe is a playground. Here are some of my favorite ways to switch things up:
Nutty Crunch Variation
Swap the Oreo cream filling for peanut butter and add a handful of crushed almond pieces. The nutty flavor pairs beautifully with the chocolate cookie base. The almond crunch adds a new texture that elevates the dish. This version is perfect for peanut butter lovers and adds a protein boost.
Dark Chocolate Delight
Use dark chocolate Oreos and a dark chocolate ganache filling. The bittersweet notes of dark chocolate contrast the sweet cookie. Top with fresh blueberries for a burst of tartness. This variation is sophisticated and ideal for a more mature palate.
Minty Fresh Twist
Incorporate a splash of mint extract into the filling and top with mint leaves. The mint gives a refreshing aftertaste that cuts through the richness. Add a few crushed peppermint candies for extra crunch. This twist is perfect for summer parties.
Banana Split Edition
Replace strawberries with thin banana slices and drizzle a little honey over the rolls. The banana’s natural sweetness complements the chocolate. Add a sprinkle of crushed walnuts for an extra layer of texture. This version feels like a dessert banana split in roll form.
Caramelized Apple Surprise
Cook thin apple slices with cinnamon and brown sugar until caramelized. Use these as the fruit topping instead of strawberries. The caramelized apples bring a warm, spiced flavor that pairs with the chocolate. This variation is great for fall gatherings.
Gluten-Free Adaptation
Use a gluten-free cookie base, such as a store-bought gluten-free chocolate cookie. Follow the same dough process, adjusting the flour amount if needed. The gluten-free version maintains the same texture and flavor. This adaptation ensures everyone can enjoy the treats.
Storing and Bringing It Back to Life
Fridge Storage
Store the rolls in an airtight container in the fridge for up to 48 hours. The cold environment keeps the filling firm and the cookie shell crisp. When you’re ready to serve, let the rolls sit at room temperature for 5 minutes to soften slightly. This brief rest restores the creamy texture.
Freezer Friendly
For longer storage, freeze the rolls in a single layer on a parchment sheet, then transfer to a freezer bag. They’ll stay fresh for up to 2 weeks. When you’re ready to eat, thaw them at room temperature for 30 minutes. The texture remains intact, and the filling stays creamy.
Best Reheating Method
To revive the rolls, gently warm them in a 300°F oven for 5 minutes or microwave on low power for 15 seconds. Add a tiny splash of water before reheating; it steams the rolls back to perfection. This trick keeps the cookie crisp and the filling silky. Avoid overcooking, or the cookies will become soggy.