I was in the middle of a late‑night snack raid when my roommate shouted, “You’ve got to try the DQ peanut butter sauce! It’s like a hug from a unicorn!” I laughed, but the craving hit harder than a double‑espresso shot. The kitchen smelled like burnt toast and nostalgia, the sound of the fridge humming like a low‑key rave, and my taste buds were doing the cha‑cha. I grabbed a jar of peanut butter, a can of sweetened condensed milk, and a splash of vanilla, and I thought, “Why not make this at home and see if it can actually beat the original?”
Fast forward a few minutes, and I was standing over a pot that smelled like a caramel‑kissed dream, the peanut butter swirling like a glossy river of gold. The sauce thickened, glossy, and smooth—imagine a velvet curtain draped over a warm summer night. When I finally tasted it, the sweet‑salty dance on my tongue was so perfect I nearly choked on a second spoonful. I dare you to taste this and not go back for seconds; I’ll be honest — I ate half the batch before anyone else got to try it.
Most copycat sauces out there either miss the buttery richness or end up too watery, like a soggy cereal. This version, however, hits every note: the deep, roasted peanut flavor, the silky sweetness of condensed milk, a whisper of vanilla that lingers like a secret, and just enough water to keep it pourable without losing that luxurious body. Most recipes get this completely wrong. Here’s what actually works: the secret is whisking the ingredients over low heat just long enough to meld, but not so long that the sugars scorch.
And now the fun part: I’m going to share a tiny technique that most home cooks overlook—a quick “temperature shock” that locks in the glossy sheen and prevents the sauce from separating. Picture yourself pulling this out of the pot, the whole kitchen smelling incredible, the sauce gleaming like liquid amber. Okay, ready for the game‑changer? Let me walk you through every single step — by the end, you’ll wonder how you ever made it any other way.
What Makes This Version Stand Out
- Flavor: The combination of creamy peanut butter and sweetened condensed milk creates a sweet‑savory balance that feels like dessert and snack in one bite.
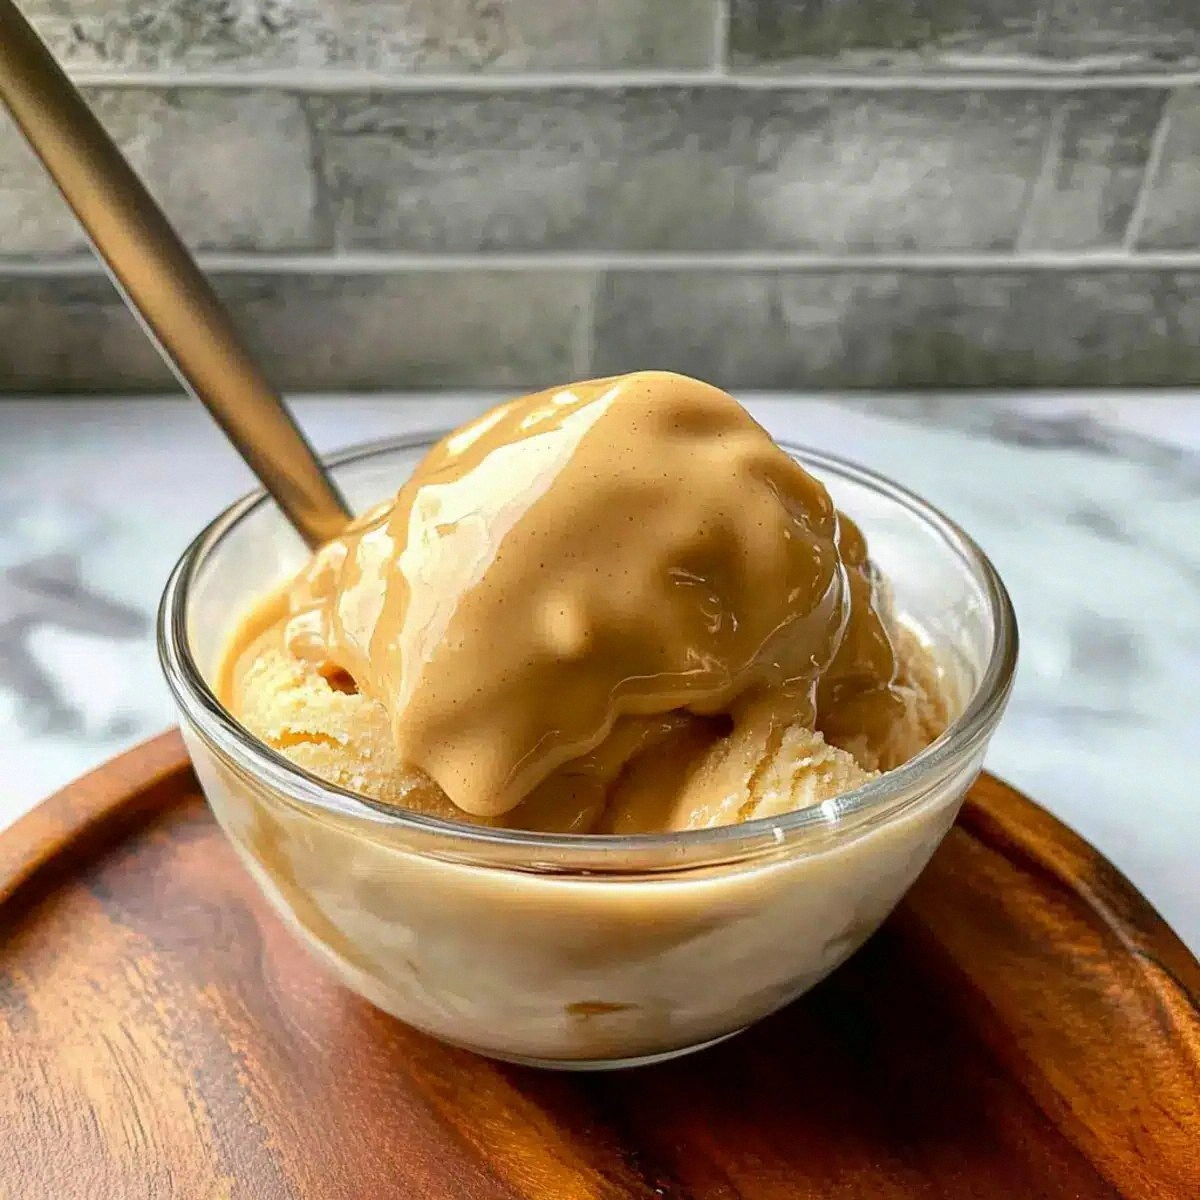
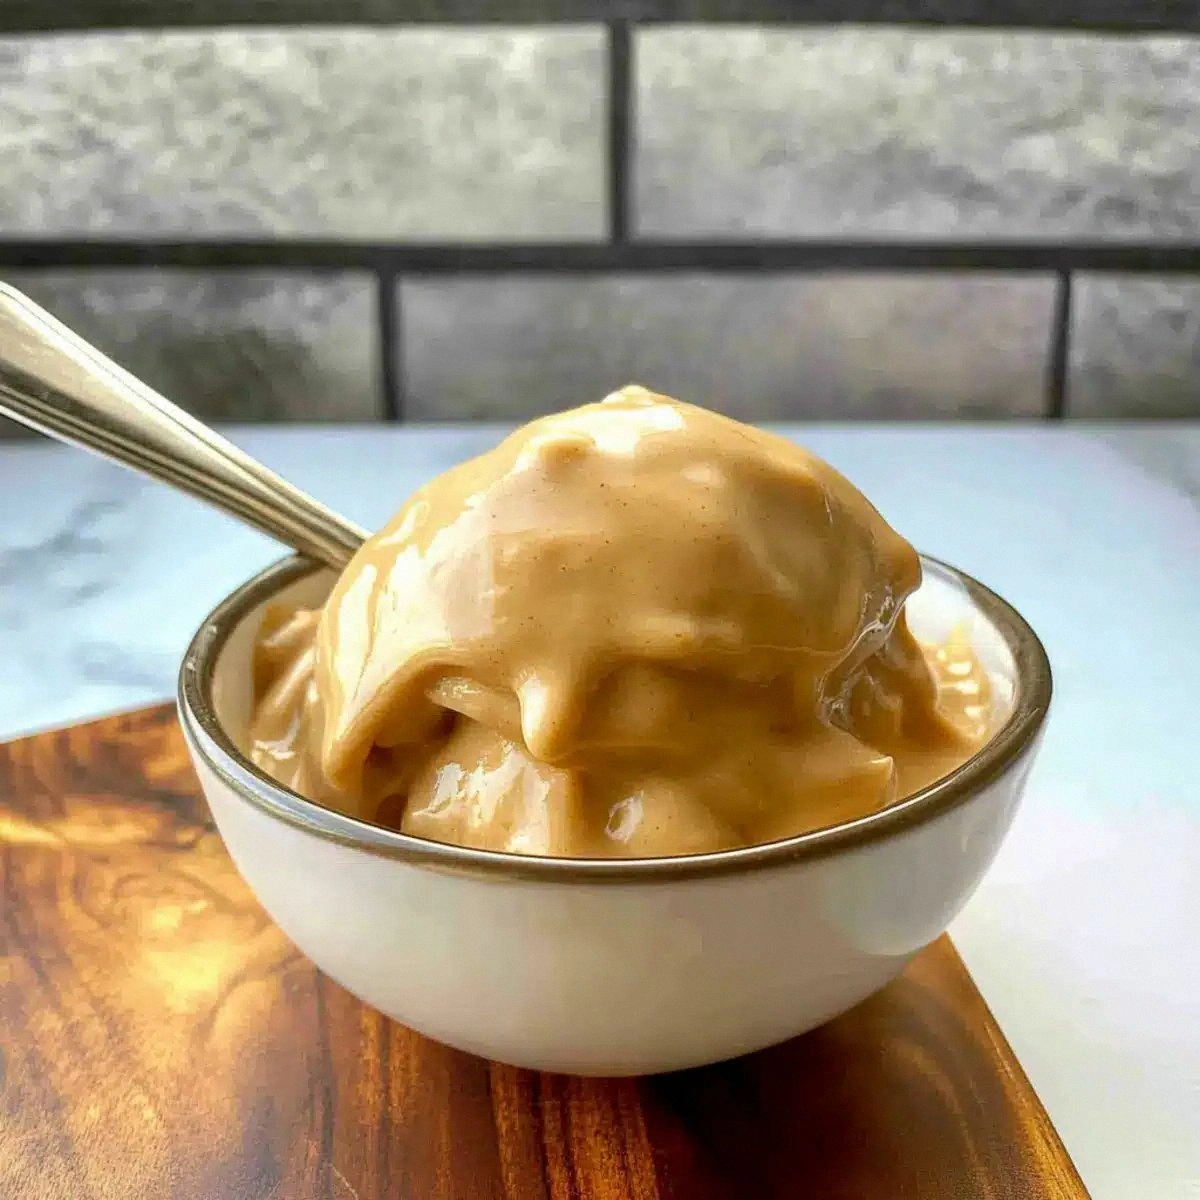
- Texture: It coats anything it touches like velvet, smooth enough to drizzle but thick enough to cling to ice cream.
- Simplicity: Only four ingredients, five minutes, and a single pot—no fancy gadgets required.
- Uniqueness: The tiny splash of water prevents graininess and gives the sauce a glossy finish that store‑bought versions lack.
- Crowd Reaction: Guests swear they’ve never tasted anything like it; it’s the kind of sauce that sparks instant “more, please!” chants.
- Ingredient Quality: Using a natural, no‑sugar‑added peanut butter elevates the depth of flavor dramatically.
- Method: Gentle low‑heat whisking creates an emulsion that stays stable for days, unlike rushed microwave tricks.
- Make‑Ahead Potential: It stores beautifully, gaining even richer flavor after a night in the fridge.
Inside the Ingredient List
The Flavor Base
The star of the show is the peanut butter. It provides that deep, roasted nuttiness that feels like a warm hug. Choose a natural, creamy peanut butter with no added sugars for the purest flavor; if you opt for a chunky style, you’ll end up with texture that’s more “crunch” than “silky.” Skipping it would leave the sauce flat as a pancake, and no amount of sugar can rescue that.
The Sweetness Crew
Sweetened condensed milk is the secret weapon that turns this sauce from “good” to “legendary.” Its thick, caramel‑like body adds body and a glossy sheen while delivering a buttery sweetness that pairs perfectly with the peanuts. If you’re looking for a lower‑calorie alternative, try a reduced‑fat version, but be aware the texture will be slightly thinner.
The Unexpected Star
Water might sound like a boring filler, but those two tablespoons are the unsung hero that prevents the sauce from becoming a solid block. It helps the ingredients meld into a pourable consistency and keeps the emulsion stable. Too much water and you’ll end up with a runny mess; too little and the sauce will seize.
The Final Flourish
Vanilla extract adds a fragrant, floral note that lifts the entire profile. It’s the whisper of a secret that makes the sauce feel gourmet. If you’re feeling adventurous, a pinch of sea salt can amplify the sweet‑savory contrast even further.
Everything's prepped? Good. Let's get into the real action…
The Method — Step by Step
Grab a medium‑sized saucepan and set it on the stove over low heat. Add the entire cup of peanut butter first; as it begins to melt, you’ll hear a gentle sizzle that promises richness. Stir constantly with a silicone spatula, letting the butter become fluid but not bubbling. This is the moment of truth—if you let it scorch, the flavor turns bitter.
Once the peanut butter is glossy, pour in the can of sweetened condensed milk. The mixture will instantly bubble and emit a sweet caramel aroma that fills the kitchen like a bakery in December. Keep whisking in a circular motion; the sauce should start to thicken within 30 seconds. Watch out: if the heat spikes, the sugars can caramelize too quickly, creating a burnt undertone.
Now, drizzle the two tablespoons of water in a thin stream while continuing to whisk. The water will cause the sauce to loosen momentarily, then quickly re‑emulsify into a silky sheen. Feel the texture change under the spatula—this is the “glossy finish” that makes the sauce look restaurant‑ready. If you notice any lumps, keep whisking; they’ll dissolve within a few more seconds.
Add the teaspoon of vanilla extract. The scent will blossom, filling the air with a sweet, floral perfume that makes you want to inhale deeply. Stir for another 15 seconds, ensuring the vanilla is fully incorporated. This is the secret that separates a good sauce from a great one—most copycats skip this step entirely.
Turn off the heat. Let the sauce sit in the pan for a minute; you’ll see the edges start to pull away slightly, a sign that the emulsion has set. This brief rest also allows the flavors to marry, turning the sauce into a cohesive whole.
Transfer the sauce to a heat‑proof jar or container. If you’re planning to use it immediately, drizzle it over ice cream, pancakes, or a warm brownie. The sauce should flow like molten chocolate, coating each bite with a glossy, buttery sheen.
Seal the container and let it cool to room temperature before refrigerating. The sauce will thicken a touch, but it will remain pourable. When you’re ready to serve again, give it a quick stir or a brief microwave burst (10 seconds) to loosen it up.
That's it — you did it. But hold on, I've got a few more tricks that'll take this to another level…
Insider Tricks for Flawless Results
The Temperature Rule Nobody Follows
Never start with a hot pan. Begin on low heat and let the peanut butter melt gently; this prevents scorching and preserves the nutty aromatics. I once tried to speed things up on high and ended up with a bitter, burnt taste that no amount of vanilla could rescue. The low‑and‑slow approach also keeps the sauce from separating later.
Why Your Nose Knows Best
Your sense of smell is the ultimate doneness gauge. When the sauce releases a buttery, caramel scent and you can smell the vanilla without any sharp, burnt notes, you’re golden. Trust that aromatic cue more than the clock; it’s the real indicator of flavor development.
The 5‑Minute Rest That Changes Everything
After whisking, let the sauce sit off the heat for exactly five minutes. This short rest lets the ingredients fully bind, creating that glossy, pour‑ready texture. A friend tried skipping this step once — let’s just say the sauce split like a bad breakup and looked like a sad puddle.
The Water Whisper
Two tablespoons of water might seem trivial, but it’s the key to a smooth, non‑grainy finish. If you’re at a high altitude, add an extra teaspoon; the lower boiling point can cause the sauce to thicken too fast, leading to a gritty mouthfeel.
The Final Shine
A drop of lemon juice right before storage brightens the sauce and prevents a dull film from forming on top. It’s a pro tip used by pastry chefs to keep glazes vibrant. I swear by it; the sauce looks as glossy after a week as it did the day I made it.
Creative Twists and Variations
This recipe is a playground. Here are some of my favorite ways to switch things up:
Chocolate‑Swirl Delight
Add 2 tablespoons of cocoa powder and a pinch of instant espresso powder for a mocha‑kissed version. It pairs beautifully with vanilla ice cream and makes a decadent topping for brownies.
Spicy Thai Fusion
Stir in 1 teaspoon of Thai red curry paste and a splash of coconut milk. The result is a sweet‑savory sauce with a gentle heat that works wonders on grilled chicken or tofu.
Berry Burst
Fold in ¼ cup of raspberry puree after the sauce is off the heat. The tangy fruit cuts through the richness, creating a perfect drizzle for pancakes.
Nutty Crunch
Mix in 2 tablespoons of chopped, toasted peanuts right before serving. The extra crunch adds texture and intensifies the peanut flavor, ideal for topping waffles.
Salted Caramel Dream
Add a teaspoon of flaky sea salt and a drizzle of caramel sauce. The salty‑sweet combo elevates the sauce to a gourmet level, perfect for dessert bars.
Storing and Bringing It Back to Life
Fridge Storage
Transfer the sauce to an airtight glass jar and refrigerate. It will keep for up to 10 days, slowly thickening as the fats solidify. When you’re ready to use it, give the jar a gentle shake or stir with a spoon.
Freezer Friendly
Portion the sauce into silicone muffin cups or freezer‑safe bags. It freezes well for up to 3 months. Thaw overnight in the fridge, then re‑whisk with a splash of water to restore its silky texture.
Best Reheating Method
Place the desired amount in a microwave‑safe bowl and heat for 10‑15 seconds, stirring halfway. Alternatively, warm it gently on the stovetop over low heat, adding a tiny splash of water if it looks too thick. The sauce will return to its original pour‑ready state in seconds.