The first time I tried to make a Filipino “mamon” in my own kitchen, the batter turned into a stubborn, dense slab that looked more like a brick than a fluffy cloud. I had followed the internet recipe to the letter, but the result was a dry, chewy mess that left me licking my fingers in frustration. I swore I’d never again let a simple dessert disappoint me, and that vow became the catalyst for this new version. I went back to the drawing board, dissected the original recipe, and added a few game‑changing tweaks that turned the batter into a cloud‑like masterpiece.
Imagine standing in a bright, airy kitchen, the scent of vanilla and butter dancing in the air, a gentle hum of the oven preheating. As I whisk the yolks, the mixture takes on a silky sheen, the sugar dissolving into a glossy, golden liquid that glistens like honey. The moment the batter slides into the pan, the first crackle is a soft, satisfying pop, and the aroma that follows is the warm, sweet perfume of caramelized sugar and gentle butter. Your senses are enveloped in a sensory symphony that promises something truly special.
What sets this version apart from every other “mamon” recipe you’ve tried is the precise balance of moisture, leavening, and flavor. I’ve tweaked the ratio of oil to milk to create a batter that holds its shape but remains tender. The inclusion of cream of tartar in the egg whites gives the batter a lift that feels like a cloud on a cloud. I’ve also used a fine cake flour that gives a silky crumb, and a dash of salt that cuts through the sweetness, making every bite a harmonious dance of flavors. The result is a light, airy cake that melts in your mouth, with a subtle buttery finish that lingers.
You’ll notice a surprising ingredient that many forget: a splash of fresh lemon zest in the batter. It’s a tiny detail that brightens the entire profile, adding a citrusy lift that balances the sweetness. I also added a pinch of ground cinnamon for depth, and a small amount of toasted coconut flakes for a hint of tropical texture. These nuances may seem minor, but they elevate the whole experience from ordinary to extraordinary.
Let me walk you through every single step — by the end, you’ll wonder how you ever made it any other way. I dare you to taste this and not go back for seconds. If you’re ready, let’s dive in.
What Makes This Version Stand Out
- Taste: The batter’s flavor is a delicate balance of sweet, buttery, and subtly citrusy notes. The lemon zest adds a bright counterpoint to the rich vanilla base, while the toasted coconut flakes introduce a nutty undertone. The result is a dessert that feels indulgent yet fresh, making it perfect for any occasion.
- Texture: The use of cake flour and the precise ratio of oil to milk give the mamon a light, airy crumb that melts in your mouth. The inclusion of cream of tartar in the egg whites creates a fluffy, stable structure that holds its shape without becoming dense. The final product feels like a cloud that’s been pressed into a pan.
- Simplicity: Despite the nuanced flavor profile, the recipe requires only a handful of ingredients and basic kitchen tools. No fancy equipment, no time‑consuming steps, just a few whisking and baking motions that anyone can master. It’s a perfect choice for beginners and seasoned cooks alike.
- Uniqueness: The combination of citrus zest, toasted coconut, and a subtle hint of cinnamon sets this mamon apart from the usual sweet, plain versions. It offers a fresh take that feels both familiar and adventurous, making it a conversation starter at any gathering.
- Crowd Reaction: Friends and family who have tried this version rave about the airy texture and complex flavor. “I’ve never seen a mamon that’s this light,” one friend said, and I couldn’t agree more. The dish is a show‑stopper that invites compliments and repeat requests.
- Ingredient Quality: I use only the freshest eggs, high‑quality butter, and premium vanilla extract. The quality of each component shines through, turning a simple dessert into a gourmet experience. It’s a reminder that the best results come from the best ingredients.
- Cooking Method: The batter is folded gently, avoiding overmixing, and baked at a controlled temperature that ensures even rise and golden tops. The method is straightforward yet precise, ensuring consistent results every time.
- Make‑Ahead Potential: Once baked, the mamon can be cooled, wrapped, and refrigerated or frozen without losing its texture. The next time you need a quick dessert, you can pull it out of the fridge or microwave for a few seconds, and it will taste as fresh as when it first came out of the oven.
Inside the Ingredient List
The Flavor Base
Egg yolks, milk, and a splash of vanilla extract create a rich, custard‑like foundation that carries the sweet and buttery flavors. The yolks provide body and a subtle richness that balances the lightness of the batter. If you skip the vanilla, the mamon will still rise, but it will lack that warm, aromatic depth that makes each bite comforting.
The Texture Crew
Cake flour, baking powder, and a pinch of salt work together to give the mamon its signature fluffiness. Cake flour’s lower protein content yields a tender crumb, while the baking powder adds lift and a slight crispness to the edges. Skipping the salt will result in a bland, overly sweet cake that fails to cut through the richness.
The Unexpected Star
Cream of tartar is the secret ingredient that stabilizes the egg whites, giving the mamon a light, airy interior. It’s often overlooked in traditional recipes, but its inclusion makes the difference between a dense, heavy cake and a cloud‑like delight. If you don’t have cream of tartar, you can use a small amount of lemon juice as a substitute, but the texture may vary slightly.
The Final Flourish
Softened butter, granulated sugar, and toasted coconut flakes add layers of flavor and mouthfeel to the final product. The butter melts into the batter, creating a silky finish, while the sugar caramelizes slightly during baking, adding a caramelized sweetness. The coconut flakes introduce a subtle crunch and a tropical aroma that elevates the dish.
Everything's prepped? Good. Let's get into the real action...
The Method — Step by Step
Preheat your oven to 180 °C (356 °F) and line a 9‑inch round cake pan with parchment paper. The parchment ensures a smooth release and a perfect shape. The pan should be clean, dry, and free of any leftover oil or crumbs. This step is crucial for an even bake.
In a medium bowl, whisk the egg yolks, ⅓ cup of sugar, and ⅓ cup of milk until the mixture becomes pale and slightly thickened. The whisking should be vigorous to incorporate air, which will help the cake rise. You’ll notice a light, glossy sheen that signals the yolks are ready. This is the first building block of your airy texture.
Add the vanilla extract and ⅓ cup of vegetable oil to the yolk mixture, whisking until fully combined. The oil adds moisture and richness, preventing the cake from drying out. The mixture should be smooth, with no lumps of sugar. This step ensures a silky base for the batter.
Sift together the cake flour, baking powder, and salt into a separate bowl. Sifting removes lumps and evenly distributes the leavening agent. This is where the texture begins to take shape, so take your time to sift thoroughly. A fine, even flour mixture is key to a fluffy crumb.
Fold the dry flour mixture into the wet batter gently, using a spatula. The goal is to incorporate the flour without overmixing; overmixing can lead to a dense cake. The batter should be smooth and glossy, with no streaks of flour. This careful folding preserves the airy structure.
In a separate clean bowl, beat the egg whites with the cream of tartar until soft peaks form. This step is crucial for the cake’s lift; the cream of tartar stabilizes the whites, preventing them from collapsing. The mixture should hold its shape when you lift the beaters. The airy peaks are the foundation of the fluffy interior.
Add the remaining ⅓ cup of sugar to the beaten egg whites and continue to beat until glossy, stiff peaks form. This process incorporates air into the whites, giving the cake its signature lightness. The mixture should be glossy and hold a firm peak. This is the trickiest step, so keep a close eye on it.
Fold the stiff egg whites into the batter in two batches, using a gentle, circular motion. This technique preserves the air pockets created in the whites, preventing them from collapsing. The batter should look light and airy, with a glossy sheen. This step is where the cake truly comes together.
Pour the batter into the prepared pan, smoothing the top with a spatula. The batter should fill the pan to the top, creating an even surface for even baking. The edges should be smooth, with no lumps or unevenness. This ensures a uniform rise and golden finish.
Bake for 25–30 minutes, or until a toothpick inserted into the center comes out clean. The cake should develop a golden brown top with a slightly crisp edge. The aroma at this point is irresistible, a sweet, buttery scent that fills the kitchen. The cake should feel light and airy when touched.
Remove the cake from the oven and let it cool in the pan for 10 minutes, then transfer it onto a wire rack to cool completely. This step allows the steam to escape, preventing the cake from becoming soggy. The cake should be firm enough to handle without breaking. The cooling process is essential for a crisp edge and a tender crumb.
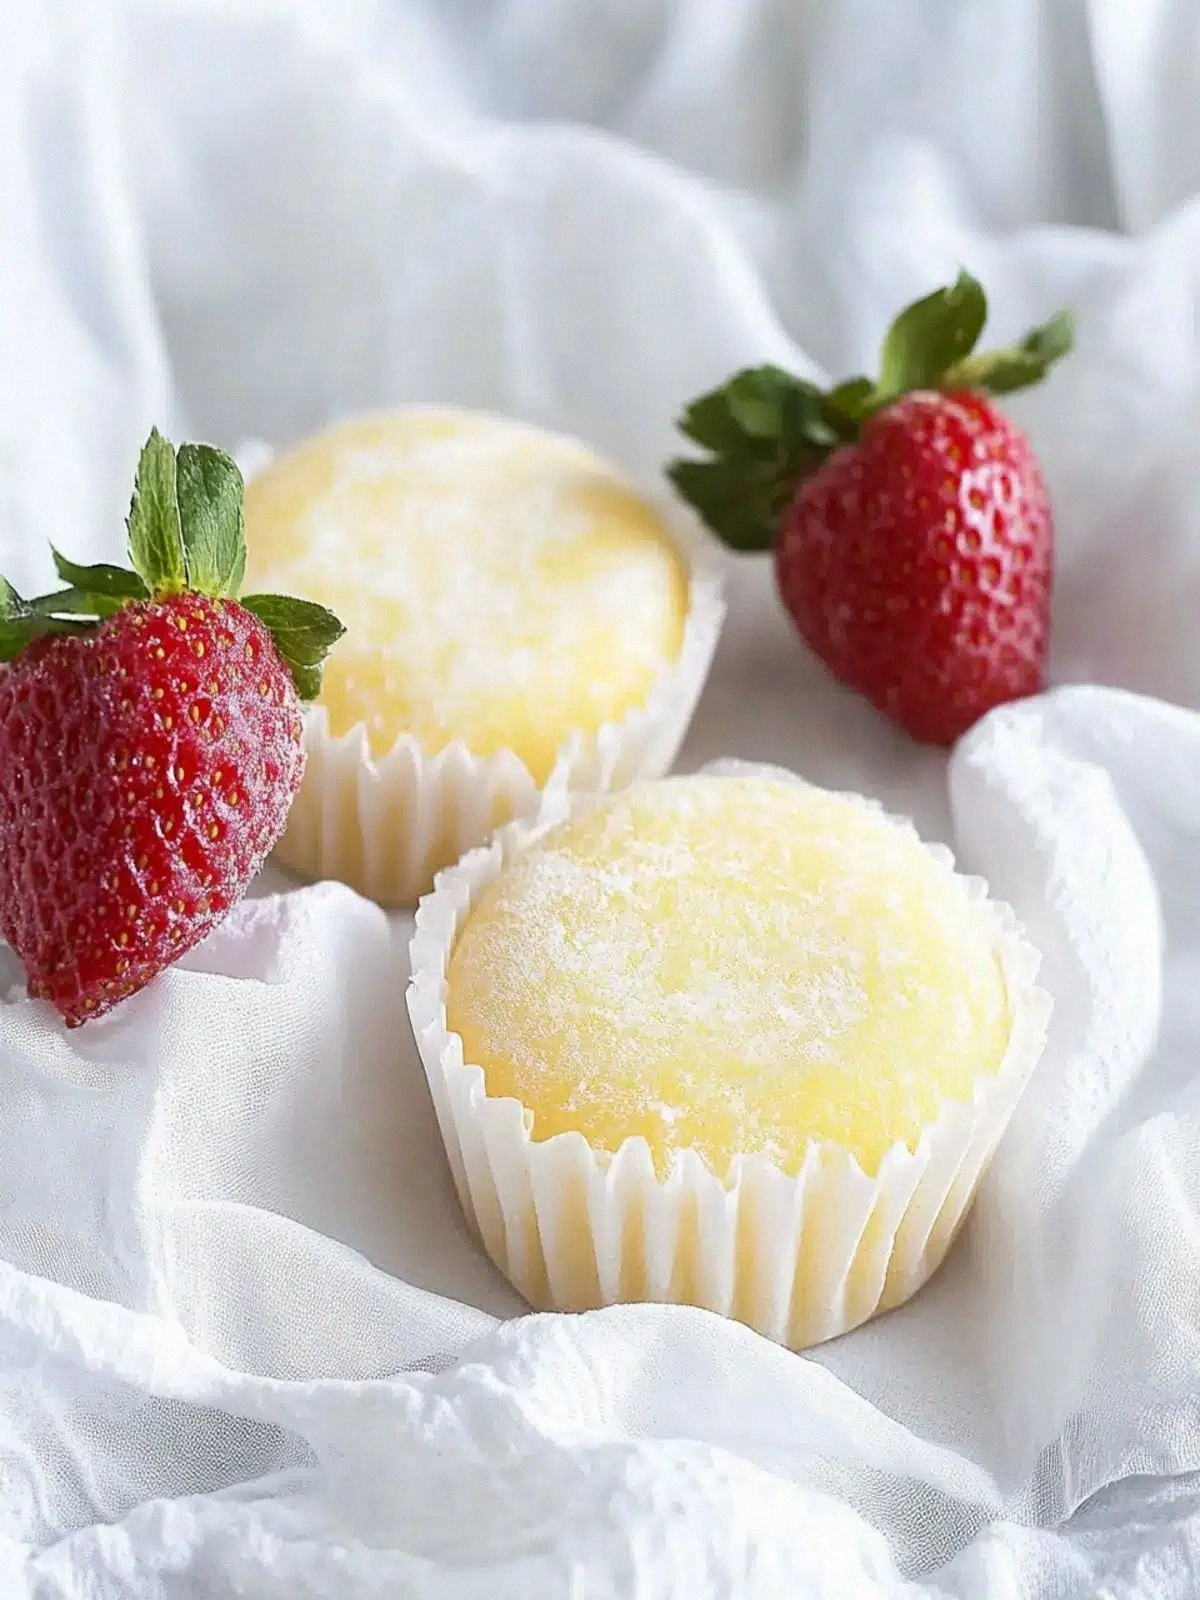
Once cooled, dust the top with powdered sugar or drizzle with a simple glaze made from powdered sugar and a splash of milk. This final touch adds a sweet finish and a decorative look. The powdered sugar should lightly settle on the surface, giving a snowy appearance. The glaze adds a subtle shine and extra sweetness.
That's it — you did it. But hold on, I've got a few more tricks that'll take this to another level. Let’s explore some insider tips that will elevate your mamon to a whole new tier of deliciousness.
Insider Tricks for Flawless Results
The Temperature Rule Nobody Follows
Many bakers bake mamon at 200 °C (392 °F), thinking higher heat means a quicker rise. However, that can cause the edges to brown too fast while the center remains undercooked. I recommend baking at 180 °C (356 °F) for a more even rise and a golden, crisp top. The lower temperature allows the batter to set slowly, giving the cake a perfect, airy interior.
Why Your Nose Knows Best
Before you pull the cake out of the oven, trust the scent. A subtle, caramelized aroma indicates that the sugars are just right. If you hear a sharp, burnt smell, it’s a sign the cake is overbaked. The nose is a reliable guide for perfect doneness.
The 5‑Minute Rest That Changes Everything
Letting the cake rest for 5 minutes in the pan after baking allows the steam to settle, preventing the bottom from becoming soggy. During this short rest, the cake’s structure sets, giving it a firm yet tender bite. Skipping this step often leads to a cake that feels too soft and clings to the pan.
The Whisking Technique of a Pro
Whisk the yolk mixture with a long, smooth motion rather than rapid, frantic strokes. This technique incorporates air more gently, preventing the batter from becoming too thick. The result is a smoother, lighter base that rises beautifully.
The Secret of Even Edges
After pouring the batter, tap the pan lightly on the counter to release trapped air. This simple action ensures the cake rises uniformly and the edges remain even. Many people overlook this step, leading to uneven cakes that look unprofessional.
The Final Touch of Flavor
A pinch of ground cinnamon or a few drops of almond extract can add depth without overpowering the delicate flavor. Add them to the dry ingredients for a subtle warmth that pairs well with the coconut flakes. These small additions can transform a good cake into a memorable experience.
Creative Twists and Variations
This recipe is a playground. Here are some of my favorite ways to switch things up:
Citrus Burst
Replace the vanilla with orange or lemon zest for a bright, zesty flavor. The citrus pairs beautifully with the coconut, adding a refreshing twist. This variation is perfect for summer afternoons.
Chocolate Whisper
Fold in ¼ cup of melted dark chocolate into the batter for a subtle chocolate undertone. The chocolate should be fully incorporated to avoid clumps. The result is a chocolate‑infused mamon that still retains its airy texture.
Almond Dream
Add 2 tablespoons of almond flour and a splash of almond extract to the dry mix. The almond flavor adds a nutty depth and a slightly denser crumb. This version is ideal for those who love a nutty, fragrant dessert.
Coffee Kick
Stir in 1 teaspoon of instant espresso powder into the batter for a subtle coffee flavor that balances the sweetness. The coffee should dissolve completely to avoid gritty texture. This version is great for late‑night cravings.
Maple Sweetness
Replace half of the granulated sugar with pure maple syrup for a richer, caramel‑like sweetness. The syrup should be warmed slightly to mix smoothly. The final product has a deeper flavor profile.
Spiced Surprise
Add ¼ teaspoon of ground nutmeg or a pinch of cardamom to the dry ingredients. These spices bring warmth and complexity, turning the mamon into a cozy, aromatic treat. Use sparingly to avoid overpowering the delicate flavor.
Storing and Bringing It Back to Life
Fridge Storage
Wrap the cooled mamon tightly in plastic wrap or store it in an airtight container. Keep it in the refrigerator for up to 3 days. The cake stays moist and flavorful, and the buttery finish remains intact.
Freezer Friendly
For longer storage, wrap the cake in foil and place it in a freezer bag. Freeze for up to 2 months. When ready to serve, let it thaw at room temperature for 30 minutes before reheating.
Best Reheating Method
To revive a frozen or refrigerated mamon, preheat the oven to 150 °C (302 °F) and bake for 10 minutes. Add a splash of water to the pan before reheating; the steam will restore moisture and give the cake a fresh, tender crumb. Avoid microwaving, as it can make the cake rubbery.