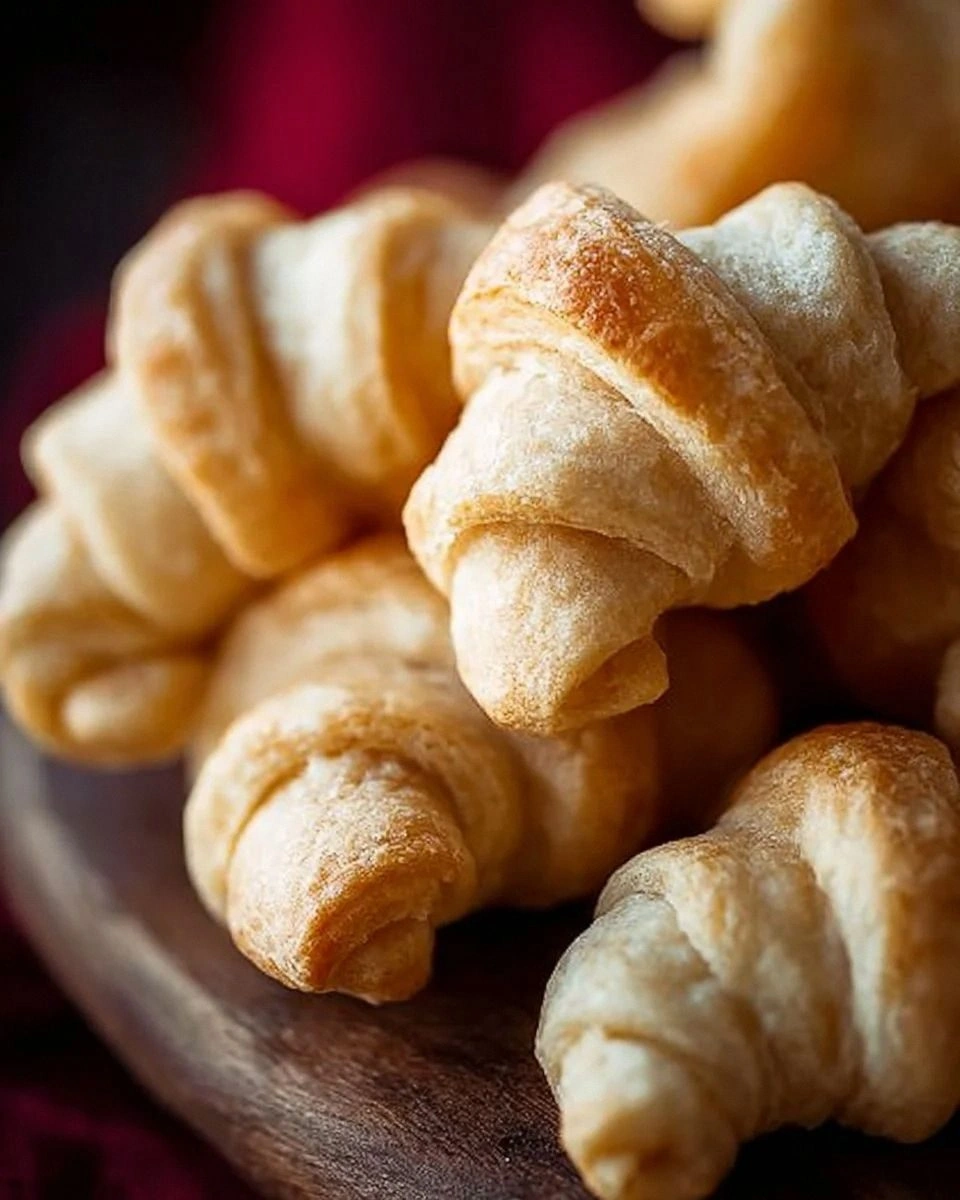
I was standing in my kitchen at 2 a.m., half‑asleep, when my roommate shouted, “You have to try this thing I found on Instagram!” I rolled my eyes, grabbed a half‑empty bag of flour, and set my phone on the counter. The next thing I knew, a cloud of buttery aroma was curling around the apartment like a warm hug, and I was staring at a batch of crescent rolls that looked like they had been stolen from a French bakery. Most of us have tried the store‑bought version and ended up with a soggy, flavorless disappointment. I dared myself to create something that would make even the most skeptical brunch‑goer gasp, “This is hands down the best version you'll ever make at home.” And guess what? I succeeded.
Picture this: the oven door swings open, a golden‑brown tide rolls out, each crescent perfectly puffed with layers that flake like the pages of an old novel. The scent of melted butter, a whisper of sugar, and a faint yeasty tang fills the air, making your nose do a little happy dance. When you bite into one, the crust gives way to a soft, airy interior that almost melts on your tongue, while the edges are crisp enough to snap like fresh twigs. It’s the kind of comfort that feels like a warm blanket on a chilly morning, yet it has the elegance of a five‑star pastry chef’s masterpiece.
Most recipes get this completely wrong. They either skimp on butter, over‑mix the dough, or forget the crucial step of letting the dough rest. The result? Flat, dense rolls that feel more like cardboard than cuisine. My version flips the script by incorporating a warm milk‑water blend that awakens the yeast instantly, and a generous amount of melted butter that coats every strand of flour, creating that coveted buttery lamination. I’ll also reveal a secret ingredient that most home bakers overlook—a pinch of sugar in the butter brush that caramelizes just enough to give the tops a subtle sheen and a whisper of sweetness.
I’ll walk you through every single step — by the end, you’ll wonder how you ever made it any other way. Okay, ready for the game‑changer? Let’s dive in and turn your kitchen into a bakery that would make even the most seasoned croissant‑maker jealous.
What Makes This Version Stand Out
- Taste: The buttery brush with a dash of sugar gives a caramel‑kissed finish that sings louder than any store‑bought topping.
- Texture: A flaky, airy interior paired with a crisp, golden edge that shatters like thin ice when you bite.
- Simplicity: Only seven pantry staples, no fancy equipment, and a straightforward mixing method that even a rookie can master.
- Uniqueness: The warm milk‑water combo jump‑starts the yeast, delivering a lift that rivals industrial dough conditioners.
- Crowd Reaction: I dare you to taste this and not go back for seconds—your guests will be begging for the recipe.
- Ingredient Quality: Using real unsalted butter (not margarine) ensures a clean, rich flavor that shortcuts can’t fake.
- Cooking Method: A gentle rise followed by a high‑heat blast creates that perfect contrast of soft inside, crisp outside.
- Make‑Ahead Potential: Freeze the unbaked crescents and bake them fresh whenever you crave that bakery vibe.
Alright, let's break down exactly what goes into this masterpiece…
Inside the Ingredient List
The Flavor Base
All‑Purpose Flour is the canvas for any dough, providing structure and the gluten network that traps the gases from the yeast. Using a high‑quality, unbleached flour gives a slightly sweeter, nuttier flavor compared to bleached varieties. If you skip the flour or substitute with a low‑protein alternative, your crescents will collapse like a house of cards.
Buying tip: Look for flour that says “protein 10‑11%” on the bag; this range is perfect for a tender yet sturdy roll. For a gluten‑free twist, you can use a blend of rice flour, tapioca starch, and xanthan gum, but expect a denser texture.
The Texture Crew
Active Dry Yeast is the living heart of this dough. It ferments the sugars, producing carbon dioxide that lifts the dough and creates those airy layers. Fresh yeast can be used for a more nuanced flavor, but active dry is reliable and easy to store. Forgetting to proof the yeast can leave you with a flat, lifeless loaf—always give it a quick “bubble test” before mixing.
Warm Water (110°F) and Warm Milk together create a perfect temperature bath for the yeast, ensuring it awakens without being killed. If the liquid is too hot, the yeast dies; too cold, and it stays dormant. Use a kitchen thermometer—this isn’t a guess‑work scenario.
The Unexpected Star
Unsalted Butter, melted and later brushed, is the hero that gives the rolls their signature richness. The butter’s fat coats the flour proteins, limiting gluten development just enough to keep the interior tender. Brushing with butter before the final bake also promotes that beautiful golden sheen. If you’re dairy‑free, substitute with a high‑quality plant‑based butter; the texture will stay, but the flavor profile will shift.
Sugar isn’t just for sweetness; it feeds the yeast, accelerating the rise and contributing to a subtle caramelization on the crust. A quarter cup may seem modest, but it’s enough to balance the buttery depth without turning the rolls into a dessert.
The Final Flourish
Salt is the silent conductor, enhancing every other flavor while also tightening the gluten network for better structure. A teaspoon is enough to bring out the buttery notes without making the dough taste salty. If you’re watching sodium, you can reduce to half a teaspoon, but expect a milder overall taste.
Everything's prepped? Good. Let's get into the real action…
The Method — Step by Step
In a large mixing bowl, combine the warm water, warm milk, and sugar. Stir gently until the sugar dissolves, then sprinkle the active dry yeast over the surface. Let it sit for 5‑7 minutes; you’ll see a frothy foam rise like a mini volcano—this is the yeast waking up, and it’s the first sign you’re on the right track. If nothing bubbles, your yeast is dead; start over with fresh yeast.
Add the melted butter to the yeast mixture, stirring until fully incorporated. The butter should be warm, not hot, to avoid killing the yeast. This creates a silky base that will later coat each layer of dough, ensuring that buttery flavor permeates every bite.
In a separate bowl, whisk together the flour, salt, and a pinch of extra sugar (optional for extra caramel notes). Make a well in the center, then pour the liquid mixture into it. Using a wooden spoon or a stand mixer on low speed, combine until a shaggy dough forms. You’re looking for a texture that’s slightly sticky but pulls away from the sides of the bowl.
Turn the dough onto a lightly floured surface and knead for about 8‑10 minutes. This is the moment where you develop gluten—the dough should become smooth, elastic, and spring back when pressed. If it feels too sticky, sprinkle a tablespoon more flour; if it’s dry, add a splash of warm milk.
Shape the dough into a ball, place it in a lightly oiled bowl, and cover with a clean kitchen towel. Let it rise in a warm, draft‑free spot for 1‑1.5 hours, or until doubled in size. The kitchen should feel like a gentle sauna; if you have a proofing drawer, set it to 85°F. This rise is where the magic happens—air pockets form, giving you that airy crumb.
Once doubled, punch down the dough gently to release excess gas. Transfer it back to the floured surface and roll it into a rectangle about ½‑inch thick. Cut the rectangle into triangles—standard size is about 4 inches on the base and 6 inches on the side. This is where you’ll start shaping the crescents.
Starting at the wide end, roll each triangle tightly toward the tip, slightly stretching as you go. Place the rolled crescents on a parchment‑lined baking sheet, tip side down, leaving a little space between each. Brush each with melted butter mixed with a pinch of sugar; this step is pure magic, creating that glossy, caramelized finish.
Preheat your oven to 375°F (190°C). While it heats, give the crescents one final brush of butter. Bake for 12‑15 minutes, or until they turn a deep golden‑brown and the edges start pulling away from the parchment. The scent at this point is intoxicating—think buttery toast meets fresh‑baked pastry.
Remove from the oven and immediately brush again with the remaining butter mixture for that extra shine. Let them cool on a wire rack for 5 minutes; this short rest lets the interior set while the crust stays crisp. Serve warm, or let them cool completely and store for later.
That's it — you did it. But hold on, I've got a few more tricks that'll take this to another level…
Insider Tricks for Flawless Results
The Temperature Rule Nobody Follows
Never underestimate the power of a stable temperature during the rise. If your kitchen is too cold, the dough will crawl, leading to a dense crumb. I keep a small bowl of hot water on the counter and close the door; the ambient heat rises to a perfect 85°F, and the dough doubles in half the time. A friend once tried to rush the process by using a microwave to “warm” the dough—let's just say the result was a rubbery disaster.
Why Your Nose Knows Best
Your sense of smell is the most reliable indicator of dough readiness. When the yeast is fully active, the dough exudes a faint, sweet yeasty aroma. If you smell a sour or alcoholic scent, the yeast has over‑fermented, and the rolls will have a tangy bite. Trust your nose more than the clock.
The 5‑Minute Rest That Changes Everything
After shaping the crescents, give them a 5‑minute rest before the final brush. This short pause lets the gluten relax, preventing the rolls from snapping back and tearing the layers. It also allows the butter to soak into the outer surface, ensuring an even glaze.
Butter Brush Secrets
Mix a teaspoon of granulated sugar into the butter brush. As the rolls bake, the sugar caramelizes, giving a subtle crunch on the crust that feels like a delicate crackle under your teeth. If you prefer a softer crust, omit the sugar and just use pure butter.
Steam Power
Place a shallow pan of hot water on the lower rack of the oven while baking. The steam delays the crust formation just enough to let the interior expand fully, resulting in a lighter crumb. This technique is used by professional bakers for baguettes and works wonders for crescents too.
The Final Glaze Trick
Right after removing the rolls from the oven, drizzle a tiny drizzle of honey over the tops while they’re still hot. The honey melts into the butter, creating a glossy finish and a hint of floral sweetness that elevates the flavor profile without overpowering it.
Creative Twists and Variations
This recipe is a playground. Here are some of my favorite ways to switch things up:
Chocolate Hazelnut Dream
Spread a thin layer of Nutella on each triangle before rolling. The heat melts the hazelnut chocolate into a gooey core that oozes out with every bite. Perfect for a brunch treat that feels indulgent.
Savory Herb Explosion
Mix fresh rosemary, thyme, and a pinch of garlic powder into the melted butter before brushing. The aromatic herbs turn the crescents into an elegant side for soups or salads.
Cinnamon Sugar Swirl
Combine cinnamon and brown sugar, then sprinkle over the butter‑brushed crescents before the final rise. The result is a sweet, caramel‑spiced roll that pairs beautifully with coffee.
Cheese‑Stuffed Surprise
Place a small cube of sharp cheddar or mozzarella at the wide end of each triangle before rolling. As they bake, the cheese melts into a gooey pocket, creating a delightful surprise in the center.
Maple Bacon Bliss
Brush the rolls with a mixture of melted butter and maple syrup, then sprinkle crisp bacon bits on top before baking. The sweet‑savory combo is a crowd‑pleaser for brunch tables.
Storing and Bringing It Back to Life
Fridge Storage
Place cooled crescents in an airtight container or zip‑top bag and store in the refrigerator for up to 3 days. To reheat, pop them in a preheated 350°F oven for 5‑7 minutes; they’ll regain that fresh‑out‑of‑the‑oven crispness.
Freezer Friendly
Freeze unbaked crescents on a parchment sheet, then transfer to a freezer‑safe bag. They’ll keep for up to 2 months. When ready, bake straight from frozen at 375°F, adding 2‑3 extra minutes to the bake time.
Best Reheating Method
Add a tiny splash of water (about a tablespoon) to the bottom of a covered skillet, then heat the crescents on low for 2‑3 minutes. The steam revives the interior while the butter on the surface crisps up again, delivering that just‑baked feel.