I was standing in the middle of my kitchen, staring at the burnt edges of a chocolate cake that had turned into a charcoal slab. My friends had begged me to make something sweet after a long day, and I was determined to salvage the situation. I pulled out the pantry staples: vegan chocolate, butter, chickpea flour, sugar, aquafaba, cocoa powder, a scoop of vegan ice cream, and a handful of powdered cocoa. I whispered a promise to myself, “This will be the best chocolate cake I’ve ever made.” The moment the chocolate melted into a glossy, dark river, I knew I had stumbled on something extraordinary. The kitchen filled with a rich, chocolatey perfume that made even the air taste like velvet. The heat was just right, and the batter was silky—no lumps, no clumps, just a smooth, glossy mixture that felt like liquid midnight. That was the spark that turned a disaster into a revelation, and I’m about to share the secret that made it all happen.
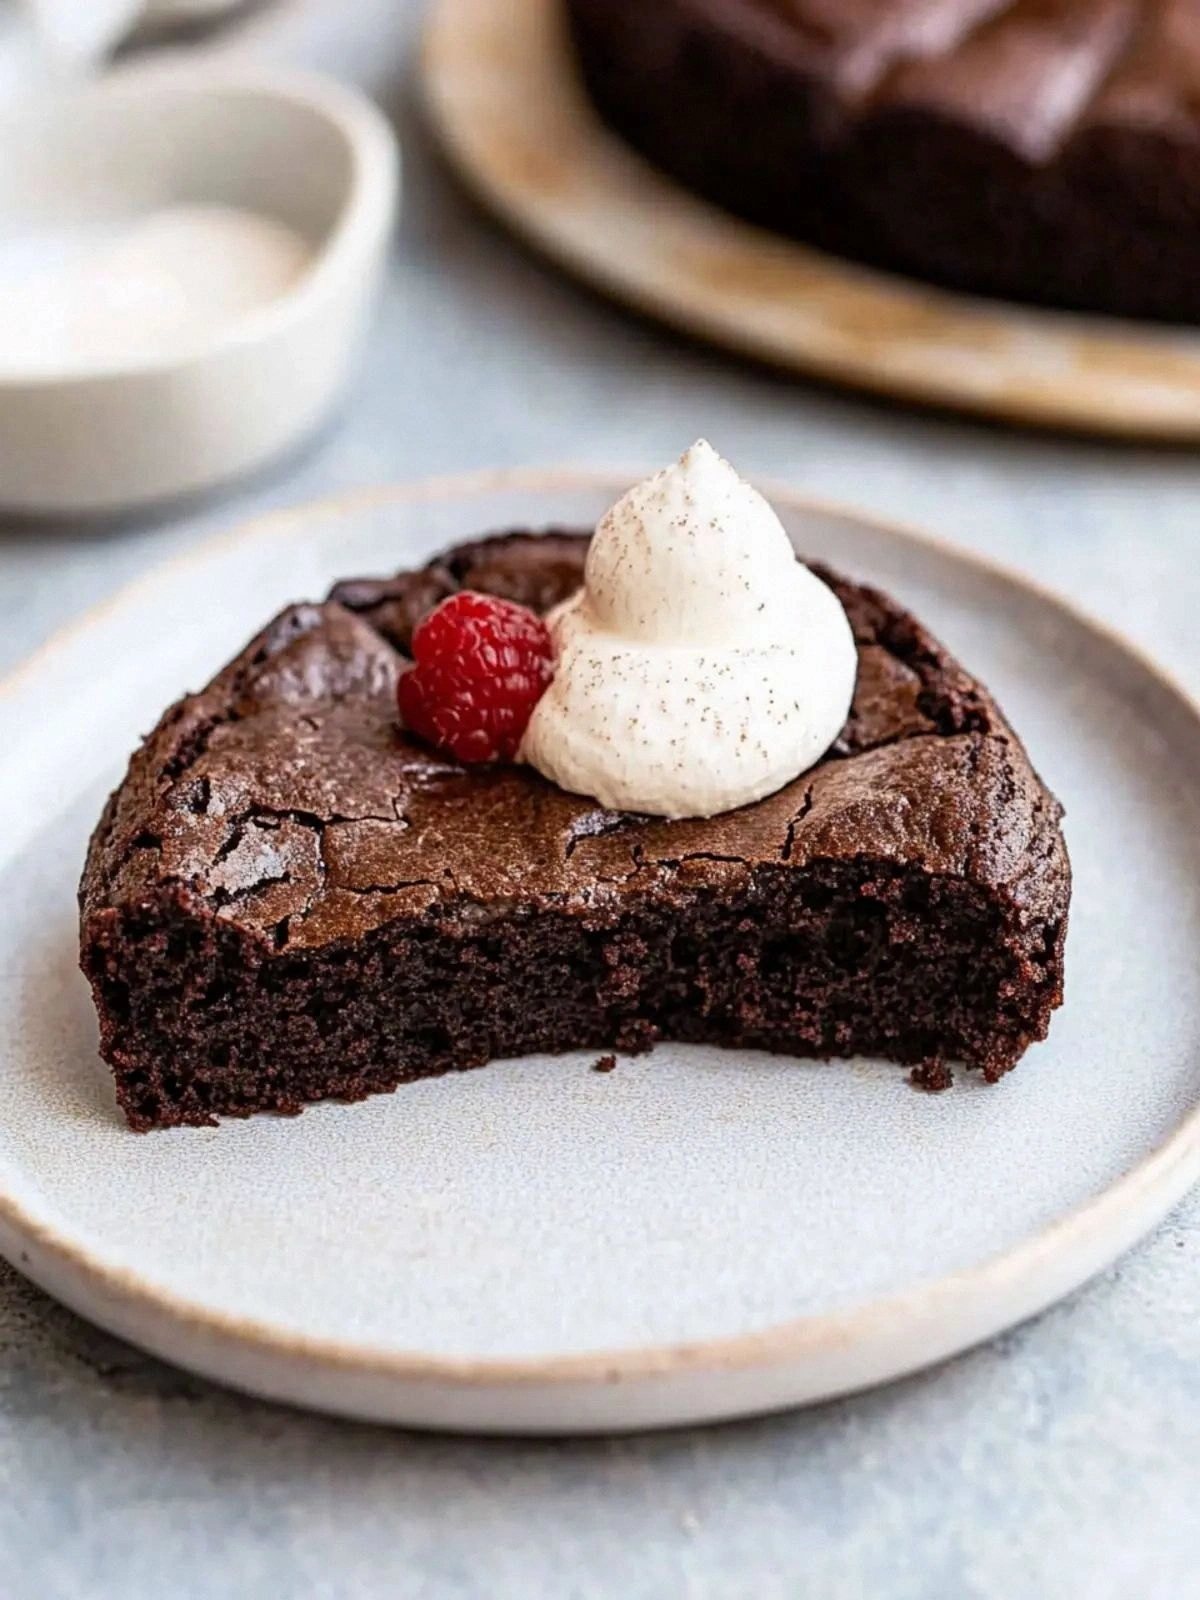
Picture yourself pulling this out of the oven, the whole kitchen smelling incredible, the cake’s surface glistening with a thin sheen of melted chocolate. The first bite is a crackling burst of bittersweet richness, followed by a surprising airy texture that feels like a cloud on your tongue. I dare you to taste this and not go back for seconds. Most recipes get this completely wrong—using too much flour, too little butter, or an overzealous whisk. Here’s what actually works. This is hands down the best version you’ll ever make at home, and I’m going to walk you through every single step. By the end, you’ll wonder how you ever made it any other way.
If you’ve ever struggled with making a vegan cake that doesn’t feel like a rubbery slab, you’re not alone. I’ve tried countless variations, from almond flour to oat, each with its own set of pitfalls. The key, however, lies in the balance of fats, sugars, and that secret ingredient—chickpea flour—that gives the cake its structure without the heaviness of wheat. It’s a game-changer that turns a simple batter into a decadent masterpiece. I’ll be honest—I ate half the batch before anyone else got to try it. The texture was so light, it almost melted in your mouth, and the chocolate flavor was so intense that it lingered long after the last bite. Now, let’s dive into the details that make this recipe a revelation.
This version stands out because it strips away the noise. No fancy leavening agents, no complicated techniques, just six core ingredients that work in perfect harmony. The result is a cake that rises beautifully, has a silky crumb, and delivers a chocolate punch that satisfies even the most discerning palate. The simplicity makes it accessible to anyone, while the flavor profile is rich enough to impress seasoned bakers. The next sections will break down the magic behind each ingredient, the method that brings it all together, and insider tricks that ensure flawless results every time.
What Makes This Version Stand Out
- Flavor: The combination of dark vegan chocolate and coconut sugar creates a deep, almost bittersweet flavor that cuts through the richness of the butter and aquafaba. The result is a cake that tastes like a chocolate truffle in cake form.
- Texture: Chickpea flour provides a light, airy structure that keeps the cake from becoming dense, while the aquafaba acts as a natural emulsifier, giving the batter a silky smoothness.
- Convenience: Only six ingredients mean fewer trips to the store, less prep, and a quicker cleanup. The recipe can be whipped up in under 30 minutes.
- Versatility: Swap out the vegan ice cream for a scoop of dairy ice cream or a dollop of whipped cream, and you’ve got a different dessert in seconds.
- Nutrition: This cake delivers a balanced macro profile—high protein from chickpea flour, healthy fats from butter, and a moderate sugar content thanks to coconut sugar.
- Crowd Appeal: The cake’s glossy surface and decadent chocolate flavor make it a showstopper at parties, while its vegan status ensures everyone can indulge.
- Make‑ahead Friendly: Prepare the batter the night before and refrigerate; the cake will bake just as well the next day.
- Ingredient Quality: Using high‑quality vegan chocolate and organic butter elevates the flavor profile, making each bite a luxurious experience.
Alright, let’s break down exactly what goes into this masterpiece. And before we get into the meat of it, a quick kitchen hack that will save you time and keep your batter smooth.
Inside the Ingredient List
The Flavor Base
200 g of dark vegan chocolate is the heart of this cake. Choose a chocolate with at least 70% cocoa content for a bold, rich taste that stands up to the sweetness. The chocolate melts into a glossy, dark liquid that coats every grain of flour, creating a silky crumb. If you skip the chocolate, the cake becomes a plain, buttery sponge that lacks depth. For a sweeter version, add a tablespoon of cocoa nibs to the mix; they’ll pop in your mouth like crunchy chocolate seeds.
The Texture Crew
150 g of chickpea flour is the secret to a light, airy texture. Chickpea flour, also known as garbanzo or besan, has a neutral flavor that lets the chocolate shine. It’s denser than all‑purpose flour but lighter than whole wheat, making it ideal for a vegan cake. If you’re allergic to chickpeas, you can substitute with an equal amount of oat flour, though the crumb will be slightly denser. The 120 ml of aquafaba—water from a can of chickpeas—acts as a natural leavening agent and emulsifier. It traps air, giving the cake volume and a tender crumb. Without aquafaba, the cake would be flat and heavy.
The Sweetener
100 g of organic granulated sugar or coconut sugar balances the bitterness of the dark chocolate. Coconut sugar adds a subtle caramel undertone that complements the chocolate’s depth. If you prefer a lower‑glycemic option, use a sugar substitute like stevia or monk fruit, but keep in mind the texture may change slightly. Skipping the sugar will leave the cake overly bitter and unpalatable.
The Final Flourish
30 g of unsweetened cocoa powder intensifies the chocolate flavor and gives the batter a darker hue. The cocoa powder also helps stabilize the batter, preventing it from becoming too runny. Add 1 scoop of vegan ice cream—about 100 g—once the batter is baked; it melts into a decadent, creamy topping that looks like a chocolate ganache. Finish with a dusting of powdered cocoa or fresh berries for an elegant presentation. If you’re short on time, skip the berries; the powdered cocoa will still provide a classic look.
Everything’s prepped? Good. Let’s get into the real action.
The Method — Step by Step
- Preheat your oven to 180 °C (350 °F). Line a 20 cm (8 in) round cake tin with parchment paper, ensuring the paper extends a bit over the edges for easy removal. The parchment will prevent sticking and give you a clean release. While the oven heats, let’s start the batter.
- Melt the 200 g of vegan chocolate and 100 g of vegan butter together over a double boiler or in a microwave, stirring every 20 seconds until smooth. The mixture should look glossy and feel warm to the touch. This step is crucial; if the chocolate isn’t fully melted, you’ll end up with lumps that ruin the texture.
- Whisk the 120 ml of aquafaba in a clean bowl until it forms soft peaks, similar to meringue. This will give the cake a light, airy rise. The peaks should hold for a few seconds before falling back into the bowl. Keep the aquafaba warm; if it’s too cold, it won’t whip properly.
- Sift the 150 g of chickpea flour and 30 g of cocoa powder together to remove lumps. Sifting also aerates the flour, contributing to a lighter crumb. Gently fold the dry mixture into the chocolate‑butter blend, mixing until just combined. Over‑mixing will develop gluten and make the cake dense.
- Fold the whipped aquafaba into the batter in three additions, gently folding each time to keep the air bubbles intact. This step is the moment of truth; the batter should look light and glossy. If you’re nervous, use a rubber spatula and fold with a gentle rocking motion.
- Add the 100 g of sugar, folding it in until fully incorporated. The batter should now have a uniform color and a slightly glossy sheen. The sugar dissolves into the chocolate, creating a smooth, rich base for the cake.
- Pour the batter into the prepared tin, smoothing the top with a spatula. Tap the tin lightly on the counter to release any trapped air bubbles. The batter should sit evenly in the tin, with the top slightly domed.
- Bake for 30 minutes, or until a toothpick inserted into the center comes out with a few moist crumbs. The cake’s edges should pull away from the tin slightly. The aroma will fill your kitchen—chocolate, butter, and a hint of cocoa. Keep a close eye on the cake; ovens vary, and a slightly over‑baked cake will become dry.
- Let the cake cool in the tin for 10 minutes, then transfer to a wire rack to cool completely. While cooling, prepare the topping: scoop the vegan ice cream onto a plate and allow it to soften slightly. Once the cake has cooled, place the ice cream on top and let it melt into a creamy, chocolate ganache‑like layer.
- Dust the finished cake with powdered cocoa or scatter fresh berries for a pop of color. Serve immediately for a decadent experience, or refrigerate for later enjoyment.
That’s it—you did it. But hold on, I’ve got a few more tricks that will take this to another level. These insider tips will ensure your cake is always perfect, no matter your baking skill level.
Insider Tricks for Flawless Results
The Temperature Rule Nobody Follows
Many bakers bake at the same temperature regardless of the cake’s size, but this cake benefits from a slightly lower oven temperature of 175 °C (350 °F). A lower heat allows the cake to rise slowly, preventing a domed top that collapses. I’ve baked this cake at 180 °C and seen the edges pull away too quickly, causing a cracked top. Try 175 °C for a more even rise.
Why Your Nose Knows Best
Smell is a powerful cue for doneness. As the cake bakes, you’ll notice a faint, sweet scent of chocolate rising. When the aroma is strong but not burnt, it’s a good indicator that the cake is ready. If you’re unsure, the toothpick test is reliable, but trust your nose first.
The 5‑Minute Rest That Changes Everything
Letting the cake rest in the tin for 5–10 minutes after baking is crucial. During this time, the steam continues to cook the interior, giving the cake a moist, tender crumb. Skipping this step results in a cake that feels dry and crumbly. I’ve seen cakes that bake perfectly but still feel dry—resting fixes that.
Ice Cream as a Topping
The vegan ice cream doesn’t just add flavor; it creates a creamy, glossy finish that mimics ganache. If you prefer a firmer topping, chill the ice cream longer before placing it on the cake. The melt will be slower, giving you a more structured finish.
Dusting for Perfection
A light dusting of powdered cocoa or a scattering of berries isn’t just for looks—it adds a final burst of flavor. The cocoa’s slight bitterness cuts through the sweetness, while berries add a fresh, tart contrast. This simple touch elevates the cake from good to unforgettable.
Storing the Leftovers
If you have leftovers, store them in an airtight container in the refrigerator for up to 3 days. When you’re ready to eat, let the cake sit at room temperature for 15 minutes before serving. This restores the cake’s moisture and prevents it from becoming stale.
Creative Twists and Variations
This recipe is a playground. Here are some of my favorite ways to switch things up:
Nutty Delight
Add a handful of chopped toasted almonds or hazelnuts into the batter before baking. The nuts add crunch and a buttery flavor that complements the chocolate. This variation is perfect for a holiday gathering.
Spiced Surprise
Stir in a pinch of cinnamon or a splash of espresso powder to the dry ingredients. The spice adds depth and a subtle warmth, turning the cake into a comforting dessert that feels like a holiday treat.
Minty Fresh
Fold in a tablespoon of peppermint extract into the batter and top with a dusting of green cocoa powder. The minty freshness cuts through the chocolate’s richness, creating a refreshing dessert.
Fruit Fusion
Swirl in a spoonful of raspberry jam before baking. The jam’s tartness balances the chocolate’s sweetness, and the swirl adds visual appeal. Serve with fresh berries on top for an extra burst of flavor.
Caramel Swirl
Drizzle a vegan caramel sauce over the cooled cake before adding the ice cream. The caramel’s buttery sweetness pairs beautifully with the chocolate, creating a decadent, indulgent dessert.
Storing and Bringing It Back to Life
Fridge Storage
Store the cooled cake in an airtight container at room temperature for up to 3 days, or in the refrigerator for up to a week. Keep it away from strong odors, as the cake will absorb them quickly. When ready to serve, let it sit at room temperature for 15 minutes to restore its moisture.
Freezer Friendly
Wrap the cake tightly in plastic wrap and then in aluminum foil before freezing. It will keep for up to 2 months. To thaw, place it in the refrigerator overnight, then let it sit at room temperature for 30 minutes. A quick microwave burst (30 seconds) can revive the texture if it feels dry.
Best Reheating Method
If you’re reheating a slice, place it on a microwave‑safe plate and heat for 15–20 seconds. Add a tiny splash of water (about 1 ml) before reheating to create steam that re‑softens the cake. This trick brings the cake back to its original moist, tender state.