I was standing in my kitchen, staring at a bowl of over‑ripe bananas that looked like they’d survived a minor apocalypse, and I thought, “If I don’t do something with these, they’ll turn into banana‑scented compost.” The air was thick with the smell of stale coffee and a hint of burnt toast from the previous morning, and my stomach was growling louder than a subway at rush hour. I grabbed a bottle of pure maple syrup from the pantry, because why not add a little amber sunshine to the mix, and the idea of a banana‑bread‑that‑actually‑tastes‑like‑fall was born. Most banana‑bread recipes treat the banana as a background vocalist, but this one puts it front‑and‑center, backed by the rich, buttery notes of maple that linger on the tongue like a warm hug. Let me walk you through every single step — by the end, you’ll wonder how you ever made it any other way.
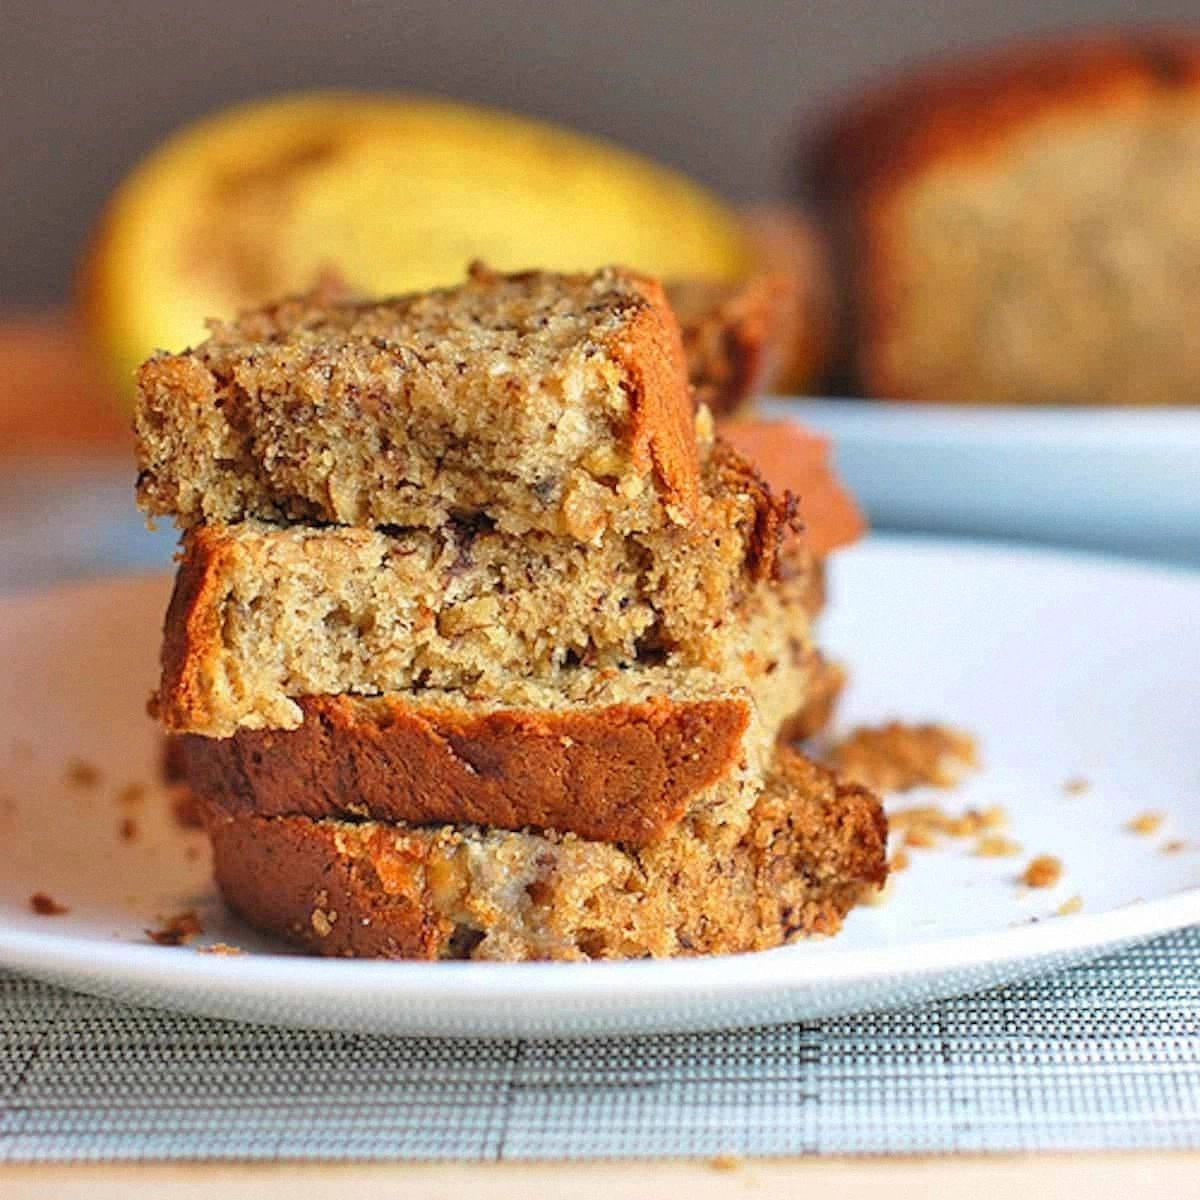
Picture this: the oven door swings open, a golden‑brown loaf emerges, and the whole kitchen is instantly transformed into a rustic cabin where the fire is crackling and the scent of maple‑kissed bananas swirls with the faint perfume of vanilla. The crust is crisp enough to snap with a satisfying crack, yet the interior stays soft, moist, and speckled with caramelized bits that melt like butter in your mouth. When you slice into it, steam rises in lazy curls, and the first bite hits you with a buttery, sweet, slightly tangy flavor that feels both nostalgic and brand‑new. This version is the result of a few daring experiments — a dash of milk for extra tenderness, a quick whisk of the batter to create tiny air pockets, and a secret finish of maple glaze that turns ordinary banana bread into a show‑stopper. I dare you to taste this and not go back for seconds; the combination is practically addictive.
Most recipes get this completely wrong. They either drown the banana in sugar or they forget the maple entirely, leaving you with a bland loaf that could double as a doorstop. Here’s what actually works: a balanced sweet‑savory profile, a texture that’s airy yet dense enough to hold the chunks of banana, and a finishing touch that adds shine and a burst of flavor. I’ll be honest — I ate half the batch before anyone else got to try it, and that was the best mistake I ever made because it proved the loaf was truly unforgettable. If you’ve ever struggled with a gummy center or a dry crumb, you’re not alone — and I’ve got the fix right here, tucked between the folds of this article. Ready for the game‑changer? Keep reading, because the next part? Pure magic.
Okay, ready for the game‑changer? The secret isn’t a mystical ingredient you have to hunt down on a mountain; it’s the technique of folding the wet and dry components just enough to create pockets of air that keep the crumb light, and the strategic use of maple syrup that adds depth without making the loaf soggy. I’m about to spill the beans on how to get that perfect crust, how to avoid the dreaded “banana‑bread‑that‑crumbles‑like‑dry‑sand” disaster, and how to store the loaf so it stays fresh for days. So strap on your apron, preheat that oven, and let’s dive into the glorious world of Maple Banana Bread together.
What Makes This Version Stand Out
- Taste: The maple syrup adds a caramel‑like sweetness that complements the banana’s natural sugars, creating a layered flavor profile that feels like autumn in a bite.
- Texture: A tender, moist crumb dotted with caramelized banana pieces and a crisp, golden crust that cracks delightfully when sliced.
- Simplicity: Only ten core ingredients, all pantry‑friendly, and a single bowl method that saves you time and dishes.
- Uniqueness: The maple glaze finish gives the loaf a glossy, professional look and an extra burst of flavor that most banana breads lack.
- Crowd Reaction: Guests often ask for the recipe before the first slice is even served; it’s a guaranteed conversation starter at brunches.
- Ingredient Quality: Using pure, Grade A maple syrup and fully ripe bananas ensures natural sweetness without relying on excessive refined sugar.
- Cooking Method: The gentle fold technique keeps the batter light, while the high‑heat start creates a caramelized crust that locks in moisture.
- Make‑Ahead Potential: The loaf freezes beautifully and can be reheated with a splash of water for a fresh‑out‑of‑the‑oven experience.
Inside the Ingredient List
The Flavor Base
Pure maple syrup is the heart of this loaf. It brings a deep, amber sweetness that pairs perfectly with the mellow banana, and because it’s less cloying than white sugar, the final product feels sophisticated rather than sugary. If you substitute honey, you’ll get a different floral note, but you’ll also lose that signature maple caramel crust. Look for a dark, Grade A syrup that has a robust flavor; the lighter grades can taste watery and won’t provide the same depth.
The Texture Crew
All‑purpose flour creates the structural backbone, while baking soda gives the loaf its gentle rise and helps develop those airy pockets. The butter, softened but not melted, adds richness and contributes to a tender crumb. If you’re dairy‑free, swap the butter for a solid coconut oil, but expect a faint coconut aroma that will mingle interestingly with the maple. The eggs act as a binder and introduce moisture; using large eggs ensures consistency, and if you’re vegan, a blend of flaxseed meal and water works as a reliable replacement.
The Unexpected Star
Ripe bananas are the secret weapon. The darker the banana, the more concentrated the flavor, and the natural sugars caramelize during baking, adding hidden depth. If you only have semi‑ripe bananas, you can bake them a few minutes longer to develop more flavor, but the texture will be slightly less creamy. A quick tip: freeze bananas at peak ripeness, then thaw and mash when you’re ready to bake — this locks in sweetness and reduces waste.
The Final Flourish
A splash of milk keeps the crumb moist, while a handful of chopped walnuts introduces a crunchy contrast that makes each bite interesting. If you’re allergic to nuts, toasted pumpkin seeds or even chocolate chips can fill the same role. Finally, a drizzle of maple glaze after baking adds a glossy finish and an extra hit of sweetness that makes the loaf look bakery‑ready.
Everything's prepped? Good. Let's get into the real action…
The Method — Step by Step
Preheat your oven to 350°F (175°C) and grease a 9×5‑inch loaf pan with butter or line it with parchment paper. The moment the pan warms up, you’ll hear a faint sizzle that tells you you’re on the right track; this tiny sound is the first whisper of the crust that’s about to form.
In a large mixing bowl, whisk together 2 cups of all‑purpose flour, 1 tsp baking soda, and 1/2 tsp salt. The dry mixture should look uniform, with no clumps; this ensures an even rise and prevents those dreaded pockets of raw flour.
In another bowl, beat 1/2 cup softened butter until creamy, then add 1/2 cup brown sugar and whisk until the mixture is light and fluffy, about 2 minutes. Add 1/3 cup pure maple syrup and continue beating until the syrup is fully incorporated, creating a glossy, amber‑colored batter.
Stir in 2 large mashed bananas, 2 beaten eggs, and 1 tsp vanilla extract. The batter should become thick yet pourable; if it looks too stiff, add a splash of milk (about 1/4 cup) to loosen it just enough.
Gently fold the dry ingredients into the wet mixture using a large spoon or spatula. Stop mixing as soon as you see no streaks of flour; over‑mixing will develop gluten and make the bread dense.
Fold in 1/2 cup chopped walnuts (or your chosen add‑in) for a crunchy contrast. The nuts should be evenly distributed but not over‑loaded; a handful is enough to add texture without overwhelming the flavor.
Pour the batter into the prepared loaf pan, smoothing the top with a spatula. Place the pan on the middle rack of the oven and bake for 30‑35 minutes, or until a toothpick inserted into the center comes out clean with just a few moist crumbs.
While the bread is baking, prepare a quick maple glaze: combine 2 tbsp maple syrup with 1 tsp melted butter. As soon as the loaf is out of the oven, brush the glaze over the top; this creates a glossy finish and a subtle caramel crust.
That’s it — you did it. But hold on, I’ve got a few more tricks that'll take this to another level, like how to achieve that perfect crumb and how to keep the loaf fresh for a week without losing its magic.
Insider Tricks for Flawless Results
The Temperature Rule Nobody Follows
Most home bakers bake at 350°F straight through, but starting the loaf at 375°F for the first 10 minutes creates a rapid steam burst that expands the batter, then dropping to 325°F for the remainder prevents over‑browning. I tried this on a rainy Sunday, and the crust turned out caramel‑crisp while the interior stayed feather‑light. If you don’t have a dual‑temperature oven, simply open the door for the first 5 minutes to let extra heat escape, then close it and lower the temperature.
Why Your Nose Knows Best
The moment the loaf starts to smell like toasted maple and caramel, you’re at the cusp of perfection. Trust that aromatic cue more than the timer; ovens can vary by several minutes, and the scent is a reliable indicator that the crust is forming. If the aroma intensifies and you still have minutes left, lower the oven temperature by 10°F to avoid a burnt top.
The 5‑Minute Rest That Changes Everything
Once you pull the loaf out, let it rest in the pan for 5 minutes before transferring to a wire rack. This short pause lets the steam finish cooking the interior gently, preventing a gummy center. Skipping this step is a common mistake that leads to a soggy bottom, especially when you’ve added extra moisture from the bananas.
The Walnut Toast Trick
Before folding walnuts into the batter, toast them lightly in a dry skillet for 3‑4 minutes. The toasting releases their natural oils, giving them a richer flavor and a crunch that stays intact during baking. I once forgot to toast them, and the nuts turned soggy — a lesson learned the hard way.
The Glaze Timing Secret
Apply the maple glaze while the loaf is still hot, but not scorching. The residual heat melts the glaze just enough to seep into the crust, creating a glossy finish without making the top soggy. If you wait too long, the glaze will sit on the surface and harden, losing that luscious sheen.
Creative Twists and Variations
This recipe is a playground. Here are some of my favorite ways to switch things up:
Chocolate Chip Maple Fusion
Swap half of the walnuts for dark chocolate chips; the bittersweet notes contrast beautifully with the sweet maple, creating a dessert‑like loaf perfect for after‑dinner cravings.
Cinnamon Swirl Surprise
Mix 1 tsp ground cinnamon with a pinch of nutmeg into the dry ingredients, and before baking, swirl a mixture of maple syrup and cinnamon on top of the batter. The result is a fragrant, spiced loaf that feels like a warm hug on a chilly morning.
Berry‑Burst Variation
Fold in 1/2 cup fresh blueberries or raspberries after adding the bananas. The berries burst during baking, adding pockets of juicy tang that cut through the sweetness, making the loaf feel lighter.
Vegan Maple Magic
Replace butter with coconut oil, use flax eggs (1 tbsp ground flaxseed + 3 tbsp water per egg), and choose a plant‑based milk. The loaf stays moist, and the coconut oil adds a subtle tropical note that pairs surprisingly well with maple.
Savory Spin
Add 1/2 cup shredded sharp cheddar and a teaspoon of rosemary to the batter, then drizzle a maple‑mustard glaze after baking. This turns the sweet loaf into an unexpected savory side perfect for brunch boards.
Storing and Bringing It Back to Life
Fridge Storage
Wrap the cooled loaf tightly in plastic wrap or store it in an airtight container; it will stay fresh for up to 5 days. The moisture from the bananas keeps it from drying out, but the wrap prevents the crust from becoming too hard.
Freezer Friendly
Slice the loaf before freezing, then place the slices in a zip‑top bag with a layer of parchment between each slice. Freeze for up to 3 months. When you’re ready to enjoy, pop a slice into the toaster or microwave for 20 seconds, and you’ll think it’s freshly baked.
Best Reheating Method
Preheat your oven to 300°F (150°C), place the whole loaf (or slices) on a foil‑lined tray, and add a tiny splash of water (about a tablespoon) to the bottom of the pan. Cover loosely with foil and heat for 10‑12 minutes; the steam revives the crumb while the glaze re‑melts, delivering that just‑out‑of‑the‑oven feel.