Picture this: you’re halfway through a week of bland, overcooked veggies, and the kitchen clock is ticking like a drumbeat. Suddenly, the pantry lights flicker, a jar of garlic whispers, and you’re left with a handful of bright, crisp snow peas that have been chilling in the fridge since last night. I’m talking about that instant, almost rebellious spark that turns a simple side into a showstopper. The moment you toss those peas into a hot pan, the sizzle is like a tiny applause, the aroma a green, peppery promise, and the texture a satisfying snap that shatters like thin ice.
I’ve spent months chasing the perfect little green companion for my plates, but nothing has hit the spot until I discovered this version of sautéed snow peas. The secret? A bold, buttery base that sings with garlic, a splash of avocado oil for a silky finish, and a daring pinch of red chili flakes that give it a punch without overpowering. This isn’t just another side; it’s a crowd-pleaser that can be whipped up in ten minutes, and I dare you to taste this and not go back for seconds. The result is a dish that feels both luxurious and approachable, a quick, zesty burst of flavor that will have your guests asking for the recipe.
Let me walk you through every single step — by the end, you’ll wonder how you ever made it any other way. I’ll be honest, I ate half the batch before anyone else got to try it, and that’s proof of how irresistible it is. Most recipes get this completely wrong by overcooking the peas or under-seasoning the butter, but here’s what actually works: keep the heat high, keep the peas moving, and let the butter melt into a glossy coating that locks in freshness. The aroma will fill the kitchen, the sizzle will be music, and the final dish will be a crisp, bright, slightly spicy masterpiece that’s perfect for dinner or as a party appetizer.
And now, let’s dive into the details. This is hands down the best version you’ll ever make at home because it balances simplicity with flavor depth, and it’s so quick that even the busiest of cooks can enjoy it without the stress of a long prep. I’ll share the technique that gives the peas that perfect snap and the ingredient swap that can elevate the dish for a vegan twist. So grab your skillet, and let’s get started.
What Makes This Version Stand Out
- Flavor: The combination of garlic, butter, and avocado oil creates a rich, savory base that elevates the natural sweetness of the peas. The chili flakes add a subtle heat that balances the buttery richness without overwhelming the palate. This layered flavor profile makes the dish feel like a gourmet experience while still being approachable for everyday cooking.
- Texture: The quick sauté technique preserves the peas’ bright green color and crisp snap. The butter coats each pod, creating a glossy finish that feels luxurious in the mouth. The result is a contrast of tender interiors and slightly caramelized edges that bite like fresh spring greens.
- Speed: With a prep time of just five minutes and a cook time of ten minutes, you can have a plate-worthy dish on the table in fifteen minutes. This makes it a perfect side for busy weeknights or a last-minute appetizer for guests.
- Simplicity: Only five ingredients are required, and no fancy equipment or complicated steps are needed. The recipe’s straightforward approach means anyone can replicate it with confidence.
- Versatility: The dish can be served as a side, a topping for pasta, or a quick snack. Swap the butter for a plant-based alternative to make it vegan, or add a splash of soy sauce for an umami kick.
- Ingredient Quality: Using fresh, high-quality snow peas is key. Their natural sweetness shines through when cooked quickly, and they hold their color and texture better than older peas.
- Make‑Ahead Potential: The peas can be prepped and stored in the fridge for up to two days. When you’re ready to serve, just reheat in a hot pan for a minute and they’ll taste as fresh as the first time.
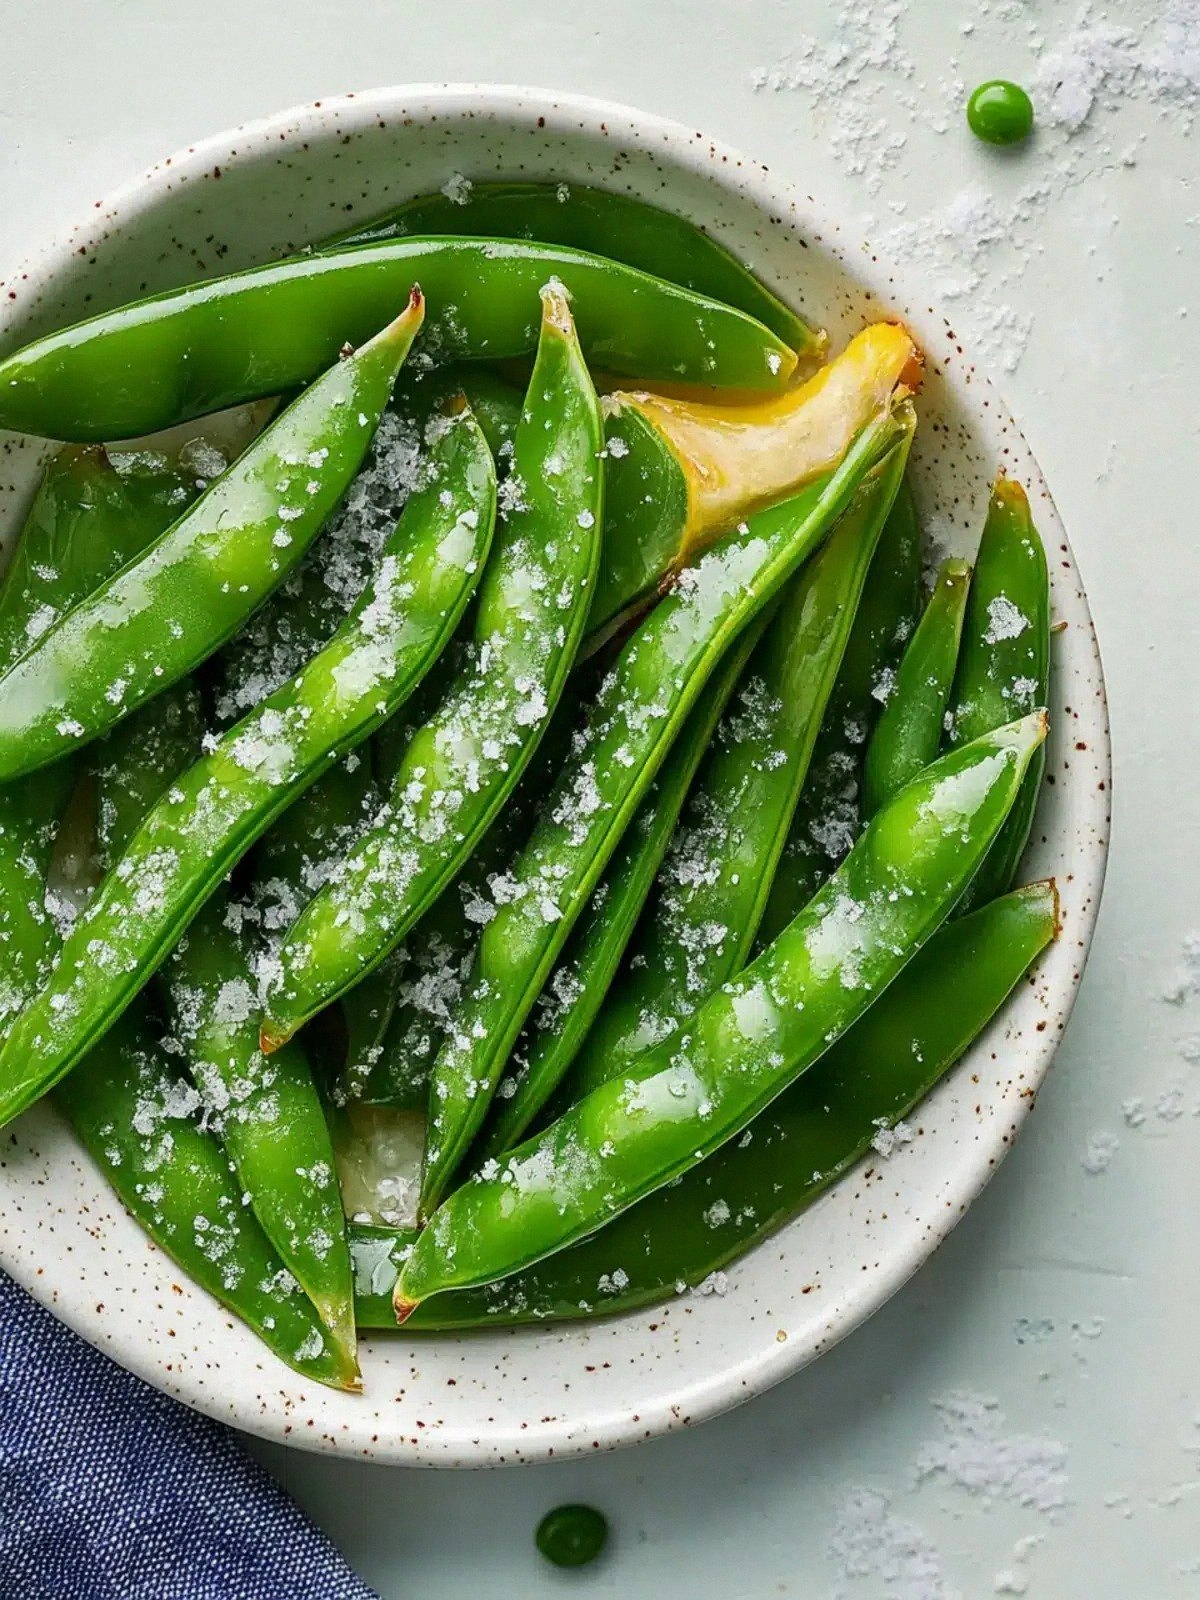
- Visual Appeal: The vibrant green of the peas against a glossy butter glaze makes for a dish that looks as good as it tastes, perfect for Instagram-worthy meals.
Inside the Ingredient List
The Flavor Base
The cornerstone of this dish is the butter, which melts into a silky, golden sauce that coats every pea. It adds a depth of flavor that is both comforting and indulgent. If you’re looking for a vegan alternative, coconut oil or a dairy-free butter substitute will work beautifully, preserving the glossy finish while keeping the dish plant-based.
The Texture Crew
Snow peas are the star of the show. Their natural crispness is amplified by quick sautéing, which prevents them from becoming mushy. When selecting peas, look for firm pods that snap when bent; this indicates freshness and ensures a satisfying bite. If you can’t find fresh peas, frozen peas can be used, but be sure to thaw and drain them before cooking.
The Unexpected Star
Red chili flakes are the secret weapon that gives this dish a subtle heat. They’re not just for flavor—they also add a pop of color that makes the dish visually striking. If you’re sensitive to spice, reduce the pinch to a quarter or omit it entirely; the dish remains delicious.
The Final Flourish
Avocado oil or vegetable oil is used to sear the peas and help the butter coat them evenly. Avocado oil has a high smoke point and a mild flavor that doesn’t compete with the garlic or chili. If you prefer a more neutral oil, vegetable oil works just as well. The oil also helps prevent the butter from burning, ensuring a smooth finish.
Everything’s prepped? Good. Let’s get into the real action.
The Method — Step by Step
- Heat a large skillet over medium-high heat until it shimmers. Add the avocado oil and let it swirl around the pan. The oil should start to smoke slightly, indicating it’s hot enough to sear the peas. This step is crucial for that beautiful, caramelized edge on each pod. Watch the color change from pale to a golden hue.
- Add the minced garlic to the pan and sauté for about 30 seconds, just until fragrant. Keep the garlic moving to avoid burning; a burnt garlic taste will ruin the dish’s delicate balance. The aroma should be sharp and inviting, like a fresh herb garden. This is the moment the dish’s base starts to build.
- Introduce the snow peas, tossing them gently to coat with oil and garlic. Stir-fry for 2 to 3 minutes, allowing the edges to start crisping. The peas should retain their bright green color; if they start to brown too much, lower the heat slightly. The sound of a gentle sizzle signals that the peas are cooking properly.
- Lower the heat to medium and add the butter. Let it melt completely before stirring, ensuring it’s fully incorporated into the mixture. The butter will create a glossy coating that latches onto each pea. Keep the peas moving to prevent the butter from sticking to the pan. The butter’s aroma should become nutty and buttery.
- Sprinkle the pinch of red chili flakes over the peas and stir to distribute evenly. The chili flakes will give a subtle heat that balances the richness of the butter. Taste a pea to gauge the spice level; adjust if needed. The heat should be gentle, not overwhelming, allowing the peas to shine.
- Cook the peas for an additional 1 to 2 minutes, or until they’re just tender but still crisp. The moment they reach that perfect snap is when the dish is at its peak. If you prefer them softer, let them cook a minute longer, but watch for mushiness. The final texture should feel lively and fresh.
- Season with a light pinch of salt to taste. The salt will enhance the natural sweetness of the peas and balance the buttery flavor. Add the salt gradually, tasting as you go. The dish should feel well-rounded and not overly salty.
- Remove the skillet from heat and let the peas rest for a minute. This brief pause allows the flavors to settle and the butter glaze to thicken slightly. The rest time also gives the peas a chance to finish cooking from residual heat, preventing overcooking.
- Give the peas a final toss to ensure an even distribution of butter, garlic, and chili flakes. This final stir brings everything together, creating a cohesive flavor profile. The peas should look glossy and appetizing.
- Serve immediately, perhaps with a squeeze of fresh lemon for extra brightness. The dish is best enjoyed hot, when the peas are still crisp and the butter is warm. Garnish with a sprinkle of fresh herbs if desired for an extra pop of color.
Insider Tricks for Flawless Results
The Temperature Rule Nobody Follows
Many cooks start with high heat and then lower it too soon, causing the peas to steam instead of sear. Keep the skillet at medium-high for the first two minutes, then reduce to medium just before adding butter. This ensures a crisp exterior and prevents the butter from burning. I once tried this and ended up with soggy peas—lesson learned!
Why Your Nose Knows Best
Before adding salt, close your eyes and smell the garlic and butter together. If the aroma feels too flat, the butter hasn’t fully melted or the garlic isn’t fragrant enough. A strong, buttery scent is a sign that your base is ready to carry the peas. Trust your nose—it’s a seasoned chef’s secret tool.
The 5-Minute Rest That Changes Everything
After cooking, let the peas rest for exactly five minutes before plating. During this time, the residual heat finishes the peas gently, while the butter glaze thickens to a silky sheen. This resting period also allows the flavors to meld, creating a more harmonious bite. Skipping it can leave the dish feeling under-seasoned.
The Quick Toss Trick
When you add the chili flakes, toss the peas quickly in the pan rather than stirring slowly. This quick motion prevents the flakes from sticking to the bottom and ensures an even distribution of heat. It also keeps the peas moving, preventing them from sticking together and becoming mushy.
The Fresh Herb Finish
Right before serving, sprinkle a handful of freshly chopped parsley or cilantro. The herbs add a bright, green contrast that cuts through the butter’s richness and adds a layer of freshness. If you’re serving this as a side to a richer main, the herbs will brighten the overall plate.
The Lemon Zest Boost
A quick zest of lemon over the finished peas gives an aromatic lift that makes the dish feel lighter. The citrus oils complement the garlic and butter, creating a balanced flavor profile. I love adding a few drops of lemon juice right before serving to bring everything together.
Creative Twists and Variations
This recipe is a playground. Here are some of my favorite ways to switch things up:
Asian Fusion Kick
Swap the butter for sesame oil, add a splash of soy sauce, and finish with toasted sesame seeds. The dish becomes a quick stir-fry that pairs wonderfully with rice or noodles. The umami depth from soy sauce enhances the peas’ natural sweetness.
Mediterranean Breeze
Replace the red chili flakes with a pinch of dried oregano and finish with a drizzle of extra virgin olive oil. Add a sprinkle of feta cheese for a tangy contrast. This version works as a side for grilled chicken or fish.
Vegan Butter Alternative
Use a plant-based butter substitute or coconut oil to keep the dish dairy-free. The coconut oil adds a subtle nutty flavor that complements the peas. This variation is perfect for vegan gatherings.
Pesto Infusion
Stir in a spoonful of basil pesto at the end of cooking for a fragrant, herbaceous twist. The pesto’s basil, garlic, and pine nut flavors mingle beautifully with the peas. This version is great as a topping for pasta or as a side for grilled meats.
Spicy Thai Twist
Add a teaspoon of Thai red curry paste during the sauté and finish with a splash of coconut milk. The curry paste brings a complex heat, while the coconut milk adds creaminess. This variation works well with grilled shrimp or tofu.
Herb-Infused Butter
Infuse the butter with fresh thyme and rosemary before cooking. The herbs infuse the peas with aromatic flavors that elevate the dish. This version is ideal for a rustic dinner party.
Storing and Bringing It Back to Life
Fridge Storage
Store the sautéed peas in an airtight container for up to two days. Keep them in the fridge at 40°F (4°C) to preserve freshness. When you’re ready to reheat, add a splash of water to keep them from drying out, then reheat in a skillet over medium heat for two minutes, stirring frequently.
Freezer Friendly
If you want to freeze the peas, spread them out on a parchment-lined tray and freeze until solid. Transfer to a freezer bag and store for up to three months. To thaw, let them sit at room temperature for 10 minutes, then reheat in a skillet with a splash of water or broth.
Best Reheating Method
The key to reheating is to add a small amount of liquid—water, broth, or even a splash of lemon juice—to keep the peas moist. Heat on medium, stirring constantly, until the peas are heated through and the butter glaze is silky. Avoid overcooking; the goal is to bring them back to that crisp, bright texture.