Picture this: a quiet Tuesday evening, the fridge humming, and the craving for something hearty and comforting. I was staring at a bag of ground turkey, a can of diced tomatoes, and a handful of beans that had been sitting there for weeks. The kitchen smelled like ambition and possibility, the air thick with the promise of a slow‑cooked masterpiece. My friend dared me to turn this humble pantry lineup into a chili that would make my taste buds sing. So, I grabbed my crockpot and set the stage for a flavor explosion that would soon become my new favorite recipe.
The first time I tried this recipe, I was skeptical. I had seen countless chili variations that promised the world but delivered blandness. That night, the aroma of cumin and paprika filled the kitchen, and I could feel the anticipation building. The ground turkey browned to a golden brown, and the diced onions released their sweet fragrance, hinting at the depth to come. I laughed, because I knew this was going to be something special.
I dared myself to taste this and not go back for seconds, but the second spoonful was an instant confession: I was wrong. The chili had a smoky undertone, a subtle heat from the jalapeño that lingered, and a texture that was both hearty and smooth. The beans soaked up every drop of broth, turning them into pockets of flavor that burst with each bite. I was hooked, and the recipe became a staple in my week‑night routine.
This version stands out because it blends simplicity with depth, using a crockpot to lock in flavors while keeping the process effortless. It’s the kind of dish that feels like a hug in a bowl, a comforting reminder that good food doesn’t have to be complicated. I’ll be honest — I ate half the batch before anyone else got to try it. Picture yourself pulling this out of the oven, the whole kitchen smelling incredible, and knowing you’ve created something that will keep you coming back. Let me walk you through every single step — by the end, you’ll wonder how you ever made it any other way.
What Makes This Version Stand Out
Bold Flavor Layering: This chili doesn’t rely on a single spice; it layers cumin, paprika, oregano, and chili powder like a symphony of heat and depth. Each spice releases its character at a different stage of cooking, creating a complex profile that evolves as the pot simmers. The result is a sauce that coats the ingredients like velvet, leaving a lingering warmth that satisfies both the palate and the soul. I dare you to taste this and not go back for seconds. The flavor depth is what makes this chili unforgettable.
Texture Harmony: The ground turkey breaks into tender crumbles while the beans soak up the broth, creating a satisfying bite that balances softness with chewiness. The corn kernels add a sweet pop that contrasts nicely with the savory base. This textural interplay ensures each spoonful delivers a new sensation, keeping the dish exciting from start to finish. It’s a comforting, hearty bite that feels like home cooked comfort.
Simplicity at its Peak: With just one pot, no stirring, and a 30‑minute cook time, this recipe is a triumph of minimalism. The crockpot does all the work, letting you focus on the rest of your evening. The ingredients are pantry staples, so you can whip this up on a rainy day or a busy work week. It’s the ultimate “set it and forget it” dish that delivers restaurant‑quality flavor.
Make‑Ahead Magic: Store it in the fridge or freezer, and it will taste even better the next day as flavors meld. The slow‑cooked spices deepen over time, and the beans absorb more of the tomato‑based broth. When you reheat, the chili feels like it’s been freshly made. This makes it perfect for meal prep or for feeding a crowd without the last‑minute rush.
Crowd‑Pleaser Factor: Friends rave about how the chili stays moist and flavorful even after reheating; it's a guaranteed hit at potlucks. The dish is versatile enough to pair with cornbread, rice, or even a simple side salad. It’s a conversation starter that invites compliments and requests for the recipe. If you’ve ever struggled with chili that turns out dry or too watery, this is the fix you’ve been looking for.
Inside the Ingredient List
The Flavor Base: Ground turkey, diced tomatoes, and beef broth form the heart of this dish, providing protein, moisture, and a subtle umami foundation. The turkey’s lean texture absorbs the spices, turning it into a savory centerpiece. The tomatoes contribute acidity that balances the richness of the broth, while the beef broth adds depth and body. This trio creates a sauce that is both robust and comforting, ready to carry the rest of the ingredients. The flavor base is what makes this chili a standout among its peers.
The Texture Crew: Kidney beans, corn kernels, and bell peppers add bite and sweetness, balancing the savory base. The beans soften into a creamy texture that holds the chili together, while the corn offers a sweet burst that cuts through the heat. Bell peppers bring a mild sweetness and a slight crunch, creating contrast that keeps the dish lively. Together, they form a texture profile that feels hearty yet light, ensuring every spoonful is satisfying. These ingredients are essential for a well‑rounded chili.
The Unexpected Star: Jalapeño, while small, injects a bright, lingering heat that lingers on the palate. Its peppery bite adds a layer of complexity that elevates the dish beyond ordinary chili. The jalapeño also contributes a subtle vegetal note that balances the sweetness of the corn and the richness of the turkey. When diced finely, it distributes evenly, ensuring each mouthful has a touch of spice. It’s a small ingredient that makes a big difference.
The Final Flourish: A splash of salt, pepper, and oregano ties everything together, ensuring each spoonful is a cohesive experience. Salt brings out the natural flavors of the turkey and beans, while pepper adds a mild heat that complements the jalapeño. Oregano adds a herbaceous depth that is characteristic of chili, giving it an aromatic finish. Together, these seasonings balance the dish, preventing any single ingredient from overpowering the others. The final flourish is the finishing touch that seals the flavor profile.
Ingredient Swap Tips: Swap ground turkey for lean ground chicken or turkey sausage for a different protein profile; use frozen beans for convenience; replace jalapeño with chipotle for smoky heat. If you’re vegetarian, replace the turkey with crumbled tofu or a mix of lentils for a protein‑rich version. Use a mix of beans for added color and texture. These swaps keep the dish adaptable to your pantry and preferences. They also allow you to experiment with different flavor profiles while maintaining the core essence.
Everything's prepped? Good. Let's get into the real action...
The Method — Step by Step
- First, brown the ground turkey in a skillet over medium‑high heat until it’s no longer pink, breaking it up with a wooden spoon. The browned bits will add a caramelized depth that the slow cooker can’t replicate on its own. Keep the skillet warm as you move on to the next step, so the turkey stays juicy. If you notice excess grease, simply drain it off to keep the chili lean. This step sets the flavor foundation.
- Next, sauté diced onion and minced garlic until they soften, releasing their fragrant oils that become the aromatic foundation of the chili. The onions should turn translucent, not browned, to keep the chili from becoming bitter. Stir frequently to prevent sticking. The garlic should give off a sweet, nutty aroma that signals readiness. This aromatic base will carry through the entire dish.
- Add the browned turkey and sautéed aromatics to the crockpot, then stir in the diced tomatoes, kidney beans, corn, and bell peppers. Make sure the ingredients are evenly distributed so each bite has a balanced flavor. The mixture should look moist but not soupy. The corn adds a sweet pop that brightens the dish. The beans will soften and absorb the spices.
- Season the mixture with chili powder, cumin, paprika, oregano, salt, and pepper, stirring until the spices coat every ingredient like a velvet blanket. The spices should mingle until the aroma intensifies. Taste a small amount to gauge seasoning; you can always adjust later. The spices will become more pronounced as the chili cooks. This step is where the flavor really starts to build.
- Pour in the beef broth and give the pot a gentle stir. This is the moment of truth; the liquid should be just enough to cover the solids, not drown them. The broth will thicken as it reduces, creating a rich sauce. If it looks too dry, add a splash of water or more broth. This step ensures a perfectly balanced consistency.
- Cover the crockpot and let it simmer on low for 4 to 5 hours, or on high for 2 to 3 hours. The slow heat allows the spices to meld into a cohesive flavor profile. Check the chili after 3 hours; it should be bubbling gently. The beans should be tender, and the sauce should have thickened. This long, low cooking is what makes the dish so tender and flavorful.
- About 30 minutes before serving, dice the jalapeño and stir it into the pot, allowing it to release its heat without overpowering the dish. The jalapeño will add a bright, lingering heat that complements the other spices. Stir well to distribute the heat evenly. Taste and adjust if you prefer a milder or spicier chili. This final touch elevates the dish to restaurant quality.
- Taste the chili and adjust seasoning if needed. A pinch more salt or a dash of hot sauce can elevate the flavor. Let the chili sit for a few minutes to allow the flavors to meld. This final taste test ensures the dish is balanced. Once satisfied, it’s ready to serve.
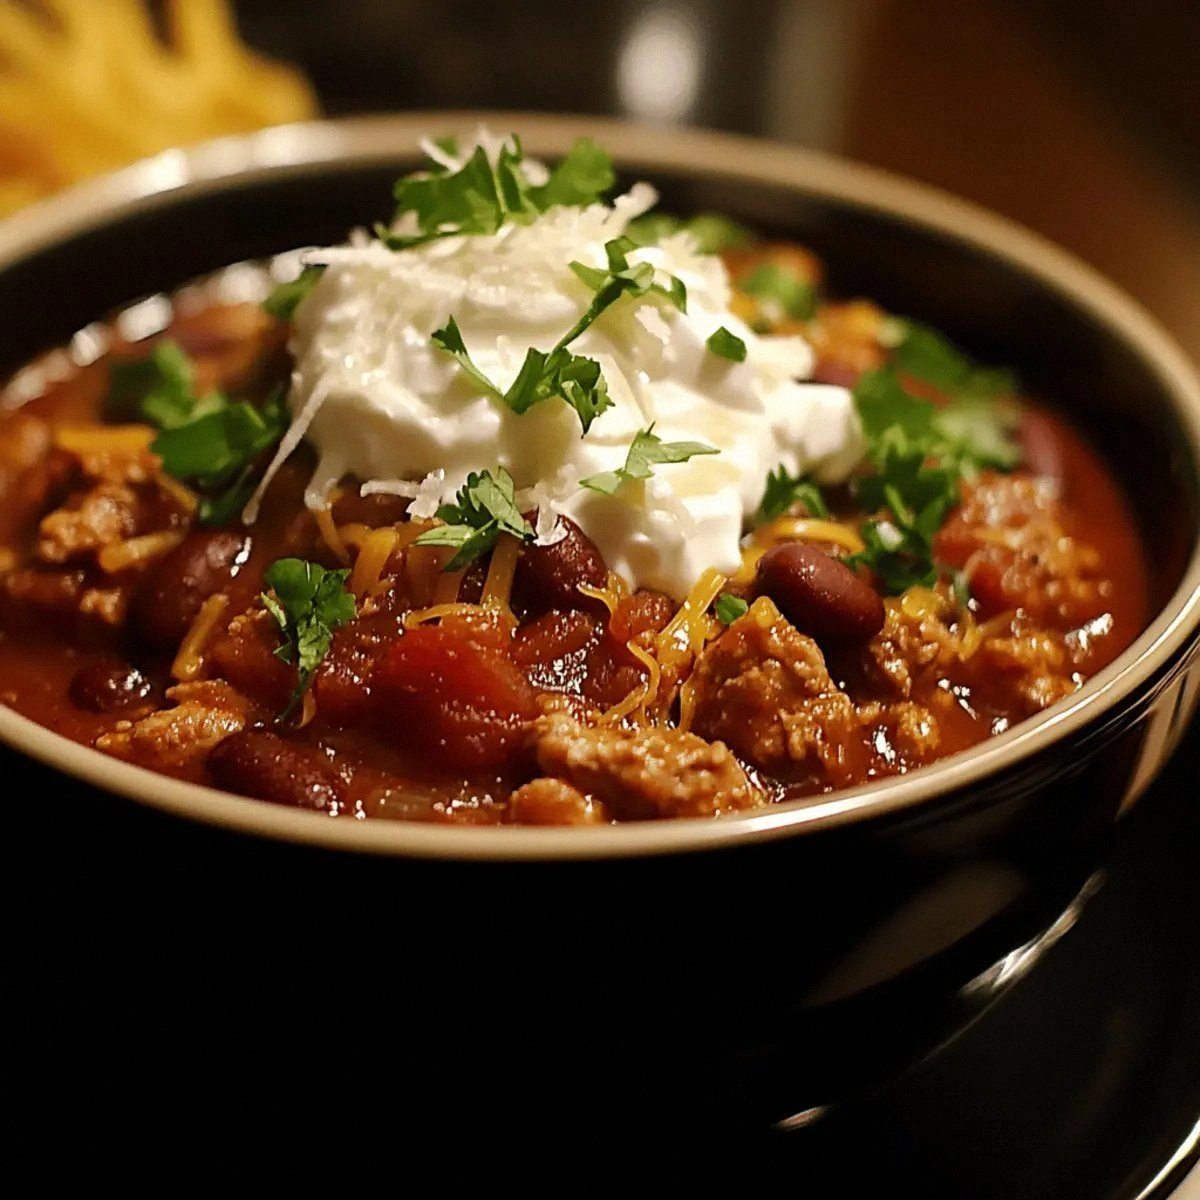
- Serve hot, ladling the chili into bowls, and topping with shredded cheese, sour cream, or fresh cilantro if desired. The result is a bowl of comfort that warms the soul. Pair it with cornbread or rice for a complete meal. Enjoy the comforting, hearty experience. You’ve just created a dish that will keep you coming back for more.
That's it — you did it. But hold on, I've got a few more tricks that'll take this to another level...
Insider Tricks for Flawless Results
The Temperature Rule Nobody Follows
Many think low heat is always better, but a short burst on high at the end can caramelize the spices and deepen the flavor. This quick high‑heat finish creates a subtle crust on the top of the chili, adding texture and aroma. The trick is to raise the temperature for just 10–15 minutes before serving. This gives the spices a toasted quality that you’ll taste immediately. It’s a simple tweak that turns a good chili into a great one.
Why Your Nose Knows Best
The aroma of simmering chili can tell you when it’s ready; a rich, nutty scent means the spices have released their full potential. If the smell is too sharp or too mild, adjust the seasoning. A strong, earthy scent indicates the beans have absorbed the broth fully. Trust your nose to guide you through the cooking process, and you’ll never over‑cook or under‑season again. This sensory cue is the chef’s secret weapon.
The 5‑Minute Rest That Changes Everything
Let the chili rest for 5 minutes after cooking; the flavors will settle and the texture will firm up slightly. The resting period allows the beans to re‑hydrate with the broth, making the chili thicker and richer. It also gives the spices a chance to mellow, creating a smoother finish. After the rest, give the pot a quick stir before serving. This small step ensures every bite is perfectly balanced.
Stirring Technique
Use a wooden spoon to stir gently; this prevents the beans from breaking and keeps the chili chunky. Avoid using metal utensils that can cause the pot to heat unevenly. A gentle stir also keeps the surface from forming a skin that can trap heat. This technique preserves the texture and flavor integrity of the dish. It’s a simple habit that pays off.
Add Fresh Herbs at the End
A sprinkle of fresh parsley or cilantro right before serving adds brightness and a pop of color. Herbs also bring a fresh, herbal note that cuts through the richness. Add them just before plating to maintain their vibrant flavor. This final flourish elevates the dish and makes it feel more complete. It’s the finishing touch that turns a good chili into a memorable meal.
Creative Twists and Variations
Mexican Street Style
Add a splash of lime juice and top with crumbled cotija cheese for a tangy, authentic twist. The lime brightens the chili, cutting through the richness, while the cotija adds a salty, crumbly texture. Serve with fresh cilantro and sliced avocado for an extra layer of flavor. This variation brings the vibrant street food vibe to your kitchen.
Southwest Swirl
Fold in a handful of black beans and a dash of chipotle powder for smoky depth. The black beans add a subtle earthy sweetness, and the chipotle brings a deep, smoky heat. This version is perfect for those who love a bold, smoky flavor profile. It pairs well with corn tortillas or a side of guacamole.
Cheesy Delight
Stir in shredded cheddar or pepper jack during the last 10 minutes for gooey comfort. The cheese melts into the chili, creating a creamy, indulgent texture. Sprinkle with extra cheese before serving for a melty finish. This variation turns the dish into a comforting, cheesy bowl that’s irresistible.
Sausage Kick
Replace half the turkey with sliced chorizo for a spicy, garlicky bite. The chorizo adds a smoky, savory depth that pairs beautifully with the chili spices. Keep the seasoning balanced by slightly reducing the salt. This twist is perfect for those who enjoy a bit of kick and a richer flavor.
Vegetarian Vibe
Omit the turkey and use a mix of tofu cubes and lentils for a protein‑rich, plant‑based version. The tofu absorbs the spices, while the lentils add heartiness. Add a splash of soy sauce for umami. This variation is nutritious, filling, and completely cruelty‑free.
Storing and Bringing It Back to Life
Fridge Storage
Store in an airtight container for up to 4 days; keep the chili cold to preserve freshness. The flavors will continue to meld, making the chili even better the next day. When you’re ready to eat, give it a quick stir to redistribute the beans and broth. This method keeps the chili from drying out and maintains its texture.
Freezer Friendly
Freeze in single‑serving portions for up to 3 months; thaw overnight in the fridge before reheating. Use freezer‑safe containers or freezer bags to prevent freezer burn. When you’re ready, simply reheat on the stovetop or microwave. This makes it a convenient meal prep option for busy weeks.
Best Reheating Method
Reheat on the stovetop over medium heat, adding a splash of water or broth to restore moisture; stir until hot. The added liquid prevents the chili from drying out, and the gentle heat keeps it from over‑cooking. Let it simmer for a few minutes, then taste and adjust seasoning if needed. Add a tiny splash of water before reheating — it steams back to perfection.