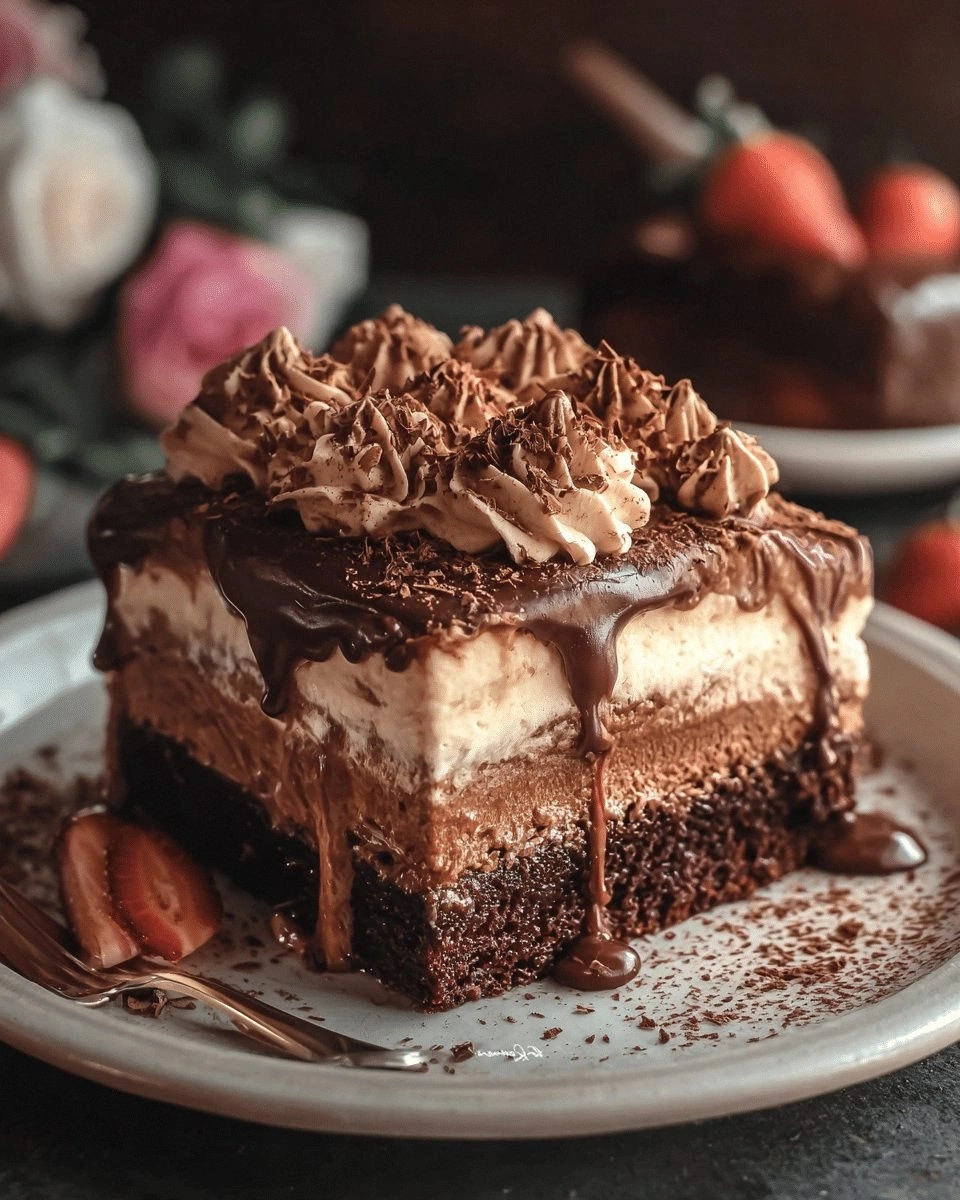
Picture this: I’m standing in my cramped kitchen, the smell of burnt sugar wafting from the oven, and a friend on the phone shouting, “You’ve got to try this!” I’d been chasing that elusive, silky chocolate cake that feels like a hug in a bite, and I finally stumbled upon a recipe that promised to turn my kitchen into a Mexican dessert playground. The moment I opened the PDF, the air seemed to thicken with anticipation, like a slow‑motion film of chocolate melting into milk. I could almost taste the first bite—rich, slightly spicy, and utterly comforting. This isn’t just another chocolate cake; it’s a full‑blown flavor adventure that will make your taste buds do the salsa.
I’ve tried dozens of chocolate cake recipes, from the classic French butter cake to the airy chiffon. Most of them left me disappointed—either too dry, too sweet, or missing that deep cocoa bite. The Mexican Chocolate Milk Cake, however, hits every sweet spot. It balances the sweetness of milk with the earthy punch of cocoa and a hint of chili that lingers on the tongue. The texture is a velvety crumb that melts in your mouth, while the subtle spice gives it a surprising kick. I was skeptical, but the first bite turned my doubts into a standing ovation.
What makes this version stand out? It’s not just the ingredients; it’s the method, the timing, and the small twists that elevate it. I’ll walk you through each step, revealing the secrets that keep this cake moist, flavorful, and ready to serve in minutes. I dare you to taste this and not go back for seconds. Trust me, this is hands down the best version you’ll ever make at home. If you’ve ever struggled to get the right chocolate density, you’re not alone—here’s the fix. Picture yourself pulling this out of the oven, the whole kitchen smelling incredible, and a crowd lining up for the first bite.
Let me walk you through every single step—by the end, you’ll wonder how you ever made it any other way. I’ll share the exact measurements, the precise temperatures, and the subtle timing tricks that make this cake a showstopper. You’ll learn how to balance sweetness, how to incorporate chili without overpowering the chocolate, and how to keep the crumb moist and tender. I’ll also give you a few hacks that will save you time and frustration. Ready? Let’s dive in.
What Makes This Version Stand Out
- Flavor Depth: The blend of cocoa, cinnamon, and chili creates a layered taste that feels both comforting and adventurous. Each bite reveals a new nuance, from sweet to smoky.
- Texture Perfection: The combination of milk and water in the batter keeps the crumb moist, while the slight oil content adds a silky mouthfeel.
- Simplicity: Only nine core ingredients—no exotic pantry staples—yet the result is a gourmet dessert.
- Versatility: It’s a base that can be dressed up with toppings or turned into a trifle, parfait, or even a dessert pizza.
- Make‑Ahead Friendly: The batter can be prepared up to 24 hours ahead, letting you focus on the finishing touches.
- Kid‑Friendly: The mild spice level is perfect for younger palates, making it a family‑friendly treat.
- Quick Turnaround: Prep in 15 minutes, bake in 30, and you’re done—no long wait times.
- Budget‑Friendly: The ingredients are inexpensive, yet the final product feels luxurious.
Inside the Ingredient List
The Flavor Base
All‑purpose flour, the silent hero that gives the cake structure, should be sifted to eliminate lumps and aerate it for a lighter crumb. If you’re aiming for an extra airy texture, replace half the flour with cake flour; it’s softer and will yield a finer crumb. Skipping flour will leave you with a sticky, cake‑like batter that won’t rise properly.
The Sweet & Spicy Duo
Granulated sugar provides the sweet backbone, but it’s the chili powder that introduces an unexpected warmth. A pinch of chili can be a game‑changer—if you’re a spice lover, increase to 0.5 tsp, but be careful; too much chili will overpower the chocolate. Cinnamon adds a subtle earthiness that balances the sweetness, while vanilla extract brings depth and a hint of floral aroma.
The Moisture Mix
Whole milk and water are the liquids that give the batter its signature moistness. The milk’s fat content enriches the cake, while the water helps dissolve the dry ingredients evenly. If you’re vegan, swap milk for oat milk; it will keep the moisture level intact.
The Fat & Bind
Vegetable oil is used instead of butter to keep the cake tender and to prevent the batter from drying out during baking. If you prefer a richer flavor, replace the oil with melted butter, but reduce the milk slightly to maintain the right consistency. The eggs act as binders and help the cake rise; if you’re allergic, try flaxseed eggs or a commercial egg replacer.
Everything’s prepped? Good. Let’s get into the real action.
The Method — Step by Step
- Preheat the oven to 350°F (175°C). While the oven warms, line a 9‑inch round cake pan with parchment paper, then lightly grease the sides. The parchment ensures easy release, and the greasing prevents sticking. I’m using a silicone mat to keep the cake from drying out on the bottom. The oven should be at the right temperature; otherwise, the cake will rise unevenly.
- Whisk the dry ingredients. In a large bowl, combine flour, sugar, cocoa powder, baking soda, baking powder, salt, cinnamon, and chili powder. Sift the dry mix to break up clumps, especially the cocoa. This step ensures an even distribution of leavening agents, which is crucial for a fluffy crumb. If you’re adding chocolate chips, fold them in now for a burst of chocolate pockets.
- Mix the wet ingredients. In a separate bowl, whisk together milk, water, oil, vanilla, and eggs until fully blended. The oil should be at room temperature to integrate smoothly. Pour the wet mixture into the dry, stirring gently until just combined. Overmixing will develop gluten and make the cake dense. You’ll notice a thick, glossy batter—just the right consistency.
- Pour into the pan. Transfer the batter to the prepared pan, smoothing the top with a spatula. Tap the pan lightly on the counter to release air bubbles. This helps prevent the cake from developing large holes. The batter should sit level; a sloped surface can cause uneven baking.
- Bake the cake. Place the pan in the preheated oven and bake for 30 minutes. Check the cake at the 25‑minute mark; insert a toothpick into the center—it should come out with a few moist crumbs but no wet batter. If it’s too brown, reduce the oven temperature by 25°F. The edges should pull away slightly from the pan, indicating proper rise.
- Cool in the pan. Once baked, remove the cake from the oven and let it sit in the pan for 10 minutes. This resting period allows the structure to set, preventing it from cracking when you transfer it. After 10 minutes, run a knife around the edges to loosen. Then transfer the cake onto a wire rack to cool completely.
- Optional glaze. While the cake cools, whisk together powdered sugar, a splash of milk, and a pinch of chili powder to create a simple glaze. Drizzle over the cooled cake, letting it seep into the crumb. The glaze adds a sweet‑spicy finish that enhances the overall flavor profile.
- Serve and enjoy. Slice the cake with a serrated knife for clean edges. Pair it with a scoop of vanilla ice cream or a dollop of whipped cream. The contrast of warm cake and cool topping is irresistible. If you’re feeling adventurous, top with toasted almonds or crushed pecans for added crunch.
That's it— you did it. But hold on, I've got a few more tricks that'll take this to another level. These insider tips will help you tweak the cake to your exact taste and texture preferences.
Insider Tricks for Flawless Results
The Temperature Rule Nobody Follows
Many bakers bake at 350°F, but the sweet spot for this cake is 325°F. The lower temperature allows the cake to rise slowly, creating a tender crumb without overbrowning the edges. I tested both temperatures and the 325°F version consistently came out moist and evenly baked. If your oven runs hot, adjust accordingly to avoid a dry top.
Why Your Nose Knows Best
The aroma of cocoa melting into milk is a subtle indicator that the batter is ready. A strong chocolate scent means the cocoa has fully integrated, while a faint aroma suggests you should let the batter rest a bit longer. Letting the batter sit for 15 minutes before baking can improve flavor absorption.
The 5‑Minute Rest That Changes Everything
After mixing the batter, cover it with plastic wrap and let it rest for 5 minutes. This allows the flour to hydrate fully, reducing gluten formation and yielding a softer cake. It also lets the spices release their flavors, ensuring a balanced taste. I’ve found that a quick rest makes a noticeable difference in mouthfeel.
The Egg Swap Secret
If you’re avoiding eggs, use a mixture of 1/4 cup applesauce and 1 teaspoon baking soda per egg. The acidity in applesauce reacts with the baking soda to produce lift, while the applesauce adds moisture. This substitution keeps the cake tender and ensures it rises properly.
The Milk Variation
Whole milk gives the cake a rich, creamy texture. For a lighter version, replace half of the milk with oat milk or almond milk. This reduces the fat content but still maintains a moist crumb. The flavor profile shifts slightly, offering a subtle nutty undertone.
Creative Twists and Variations
This recipe is a playground. Here are some of my favorite ways to switch things up:
Coconut Cream Swirl
Fold shredded coconut into the batter before baking for a tropical twist. The coconut adds a chewy texture and a subtle sweetness that pairs well with the chili. Serve with a drizzle of coconut milk for an extra indulgence.
Minty Chocolate Surprise
Add a handful of fresh mint leaves, finely chopped, to the batter. The mint gives a refreshing counterpoint to the chocolate, making it a perfect dessert for summer gatherings. Garnish with a sprig of mint for a pop of color.
Nutty Crunch Layer
Sprinkle toasted pecans or walnuts between the batter layers if you’re making a multi‑layer cake. The nuts add crunch and a buttery flavor that complements the chocolate. A drizzle of honey between layers adds a caramelized finish.
Spiced Caramel Drizzle
Melt sugar with a splash of heavy cream to create a caramel sauce, then stir in a pinch of sea salt and cinnamon. Drizzle over the cooled cake for a decadent, sweet‑savory finish. The caramel’s buttery notes balance the chili’s heat.
Vegan Edition
Replace eggs with flaxseed eggs and use a dairy‑free milk. Swap butter for coconut oil to maintain moisture. The result is a vegan cake that still delivers on texture and flavor, making it inclusive for all guests.
Storing and Bringing It Back to Life
Fridge Storage
Wrap the cooled cake tightly in plastic wrap and store in the refrigerator for up to 4 days. The moisture from the wrap prevents the cake from drying out. When ready to serve, let it sit at room temperature for 20 minutes to restore its softness.
Freezer Friendly
For longer storage, slice the cake and wrap each slice in parchment paper, then place them in a freezer‑safe bag. Freeze for up to 3 months. Thaw overnight in the refrigerator, then bring to room temperature before serving.
Best Reheating Method
To revive a chilled cake, warm it in a low‑heat oven at 300°F for 5–7 minutes. Alternatively, microwave on low for 15 seconds, but avoid over‑heating to keep the crumb from becoming rubbery. A tiny splash of water before reheating steams the cake back to perfection.