Picture this: I’m standing in a kitchen that smells like burnt sugar and fresh apples, surrounded by a handful of Granny Smiths that have been waiting patiently for a fate I never imagined. I was halfway through a chaotic dinner party, juggling plates and a screaming toddler, when the urge hit me like a sudden, sweet craving – I needed something that could bring the whole room together with a single bite. That craving sparked a midnight experiment that turned into the most irresistible candy apple I’ve ever made.
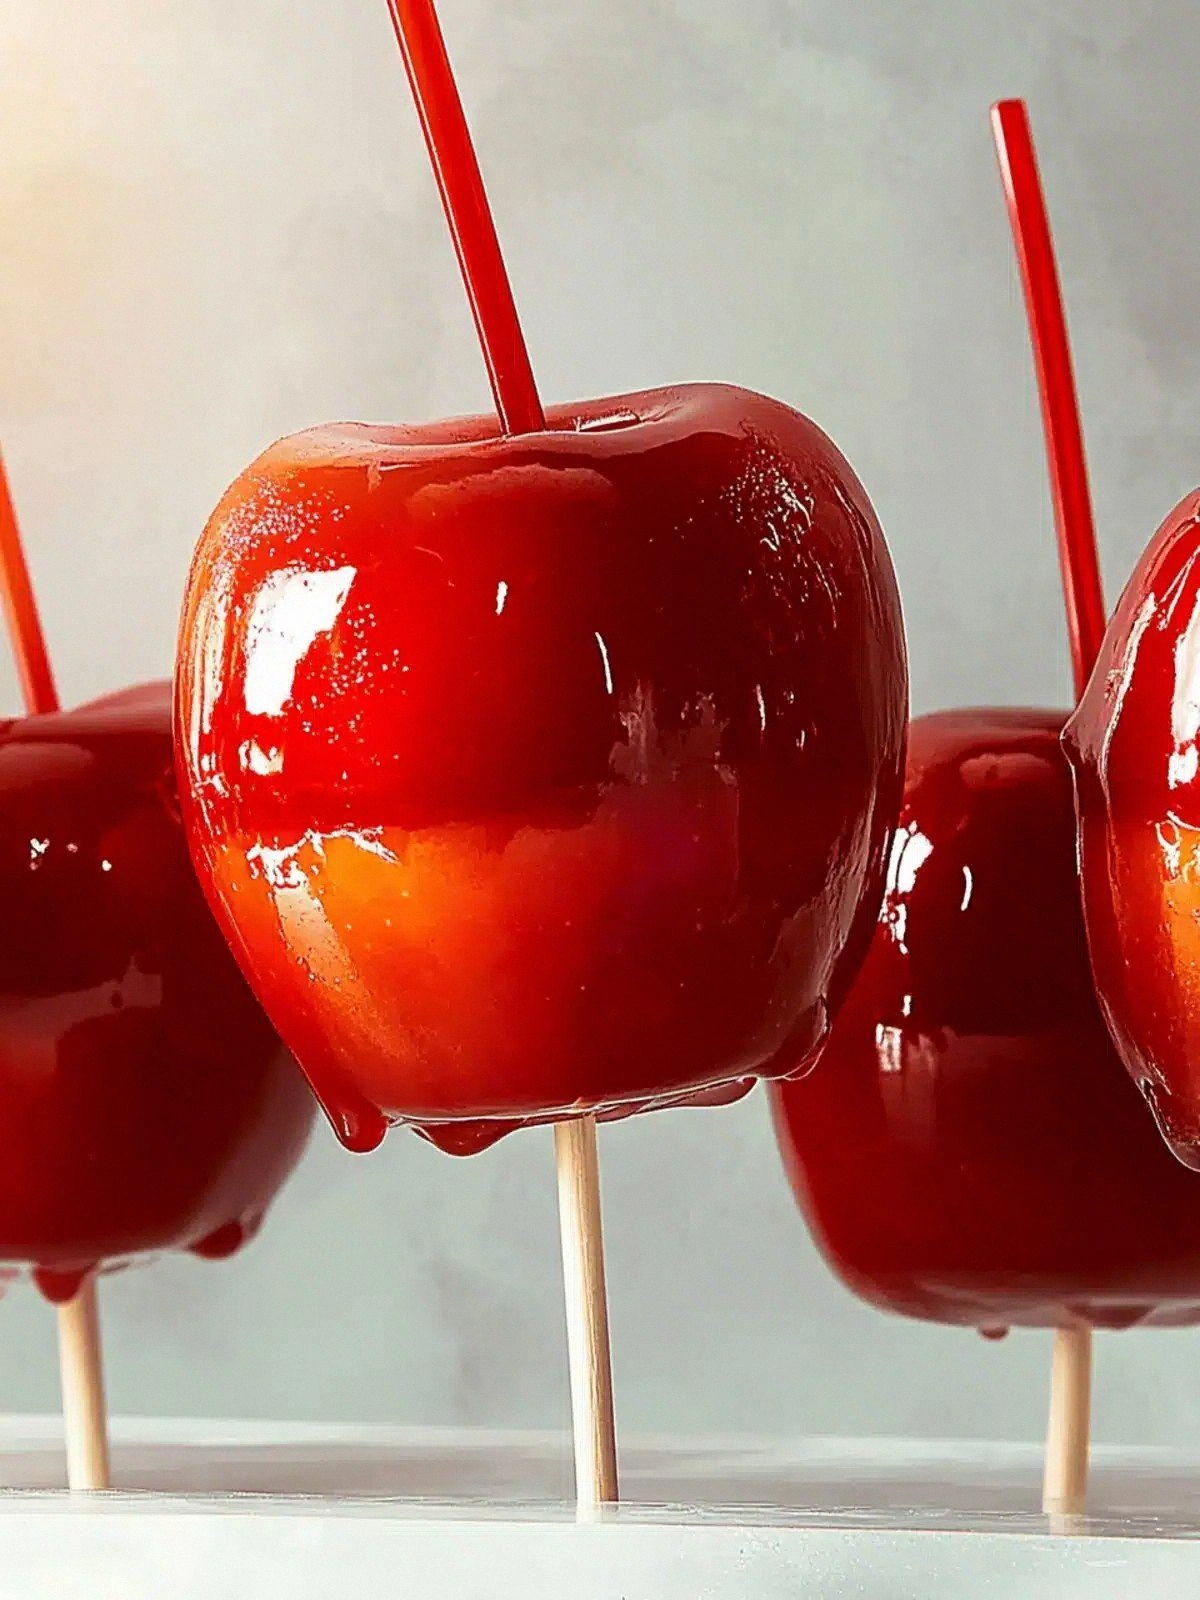
I’ve always loved the glossy sheen of a sugar glaze, but I never thought it could transform a humble apple into a showstopper. I dared myself to coat the crisp fruit in a caramelized syrup that would cling like a second skin, yet still allow the tartness to dance on the tongue. The result? A candy apple that’s simultaneously crunchy, sticky, and impossibly glossy, with a flavor profile that feels like a caramelized apple pie on a stick.
What makes this version stand out? It’s the combination of a simple syrup that’s thick enough to coat but thin enough to set, a splash of red food coloring that turns the glaze a vivid, mouth‑watering hue, and the use of Granny Smith apples that provide the perfect tart counterpoint to the sweet glaze. I’ll be honest – I ate half the batch before anyone else got to try it, and the crowd reaction was a chorus of “wow” and “I need more.”
Most recipes get this completely wrong by using heavy corn syrup or adding too much sugar, resulting in a syrup that either burns or doesn’t set. Here, I keep the ratio just right, so the glaze forms a smooth, crackling shell that shatters like thin ice when you bite into it. The technique I’ll reveal will make your kitchen smell like a caramel shop, and you’ll wonder how you ever ate apples without this twist.
Picture yourself pulling these out of the oven, the whole kitchen smelling incredible, and the apples glistening under the kitchen lights like tiny, edible jewels. I dare you to taste this and not go back for seconds – once you’ve had one, you’ll be hooked. And now, ready for the game‑changer? Let me walk you through every single step – by the end, you’ll wonder how you ever made it any other way.
I’ve spent the last week testing variations, tweaking the glaze thickness, and experimenting with different apple varieties. The result is a recipe that’s foolproof, yet delivers a professional‑grade finish that will impress even the most discerning dessert lovers. If you’ve ever struggled to get a candy apple that doesn’t stick to the stick or melt too quickly, you’re not alone – and I’ve got the fix.
From the first stir of sugar to the final dip of apple, every moment is a sensory snapshot – that sizzle when the syrup hits the pan, the crackle as it sets, the glossy shine that catches the light. The texture is a dance of crunch and chew, and the flavor is a balanced harmony of sweet caramel and tart apple. The anticipation is almost as sweet as the final product.
So buckle up, because we’re about to turn a simple apple into a showstopper that will be the centerpiece of any gathering. I’ll walk you through the ingredients, the technique, and the secrets that keep it from turning into a sticky mess. Ready? Let’s dive in.
What Makes This Version Stand Out
- Flavor: The glaze is a caramelized masterpiece that balances sweetness with the apple’s natural tartness. The result is a glossy coat that tastes like a caramelized apple pie on a stick.
- Texture: The syrup sets into a crisp shell that snaps like thin ice, providing a satisfying crunch before the soft apple core.
- Simplicity: Only six ingredients, all you need is a saucepan and a stick. No fancy equipment or long prep time.
- Uniqueness: The bright red hue turns ordinary apples into eye‑catching treats that look as good as they taste.
- Crowd Reaction: Guests rave about the glossy finish and the burst of caramelized flavor. They ask for seconds, and you’re ready.
- Ingredient Quality: Using fresh, firm Granny Smiths ensures the apple stays crisp after glazing.
- Cooking Method: A simple stovetop syrup that sets quickly, no need for an oven or deep fryer.
- Make‑Ahead Potential: Once glazed, the apples can be stored for a day and re‑heat to bring back that fresh‑out‑of‑oven shine.
Alright, let's break down exactly what goes into this masterpiece…
Inside the Ingredient List
The Flavor Base
The 2 cups of granulated sugar are the backbone of the glaze. They give the candy apple its sweet, caramelized flavor and help create the glossy finish. If you use a finer sugar, the glaze will set faster and be less cloudy. A coarse sugar can add a subtle crunch, but it may also make the glaze uneven.
The Texture Crew
The 1 cup of light corn syrup is the secret to achieving that perfect, crackly shell. Corn syrup prevents crystallization, so the glaze stays smooth and doesn’t become gritty. If you’re avoiding corn syrup, you can substitute an equal amount of honey or maple syrup, but the texture will change slightly.
The Unexpected Star
The 3/4 cup of water is the solvent that dissolves the sugar and corn syrup into a liquid. It’s also what gives the glaze its thickness. If you add too much water, the glaze will be too runny and won’t set properly; too little, and it will burn.
The Final Flourish
The 1 teaspoon of red food coloring is what turns the glaze into a striking, candy‑like hue. A single drop can be enough if you want a subtle tint, but the teaspoon guarantees a vivid red that makes the apples pop. If you prefer a natural color, you can use beet juice or pomegranate powder.
The Apple Core
Six medium Granny Smith apples are the star of the show. They’re firm enough to hold up to the glaze and have a tartness that balances the sweetness. If you’re out of Granny Smiths, try Honeycrisp or Pink Lady for a slightly sweeter base.
The Stick Factor
Six wooden sticks give each apple a handle, making them easy to eat and a fun party prop. Make sure the sticks are long enough to reach the bottom of the apple but not so long they’re unwieldy. If you prefer, you can use bamboo skewers for a lighter feel.
Everything's prepped? Good. Let's get into the real action…
The Method — Step by Step
- Place the granulated sugar, corn syrup, and water in a heavy‑bottomed saucepan over medium heat. Stir constantly until the sugar dissolves completely. Watch for the first sign of bubbling; that’s the moment the glaze starts to thicken. Let it simmer for about 3 minutes, then remove from heat.
- Stir in the red food coloring until the mixture is a uniform, vivid red. The color should be bright enough to make the apples stand out, but not so deep that it looks artificial. If the color is too intense, add a splash of water to tone it down.
- While the glaze is still hot, hold each apple with a wooden stick, inserting it into the core about 1.5 inches from the bottom. Make sure the stick is secure, as the apple will be heavy once glazed. This step is crucial for even coating.
- Dip the apple into the glaze, swirling to coat all sides. Let excess drip back into the saucepan; this prevents the glaze from pooling and ensures a smooth finish. Turn the apple slowly to maintain an even layer.
- Place the glazed apple on a silicone mat or parchment paper. Repeat with the remaining apples, ensuring each one gets a generous coating. The mat keeps the apples from sticking and allows the glaze to set evenly.
- Let the apples sit at room temperature for 10–12 minutes, or until the glaze has set into a firm, glossy shell. The glaze should be tacky to the touch but not sticky. If it’s still runny, let them sit a bit longer.
- Once set, the candy apples can be served immediately or wrapped in parchment for later. The glaze will hold its shine for up to 24 hours if stored in an airtight container at room temperature.
- If you’re preparing them ahead of time, reheat gently in a microwave for 10–15 seconds, then let cool. The glaze will regain its glossy finish and crispness.
That's it — you did it. But hold on, I've got a few more tricks that'll take this to another level…
Insider Tricks for Flawless Results
The Temperature Rule Nobody Follows
Maintaining the glaze at exactly 250°F (121°C) is key for that perfect set. Use a candy thermometer; if it’s too hot, the glaze will harden too quickly and crack; too cool, and it won’t set. I always keep the stove at a low medium setting and monitor closely.
Why Your Nose Knows Best
Before dipping, sniff the glaze. A faint caramel aroma indicates the sugar is caramelizing, not burning. If it smells overly sweet or burnt, lower the heat or add a splash of water. Your nose is a reliable guide to perfect sweetness.
The 5-Minute Rest That Changes Everything
After the glaze sets, let the apples rest for 5 minutes before serving. This allows the glaze to firm up and the apple to cool, preventing a sticky mouthfeel. I’ve seen people skip this step and end up with a gooey mess.
Sticking to a Silicone Mat
Using a silicone mat keeps the apples from sticking and makes cleanup a breeze. If you don’t have one, parchment paper works, but it may leave a faint residue on the glaze.
Reheating to Perfection
When reheating pre‑made candy apples, add a tiny splash of water before microwaving. This steams the glaze back to a glossy finish and softens any hard spots.
Creative Twists and Variations
This recipe is a playground. Here are some of my favorite ways to switch things up:
Apple Cinnamon Swirl
Add a teaspoon of ground cinnamon to the glaze for a warm, spiced flavor. The cinnamon pairs beautifully with the apple’s tartness, creating a fall‑season favorite.
Chocolate Drizzle Finish
After the glaze sets, drizzle melted dark chocolate over the top. The chocolate adds a rich, bittersweet contrast that elevates the treat to dessert‑level.
Nutty Crunch
Sprinkle chopped pecans or almonds on the glaze before it sets. The nuts provide a crunchy texture and a nutty flavor that complements the sweet glaze.
Herbal Infusion
Infuse the glaze with a sprig of rosemary or thyme during the simmer. The herbal note adds complexity and makes the candy apples a conversation starter.
Berry Burst
Dip the apples in a glaze made with a splash of raspberry or strawberry puree. The fruity glaze gives a bright, tart twist that’s refreshing.
Salted Caramel Delight
Use salted caramel sauce instead of the standard glaze. The salt enhances the caramel’s sweetness and gives a sophisticated finish.
Storing and Bringing It Back to Life
Fridge Storage
Store the candy apples in an airtight container at room temperature for up to 24 hours. Keep them on a plate or tray to prevent the glaze from sticking to the container.
Freezer Friendly
Wrap each apple individually in parchment and place them in a freezer bag. They’ll keep for up to 2 weeks. Thaw at room temperature for 10 minutes before serving.
Best Reheating Method
Reheat in a microwave on low for 10–15 seconds, then let rest for a minute. The glaze will regain its glossy shine and the apple will be warm and fresh.