Picture this: it’s a chilly December evening, the kind where the wind whistles through the cracks in the windows and you’re huddled over a pot that looks like it could double as a small furnace. I was attempting a classic peppermint hard candy, but something kept going wrong – the crystals formed like a snowstorm in my mouth, the colors never quite hit that festive red‑white swirl, and the flavor was as flat as a pancake left out too long. I stared at the sticky mess, half‑heartedly daring my roommate to try it, and muttered, “I bet I could make something better.” That dare turned into a midnight experiment, and after a few (admittedly questionable) taste tests, I finally nailed it. The result? A candy that crackles like fresh ice, carries the warm kick of Fireball whiskey, and looks like a miniature candy cane you could actually eat without worrying about a dentist’s bill.
The moment you open the jar, you’re hit with a burst of aroma that’s equal parts peppermint coolness and cinnamon‑spiced fire. It’s the kind of scent that makes you think of holiday markets, twinkling lights, and that one friend who always brings the best potluck desserts. You can almost hear the soft crackle as the candy breaks under your teeth, feel the glossy surface glide across your tongue, and taste the sweet‑spicy dance that lingers like a good story you can’t stop retelling. It’s not just candy; it’s an experience that makes the whole kitchen feel like a festive wonderland, even if you’re stuck inside a downtown apartment with no snow in sight.
What sets this version apart from every other “candy cane” recipe you’ve seen on the internet is the secret weapon: Fireball whiskey. Most people think a candy cane should be purely peppermint, but a splash of that cinnamon‑infused spirit adds a depth that makes the candy sing. Pair that with a foolproof technique that keeps the sugar from crystallizing (thanks to light corn syrup) and you’ve got a hard candy that’s glossy, smooth, and as striking as a fireworks display on New Year’s Eve. I’m not exaggerating when I say this is hands down the best version you’ll ever make at home – the flavor balance, the texture, the visual appeal, everything just clicks.
And here’s the kicker: the method I’m about to share uses a simple “pull‑and‑twirl” technique with food coloring that creates those iconic red‑white stripes without any fancy equipment. I’ll also reveal a kitchen hack that saves you from the dreaded sugar crystal apocalypse, and a watch‑out tip that prevents you from burning the candy to a bitter ash. Okay, ready for the game‑changer? Let me walk you through every single step – by the end, you’ll wonder how you ever made candy any other way.
What Makes This Version Stand Out
- Flavor Fusion: The combination of peppermint extract and Fireball whiskey creates a sweet‑spicy harmony that feels like a holiday hug for your taste buds.
- Texture Perfection: Using light corn syrup stops the sugar from crystallizing, giving you that classic hard‑candy snap without any grainy surprises.
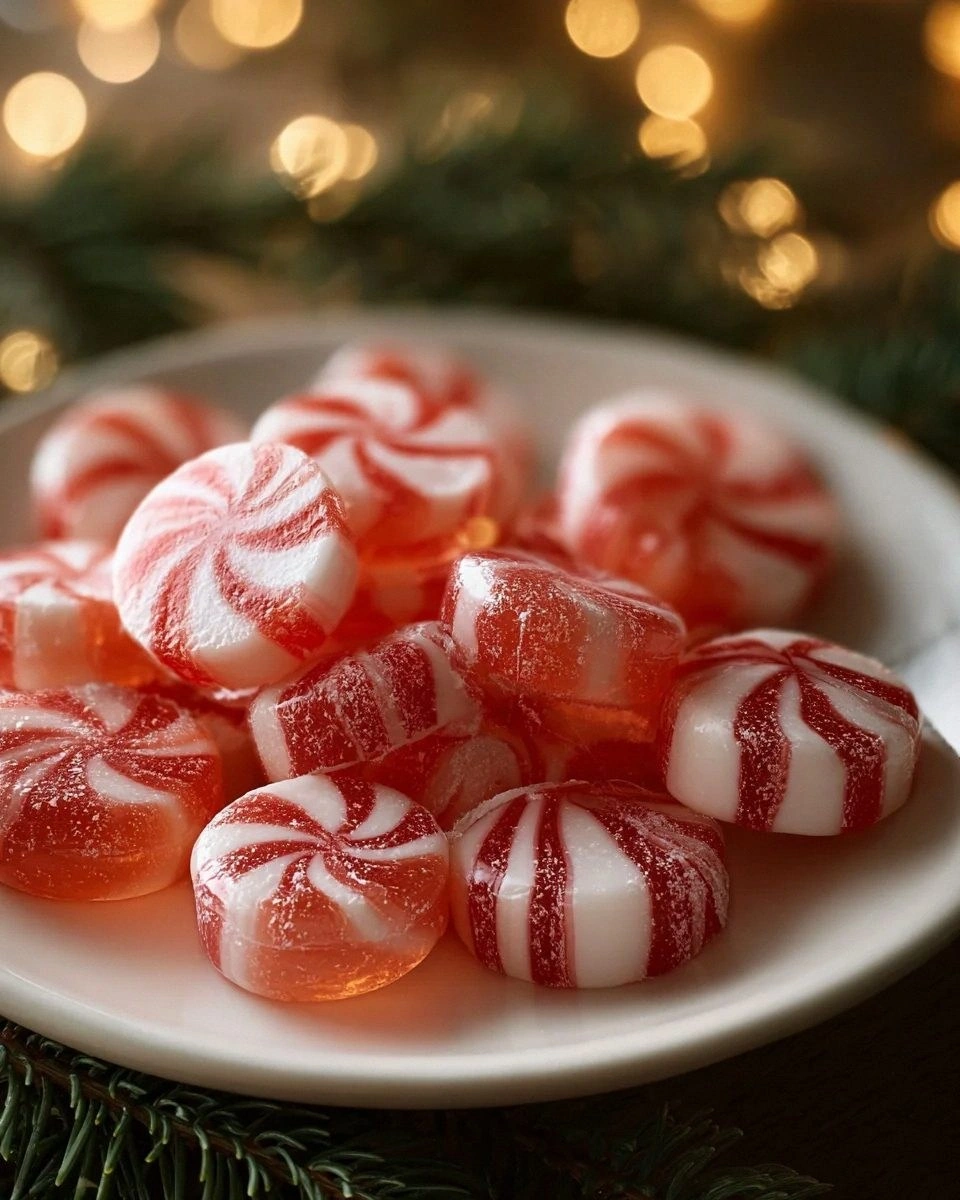
- Visual Wow‑Factor: The red and white gel food coloring swirls produce a candy‑cane look that’s as Instagram‑ready as it is delicious.
- Simplicity: Only nine ingredients, all easy to find, and no specialized candy‑making tools beyond a candy thermometer.
- Crowd Reaction: I dare you to taste this and not go back for seconds – even the most skeptical guests will be asking for the recipe.
- Ingredient Quality: Real Fireball whiskey (not a flavored syrup) brings authentic warmth that artificial extracts can’t match.
- Method Mastery: The “pull‑and‑twirl” color technique is a game‑changer that ensures perfect stripes every single batch.
- Make‑Ahead Potential: These candies keep for weeks when stored properly, making them perfect for holiday gifting or stocking stuffers.
Inside the Ingredient List
The Flavor Base
Granulated sugar: This is the backbone of any hard candy, providing the sweet, crystalline structure we all love. If you skimp on it, the candy ends up thin and brittle, more like a brittle toffee than a sturdy candy cane. For the best results, use a fine‑grained, pure cane sugar – avoid brown sugar or substitutes, as they introduce moisture that can sabotage the hard‑crack stage.
Light corn syrup: Think of this as the peacekeeper in the sugar showdown. It prevents the sugar molecules from re‑forming crystals, keeping the syrup glossy and smooth. Skipping it is a fast track to a grainy mess that looks like a sugar snow globe gone wrong.
The Unexpected Star
Fireball whiskey: This is the secret weapon that elevates the candy from ordinary to unforgettable. The whiskey’s cinnamon‑spiced profile adds warmth that balances the cooling peppermint, creating a flavor duet that feels festive and slightly daring. Use a quality Fireball – the cheaper versions can taste overly harsh and ruin the delicate balance.
Peppermint extract: The classic peppermint note gives the candy its iconic fresh bite. A little goes a long way; too much can overwhelm the palate and mask the subtle Fireball undertones. If you’re allergic to peppermint oil, a natural peppermint leaf infusion can work as a substitute, though the intensity will be milder.
The Color Crew
Red gel food coloring: Gel colors are concentrated, meaning you need only a pinch to achieve a vivid hue. This ingredient creates the bold red stripe that mimics a traditional candy cane. If you prefer a natural alternative, beet juice powder can be used, but expect a slightly muted tone.
White gel food coloring: While the candy’s base is already white from the sugar, a tiny amount of white gel ensures the stripes stay pure and don’t pick up any yellowish tint from the caramelization process.
The Final Flourish
Powdered sugar: Dusting the finished candies with powdered sugar prevents them from sticking together and adds a delicate sweet finish. It also gives the candy a snow‑kissed appearance that’s perfect for holiday presentations.
Silicone round candy molds: These molds are flexible enough to release the hardened candy without cracking, and their smooth surface helps maintain the glossy finish. Metal molds can be used, but you’ll need to grease them heavily, and the candy may stick.
Cinnamon extract (optional): If you crave an extra kick, a half‑teaspoon of cinnamon extract adds a deeper spice note that pairs beautifully with the Fireball. Skip it if you prefer the peppermint to dominate.
Everything's prepped? Good. Let’s get into the real action…
The Method — Step by Step
First, set up your workstation. Lightly dust a silicone round candy mold with powdered sugar, then set it aside on a parchment‑lined tray. This dusting acts like a non‑stick shield, ensuring that once the candy hardens, it slides out with the grace of a ballerina. While you’re at it, have a heat‑proof spatula, a candy thermometer, and a small bowl of ice water ready – trust me, you’ll thank yourself later.
Combine 2 cups of granulated sugar and 2/3 cup of light corn syrup in a heavy‑bottomed saucepan. Stir gently over medium heat until the sugar dissolves, then increase the heat to bring the mixture to a gentle boil. You’ll hear a soft, steady hiss – that’s the sugar saying, “I’m ready for the big league.” Keep the mixture moving just enough to avoid scorching, but not so much that you create air bubbles.
Attach a candy thermometer to the side of the pan, making sure the bulb is submerged but not touching the bottom. Continue boiling the syrup until it reaches 300°F (149°C), the hard‑crack stage. As the temperature climbs, the mixture will turn a deep amber, and the aroma will shift from sweet to a toasty caramel that fills the kitchen like a warm blanket.
Watch Out: If you let the temperature exceed 310°F, the sugar will burn, giving the candy a bitter, burnt taste that no amount of frosting can fix.When the thermometer hits 300°F, immediately remove the pan from the heat. The syrup will be bubbling furiously, so be cautious. Quickly stir in 2 tablespoons of Fireball whiskey, 1 teaspoon of peppermint extract, and, if you’re feeling bold, ½ teaspoon of cinnamon extract. The mixture will foam up like a miniature volcano; this is normal and signals that the flavors are integrating perfectly.
Now for the color magic. Add ¼ teaspoon of red gel food coloring to one side of the pan and ¼ teaspoon of white gel to the opposite side. Using a clean spatula, gently swirl the two colors together in a figure‑eight motion. The result should be a marbled ribbon that looks exactly like a candy cane’s signature stripes – pure, vivid, and ready to wow anyone who sees it.
With the mixture still molten, carefully pour it into the prepared silicone molds, filling each cavity just to the brim. The syrup is hot enough to set in seconds, so work swiftly but calmly. If you notice any air bubbles, give the mold a gentle tap on the countertop; the bubbles will rise to the surface and pop, leaving a flawless finish.
Kitchen Hack: After pouring, place the molds in the freezer for 30 seconds – this firms the candy just enough to make unmolding a breeze without compromising the glossy texture.Allow the candies to cool completely at room temperature. This can take anywhere from 10 to 20 minutes, depending on ambient humidity. You’ll know they’re ready when the surface feels firm to the touch and the edges have pulled slightly away from the mold walls, a visual cue that the sugar has fully crystallized into its hard‑candy state.
Once cooled, gently pop each candy out of its silicone mold. If any candy sticks, a quick roll on the back of a spoon or a light dusting of powdered sugar will free it without cracking. Immediately dust each piece with a thin veil of powdered sugar – this not only prevents them from sticking together but also gives them a subtle snow‑kissed sparkle.
Transfer the finished candies to an airtight container lined with parchment paper. Store them in a cool, dry place away from direct sunlight, and they’ll stay glossy and crisp for up to three weeks. If you’re planning a holiday party, you can even layer them with decorative tissue paper for a festive presentation that screams “handmade with love.”
That’s it — you did it. But hold on, I’ve got a few more tricks that’ll take this to another level, like how to achieve an even more intense stripe contrast and a secret finishing glaze that makes the candy shine like a polished gemstone. Stay with me here — this is worth it.
Insider Tricks for Flawless Results
The Temperature Rule Nobody Follows
Most home cooks rely on visual cues alone, but a candy thermometer is your best friend. Keep it calibrated and watch the needle climb to exactly 300°F. If you’re off by even a few degrees, the candy can turn gummy or become too brittle. My personal trick? I set a second timer for 2 minutes once the syrup hits 295°F; this gives a safety margin that prevents overshooting.
Why Your Nose Knows Best
Before you even check the thermometer, take a deep sniff. When the syrup reaches the hard‑crack stage, the aroma shifts from buttery caramel to a faintly toasted sugar note, like the scent of fresh popcorn left on the stove. Trust that nose signal – it’s often more reliable than the thermometer if the latter is slightly off.
The 5‑Minute Rest That Changes Everything
After you pour the candy into the molds, let it sit untouched for exactly five minutes before moving it. This brief pause allows the sugar crystals to align perfectly, resulting in a smoother surface and fewer internal cracks. Skipping this rest can cause the candy to crack as it contracts, ruining the flawless look.
Silicone vs. Metal Molds – The Showdown
Silicone molds are flexible, making unmolding a breeze, but they can sometimes retain a faint oiliness if reused without proper cleaning. I recommend washing them with hot, soapy water and then giving them a quick spray of cooking oil before the next batch – the oil creates a non‑stick barrier without affecting flavor.
Boosting the Stripe Contrast
For an even sharper red‑white contrast, add a drop of clear vanilla extract to the white side of the color swirl. The vanilla’s slight opacity deepens the white, making the red stand out like a ruby against ivory. This is a pro tip I learned after a friend complained that the stripes looked “washed out.”
Creative Twists and Variations
This recipe is a playground. Here are some of my favorite ways to switch things up:
Spicy Chili‑Chocolate
Swap the peppermint extract for ½ teaspoon of cocoa powder dissolved in a teaspoon of hot water, and add a pinch of cayenne pepper. The result is a deep, dark candy with a surprising heat that pairs wonderfully with the Fireball’s cinnamon notes.
Holiday Cranberry
Replace the red gel with a few drops of cranberry juice concentrate and add a teaspoon of natural cranberry powder. The candy takes on a tangy pink hue, and the subtle fruit acidity balances the sweet base beautifully.
Vanilla Bean Dream
Omit the peppermint and cinnamon extracts, and instead stir in the seeds from one vanilla bean plus a splash of vanilla‑flavored vodka. This creates a smooth, aromatic candy that feels like a winter night in a glass.
Mint‑Chocolate Swirl
After adding the peppermint extract, drizzle melted dark chocolate over the hot syrup before it sets, then use a toothpick to create a marbled effect. The chocolate adds richness, while the mint keeps it fresh.
Eggnog Spice
Swap Fireball whiskey for a tablespoon of eggnog liqueur and add a pinch of nutmeg and allspice. The candy takes on a creamy, holiday‑spice profile that’s perfect for a Christmas cookie platter.
Alcohol‑Free Version
If you need a sober alternative, replace the Fireball with an equal amount of cinnamon‑infused simple syrup (made by simmering equal parts water and sugar with cinnamon sticks). The flavor remains robust, and the texture stays identical.
Storing and Bringing It Back to Life
Fridge Storage
Place the candies in an airtight container lined with parchment paper and store them in the refrigerator for up to two weeks. The cool environment slows down any moisture absorption, preserving the crisp snap. When you’re ready to serve, let them sit at room temperature for 10 minutes – this prevents a sudden “sweat” on the surface.
Freezer Friendly
For longer storage, wrap each candy individually in a small piece of wax paper, then seal them in a zip‑top freezer bag. They’ll keep for up to three months without losing flavor or shine. To thaw, move the bag to the fridge for an hour, then bring the candies to room temperature before unwrapping.
Best Reheating Method
If a candy loses its glossy finish, place it on a microwave‑safe plate and heat for 5‑7 seconds on low power, then quickly dust with a fresh sprinkle of powdered sugar. Adding a tiny splash of water (just a few drops) before reheating creates a gentle steam that restores the candy’s shine without melting it.